Up next in 10

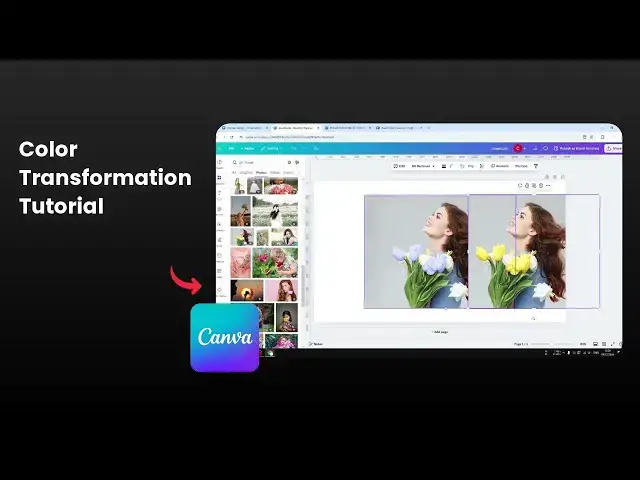
👉 In this video, learn the simple steps to change the color of any image using Canva. Transform your designs quickly and effortlessly with our easy-to-follow guide!
🎙 Microphone: https://geni.us/KVRt
🦾 Boom arm: https://geni.us/FU6y
💻 Web hosting: https://geni.us/BestWordPressHosting
❤ Subscribe if you find this video helpful:
https://www.youtube.com/@asapguide?sub_confirmation=1
Show More Show Less View Video Transcript
0:00
in this video I'm going to show you on
0:03
how you can change the color of an
0:04
object from a photo using confra so
0:08
first you have to insert picture into
0:10
your confa document and in this
0:12
demonstration I'm going to try to change
0:14
the color of this flower from yellow
0:17
into something else maybe purple maybe
0:19
red let's see what we can do now after
0:22
that after the picture has been inserted
0:24
you can click edit and then you can go
0:27
to the adjust menu and then here
0:31
sometimes confa will automatically find
0:34
the color prominent colors from the
0:36
picture and you have the option to
0:38
select on any of the color for example I
0:40
can select yellow and I can change the
0:42
color of this yellow part to be
0:44
something else you can do that by
0:46
adjusting the slider on the Hue section
0:48
and you can see that now the color is
0:50
different and look it looks pink now and
0:54
I think it looks really great although
0:56
there is one uh caveat here because if
0:58
you actually look add other elements now
1:01
this leaves used to be green if you're
1:04
changing the color of just yellow now
1:05
it's turning into something else so that
1:08
is probably not a perfect solution for
1:11
this problem although in some cases you
1:12
can definitely use this method and it's
1:14
actually very easy uh if you want to be
1:17
very very specific then we need a
1:19
different method and fortunately we can
1:22
isolate the color so at the objects from
1:26
a photo so we can focus the editing on
1:29
that specific object
1:30
so let's uh go back to the image editing
1:34
and we need the AI tool called Magic
1:37
grab so actually you can use that but I
1:40
highly recommend to create a duplicate
1:42
and then you want to place the duplicate
1:44
on top of the previous original picture
1:47
and then you want to go to edit and
1:49
click magic grab uh it's basically going
1:52
to make the whole result a lot better
1:54
now there are two methods where you can
1:56
isolate the object there is a brush
1:58
method which where you have to manually
2:00
select the object like this or you can
2:02
also use the click method where thei
2:05
will automatically find the object for
2:07
you and in this case unfortunately it
2:09
doesn't isolate the yellow color
2:12
automatically so that means I have to
2:15
use the brush method to select these
2:17
colors these flowers that are yellow and
2:19
then I'm going to edit them and after we
2:22
are isolating these colors this object
2:26
and let's click
2:28
grab okay uh you don't have to do it
2:30
perfectly and AI will understand what's
2:33
uh happening in the picture and it will
2:36
automatically correct your isolation or
2:39
corre the brush and then you can get
2:40
this picture so after that now we got
2:43
this area that is pretty much isolated
2:45
from the actual picture and I'm going to
2:48
remove this picture let's right click
2:51
and by the way this is the copy picture
2:54
as you can see now there is no flower
2:55
anymore and you can click delete and
2:59
there you go now we have this picture
3:01
and we have this picture so this is the
3:03
color that I'm going to change let's
3:05
click edit and let's go to adjust and
3:08
after that we can play around with the
3:10
Hue or you can also select this color
3:12
manually and again it will be isolated
3:16
if you select the slider now the color
3:19
is different and it doesn't affect the
3:21
rest of the image which is something
3:23
that we really want to have in this
3:25
editing process so let's try this color
3:28
and I think it looks pretty cool let's
3:30
increase saturation so it looks more
3:32
prominent and I guess I'm going to
3:34
increase the sharpness and Clarity a bit
3:38
and there you go now we got a different
3:41
color for a picture remember it used to
3:43
be like this but now we got something
3:46
that looks very different but also very
3:49
interesting so there you have it that's
3:51
how you can edit the color of a from an
3:55
object in a photo in confa if you want
3:58
this video to be helpful please consider
4:00
subscribing to this Channel and I'll see
4:02
you on the next video