Key takeaways:
- Choose JPEG for photos and PNG for logos/graphics 🎨
- Compress PNG files with one click ✨
- Adjust JPEG quality to 70-80% for best results 🔄
Ever tried sharing your Canva design but got stuck with huge file sizes? I’ve been there! Let me show you some simple tricks to make your files smaller while keeping them looking sharp.
Table of Contents
How to Choose the Right Format 📁
PNG works best for:
- Logos
- Graphics
- Infographics
- Anything with transparency
JPEG is perfect for:
- Photos
- Social media posts
- Web images
Quick Steps to Reduce PNG Files 🗜️
To make your PNG smaller, just:
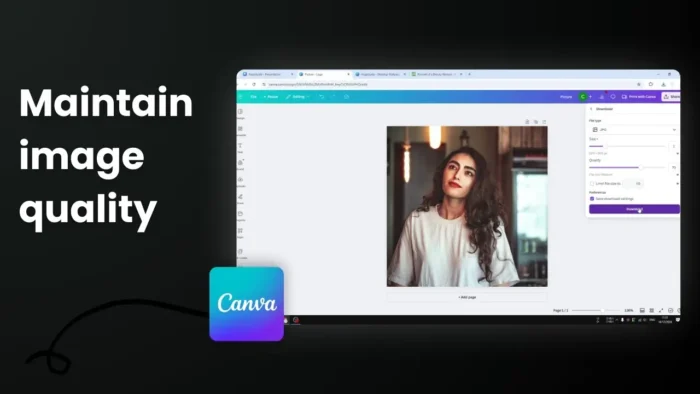
- Click “Share” then “Download”
- Select PNG format
- Check the “Compress file” option
Make JPEGs Even Smaller 📉
Here’s how to export as JPEG:
- Click the “Download” button
- Pick JPEG format
- Adjust quality settings
- Download your file
Pro Tips for Better Results 💡
Before you export:
- Remove any elements you don’t need
- Use fewer fonts
- Keep your design simple
What Quality Setting Should You Use? 🤔
Finding the right balance between file size and quality is key. You want your designs to look good while being easy to share and download.
FAQs
Does compression affect image quality?
Not much! Canva’s compression is pretty smart – you can reduce file size without noticeable quality loss, especially if you’re a Pro user.
Which format is best for logos?
PNG is your best bet for logos since it supports transparency and uses lossless compression.
What’s the ideal JPEG quality setting?
A quality setting of 80% usually works well for most purposes, especially for web images and blog posts.
Can I compress files in free Canva?
File size reduction features are only available with a Canva Pro license.
Will compression affect printing quality?
For web use, go with medium quality JPEG or compressed PNG. For printing, use PDF format with print-quality settings.

