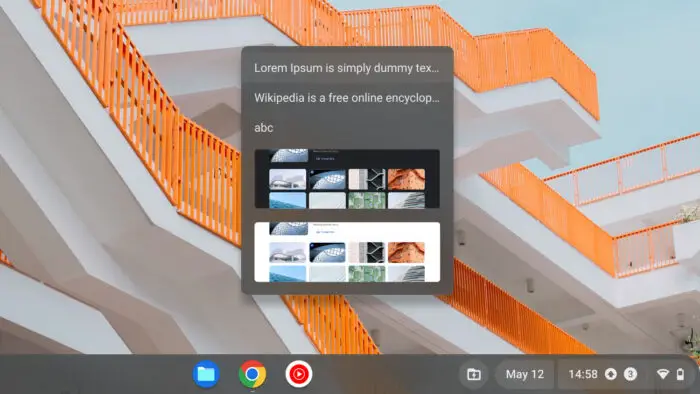
With virtually every app demanding our attention, it’s easy to find a pile of notifications on our online devices. Worse, not all notifications are equal. Some are important, but others are just junk that we should always try to remove.
By default, your Chromebook allows any app to send over notifications. But if you are not managing them properly, your screen may be drowned with trivial messages.
To prevent that from happening, learn how to manage notifications on your Chromebook. This article will cover notifications from apps and websites. At the end of the following guides, you can expect the operating system to be cleaner and clutter-free.
How to manage app notifications on Chromebook
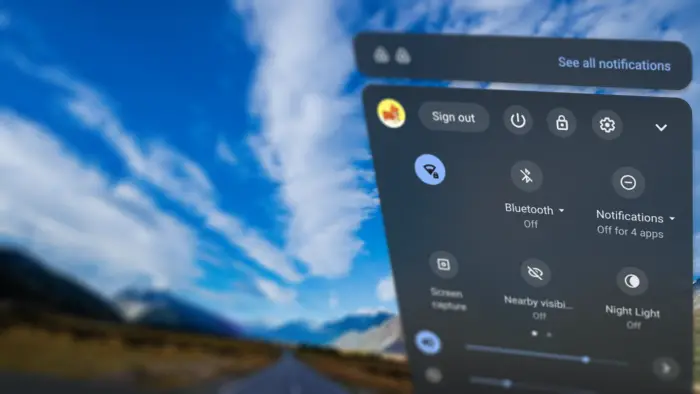
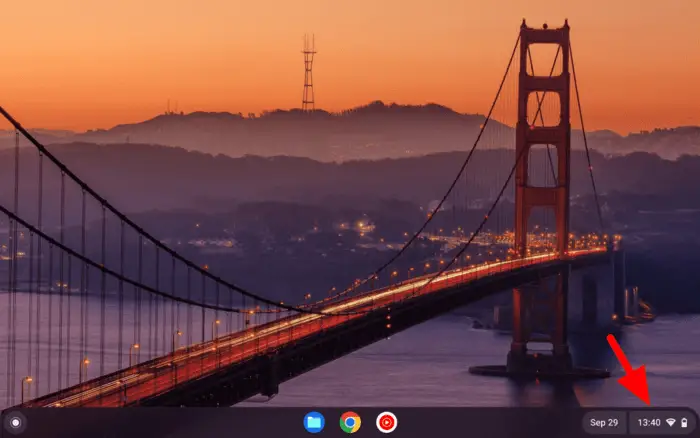
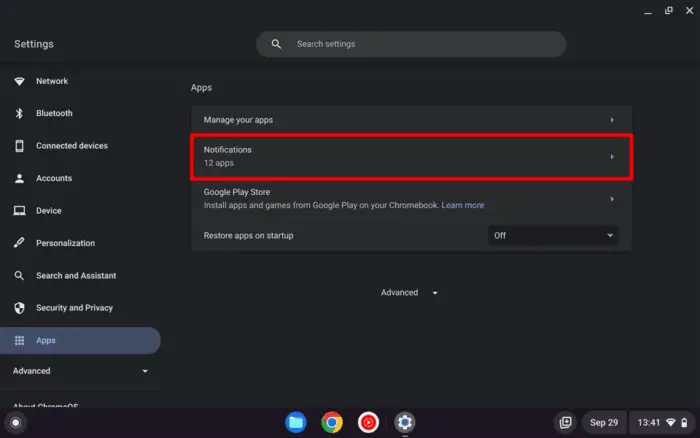
1. Launch your Chromebook, then click the Status Bar in the lower right corner.
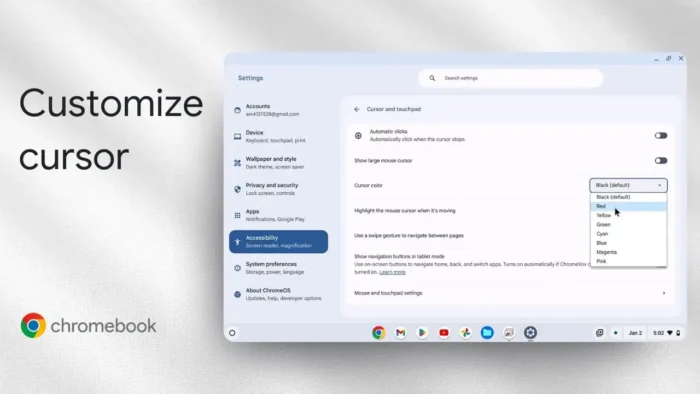
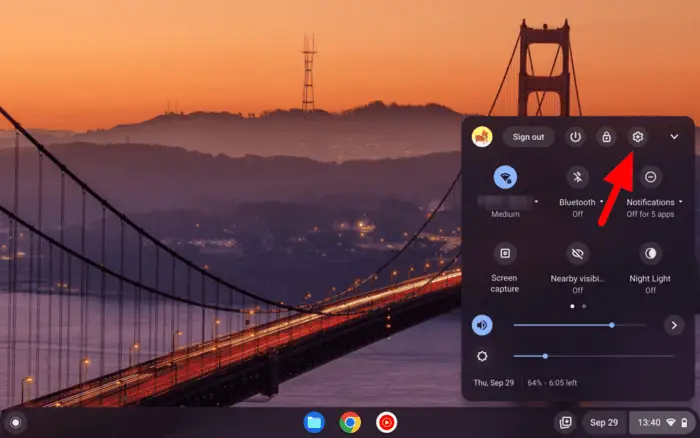
2. Now, go to Settings, displayed as a gear icon.
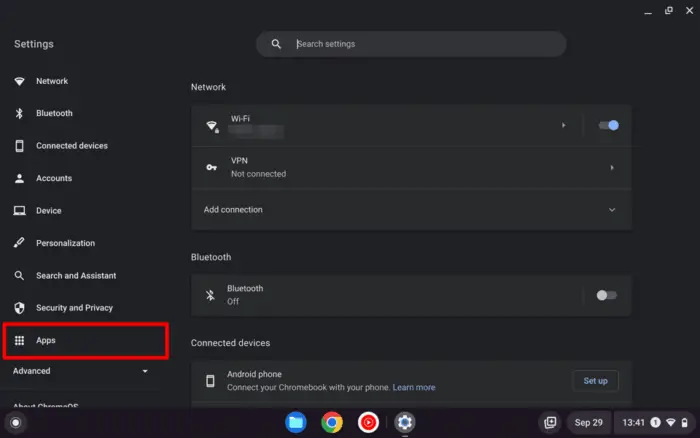
3. On the left menu, click Apps.
4. Then, select Notifications.
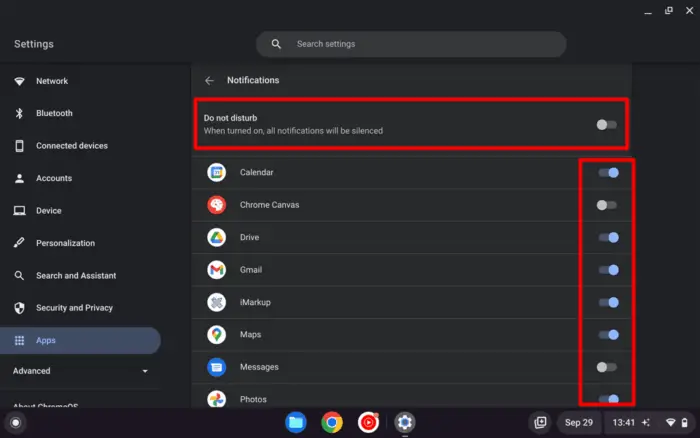
5. At the very top, you can enable Do not disturb to turn off all notifications. You may also select which apps that can send you notifications.
6. Additionally, the Do not disturb mode can also be found on the Status Bar. Use it to instantly enable or disable the mode.
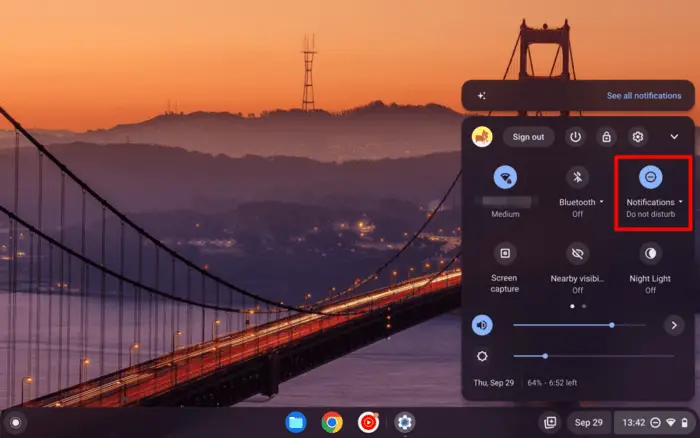
Just for your information, even if the notification-free mode is active, Chrome OS may still let some extremely important notifications pass through. For example, an alert about password breaches, privacy check-ups, and other similar events.
How to manage web notifications on the Chrome browser
If you have allowed some websites to nudge you with their notifications, you can always opt out from the recipient list. Google Chrome has an option dedicated to managing notifications from websites. Here’s how to open it.
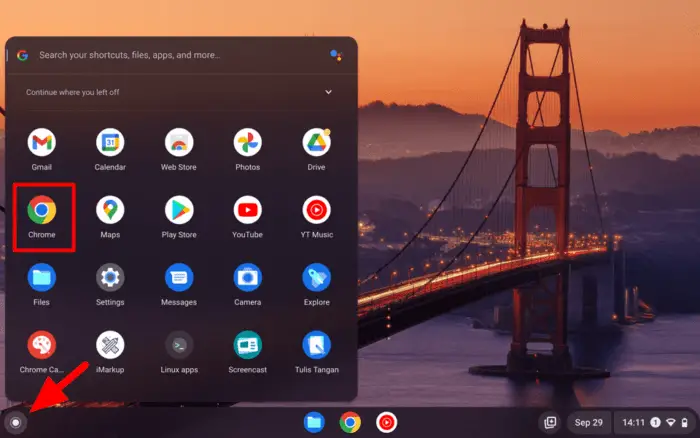
1. Navigate to Launcher, then open Chrome.
2. Open its menu, then select Settings.
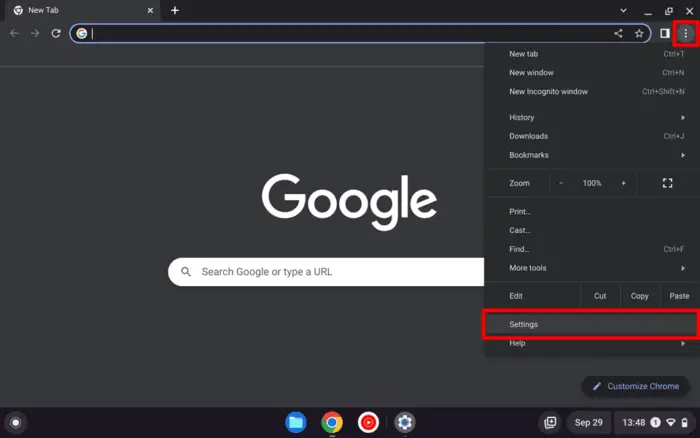
3. On the left menu, click Privacy and security, then select Site settings.
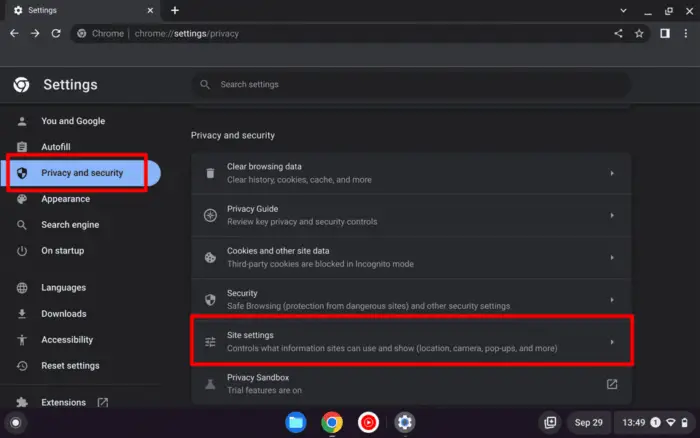
4. Head to Notifications.
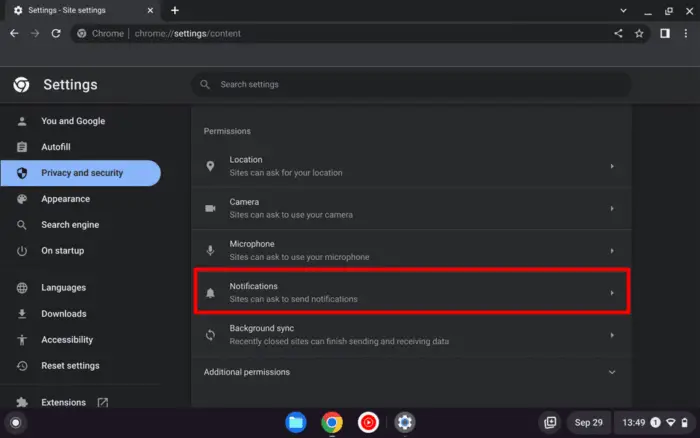
5. In this section, you can choose notification behavior like letting them ask your permission, quieter alert, or don’t allow them to send notifications in the future.
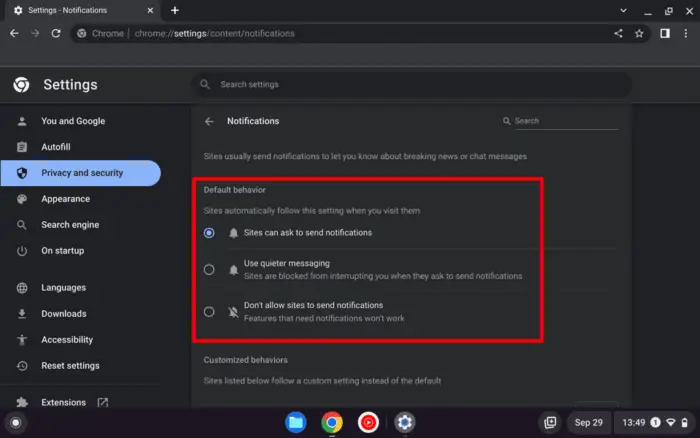
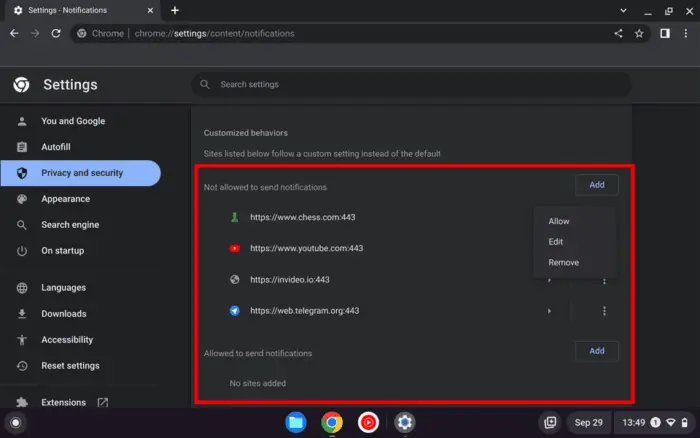
6. If scroll down a bit, there will be lists of websites with blocked and allowed notifications. Here, you can manage the settings for each individual website.
Both app notifications and web notifications won’t appear if the “Do not disturb” mode is enabled. Hence, be sure to keep the feature on while you are working on something that requires serious concentration. Moreover, consider enabling Dark Mode to make the screen less hurtful to the eyes.

