Key takeaways:
- Recraft.ai gives you 50 free credits a day, with no watermark on downloads.
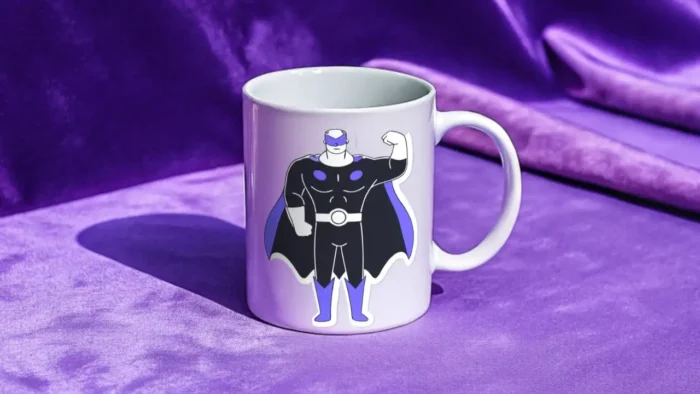
- You can create mockups by generating images or uploading your own.
- The process is fast, simple, and works for t-shirts, tumblers, and more.
Ever tried making a mockup for your merch or brand but ran into paywalls or ugly watermarks? Been there. I wanted high-quality, realistic mockups without dropping cash or fiddling with complicated tools. That’s where Recraft.ai comes in. I’ll walk you through how I make slick mockups using this free AI tool, from idea to export. If you want to create a t-shirt, sticker, or even a Tumblr design, stick around.
Table of Contents [Hide]
- Why I Use Recraft.ai for Mockups and Not the Others
- Starting a New Project and Setting Up Your Canvas
- Customizing the Look – Style, Color, and Resolution
- Generating the Mockup Base Image
- Creating or Uploading Your Sticker, Logo, or Design
- Turning Your Base Photo into a Mockup
- Fine-Tuning the Placement
- Exporting Your Final Mockup – No Watermark, No Fuss
- Tips for Getting the Best Results
- What to Do If Generation is Slow
- Real-World Uses: T-Shirts, Tumblers, Stickers, and More
- Limitations and Things to Watch Out For
- Quick Recap: My Workflow for Mockups with Recraft.ai
- FAQs
- How many free images can I generate per day?
- Can I upload my own designs or photos?
- Will my exported mockup have a watermark?
- How long does it take to generate an image?
- Can I use these mockups for commercial projects?
Why I Use Recraft.ai for Mockups and Not the Others
Let’s get real. Most AI mockup sites tease you with free generation but hit you with a paywall when you want to download. Recraft.ai is different. You get 50 free credits every day, and you can export your images as PNG or JPG with zero watermark. That’s enough to play around, experiment, and actually finish your project.
If you sign up with a referral link, you get an extra 200 credits. Perfect for testing out all the features or just going wild with ideas.
Starting a New Project and Setting Up Your Canvas
Once you’re in, hit “Create New Project.” You can start from scratch or upload your own image (limited to three uploads per day on the free plan). That’s enough for a basic workflow, but if you’re doing a big batch, just pace yourself.
Here’s what I usually do:
- Open a new project.
- Click “Image” to generate a base photo (like a person wearing a plain t-shirt).
- Or, drag and drop your own photo if you want to use a real product shot.
If you want to create a mockup for a t-shirt, just prompt something like:
young American woman standing in a park, smiling, wearing a white t-shirt.
You can get more detailed with your prompts to get the vibe you want.
Customizing the Look – Style, Color, and Resolution
Before you generate, you can tweak a few things:
- Styling: Choose between photorealism, illustration, or vector. Or just stick with the default for a natural look.
- Avoid text in image: Turn this on if you don’t want random words showing up.
- Color: Pick a specific color or randomize it. I usually go with default unless I have a brand color in mind.
- Resolution: Go with 3×2 for t-shirts, or adjust for other products.
If you’re on the premium plan, you can set the number of images per prompt and make your project private. But for most, the free plan is more than enough.
Generating the Mockup Base Image
Once you’ve set everything, hit the recraft button. It usually takes 10-20 seconds. Sometimes, if a lot of people are using it, you might wait a bit longer. You’ll get two images to choose from.
Pick the one where the product area (like the t-shirt’s front) is clearly visible. That’s where your design will go.
Creating or Uploading Your Sticker, Logo, or Design
Next, you need the graphic to put on your mockup. You can:
- Generate a new image with a prompt (like “panda sticker” or “cool logo”).
- Upload your own design or logo (again, three uploads per day).
If your generated image has a background, use the “Remove Background” button. It’s quick and makes your sticker ready to slap onto your mockup.
For more on removing backgrounds or editing images, check out how to put a transparent image over another image in Paint.
Turning Your Base Photo into a Mockup
Click on your base photo and hit “Convert to Mockup.” This doesn’t change the image, but it tells the AI where to put your design. The tool automatically figures out the t-shirt, mug, or whatever product you’re working with.
Now, drag your sticker or logo onto the mockup. The AI will process it and place it on the right spot. If it’s off, just resize or move it until it looks right.
Fine-Tuning the Placement
Sometimes, the design lands in a weird spot or is too big. No problem:
- Shrink or move the sticker so it fits nicely on the product.
- Play around until it looks natural.
If you want to make a batch of different versions, just repeat the process with new graphics or base images.
Exporting Your Final Mockup – No Watermark, No Fuss
When you’re happy with the result, right-click and choose “Export as,” or use the export button. Choose PNG for a transparent background or JPG for a regular photo. Download and you’re done—no watermark, no hidden fees.
If you want to compress your photo before sharing or uploading, check how to compress photo online.
Tips for Getting the Best Results
- Use specific prompts for better control over the generated base image.
- If you want a certain style, pick it before generating.
- Remove backgrounds from stickers/logos for a cleaner look.
- Make sure the product area is visible in your base image.
- Take advantage of your daily credits—test different ideas.
What to Do If Generation is Slow
Sometimes, the site gets busy and things slow down. Just wait it out or try again later. Usually, it’s pretty fast, but peak hours can hit.
Real-World Uses: T-Shirts, Tumblers, Stickers, and More
I’ve used Recraft.ai for:
- T-shirt mockups
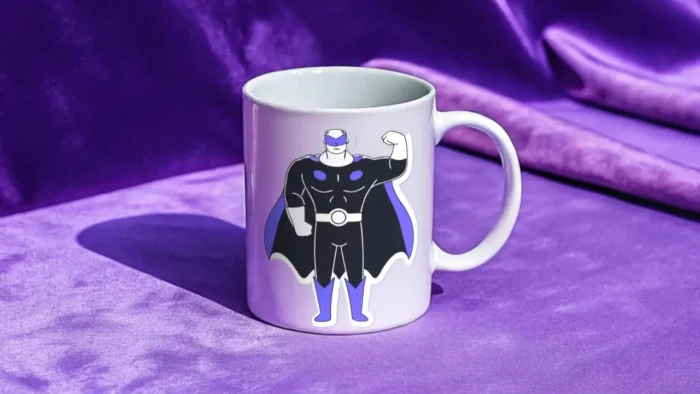
- Tumblers and mugs
- Stickers for laptops or water bottles
- Social media previews
It works for almost any product you can think of.
Limitations and Things to Watch Out For
- Free plan lets you upload three images a day.
- Credits reset every 24 hours.
- Sometimes, the AI puts the design in a weird spot—just move or resize as needed.
- Private projects are only for premium users.
If you need to resize your image for a specific platform or print, check how to resize picture on PC.
Quick Recap: My Workflow for Mockups with Recraft.ai
- Sign up and claim your credits.
- Create a new project and generate a base product image.
- Generate or upload your design, remove the background if needed.
- Convert the base image to a mockup.
- Drag and drop your design onto the product, adjust as needed.
- Export as PNG or JPG—no watermark.
FAQs
How many free images can I generate per day?
You get 50 free credits daily, which means 50 images.
Can I upload my own designs or photos?
Yes, but only three uploads per day on the free plan.
Will my exported mockup have a watermark?
Nope, all downloads are watermark-free.
How long does it take to generate an image?
Usually 10-20 seconds, but it can be slower if the site is busy.
Can I use these mockups for commercial projects?
Yes, but always double-check Recraft.ai’s terms if you’re selling or using them for clients.
That’s how I use Recraft.ai for quick, realistic mockups. It’s easy, free, and gets the job done. If you want to make your own stickers for WhatsApp, check out how to send your photo as sticker on WhatsApp for more creative ideas. Happy designing! 🎨👕

