Each device that is connected to the internet will have an internet protocol address (or often called IP address). It is essentially a digital address to identify the device so it could send and receive data properly.
Your Chromebook is also one kind of internet device. Therefore, it has an IP address. In fact, it has two; IPv4 and IPv6. Both addresses are assigned automatically once you connected to a network, like your home’s WiFi.
Before I’m going to show you how to find the IP address on a Chromebook, I’d like to inform you briefly about the difference between the two types of IP addresses.
What are IPv4 and IPv6 actually?
In a nutshell, IPv4 is an ancient type of IP address that we still used today. It stands on a 32-bit system which makes the number of unique addresses extremely limited; only about 4.3 billion.
Given the significant growth of Internet of Things devices in recent years, IPv6 with a 128-bit system was introduced to help identify more devices. Additionally, IPv6 is also more secure, faster, and efficient at transferring data.
You can learn more about the two on the article from FS Community.
Now, check out how to see the IP addresses on your Chromebook laptop.
How to find IP address on Chromebook.
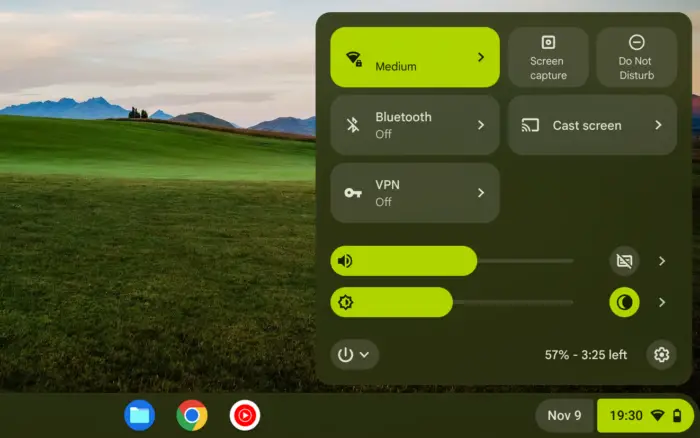
1. Open your Chromebook, then click the clock icon in the lower right corner.
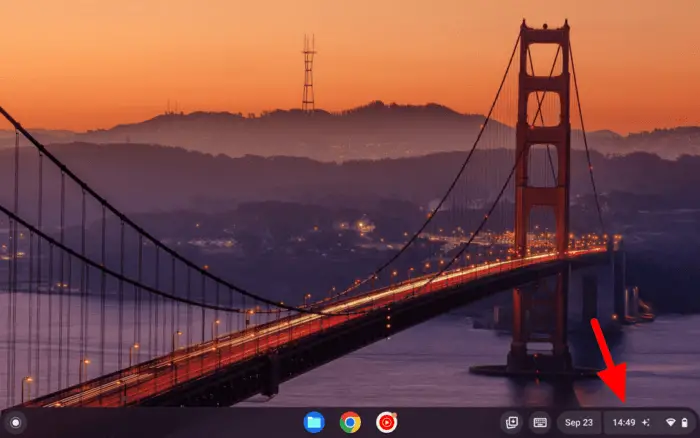
2. Select Settings.
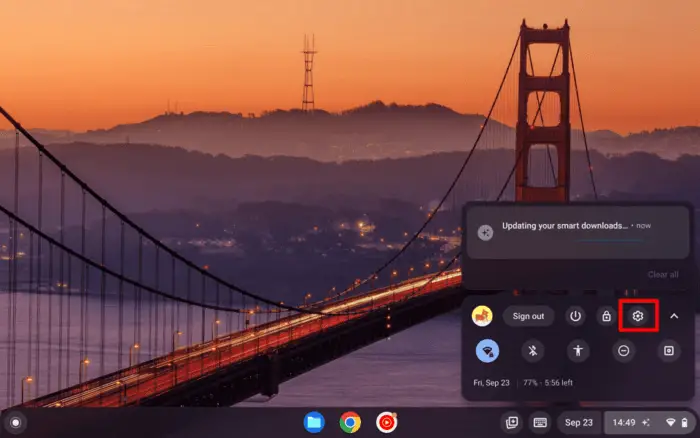
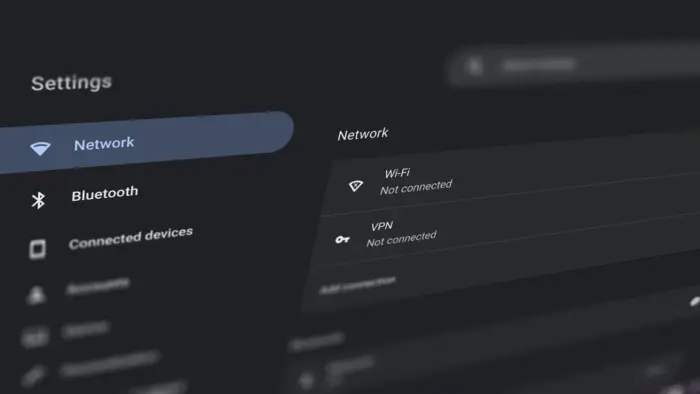
3. Under the Network menu, go to WiFi.
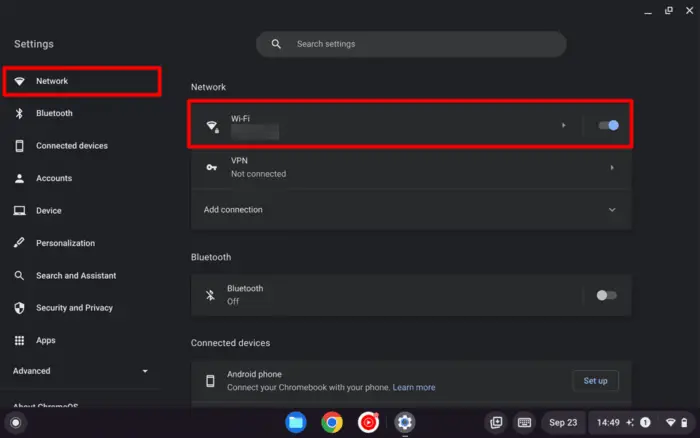
4. Select the currently connected network.
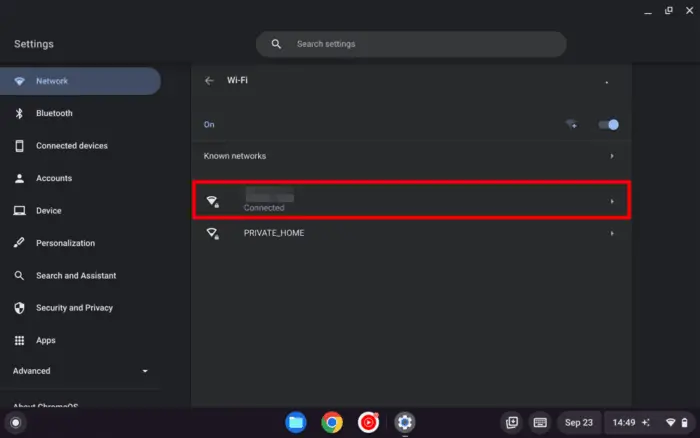
5. You would find the IP address there. That is your IPv6 address.
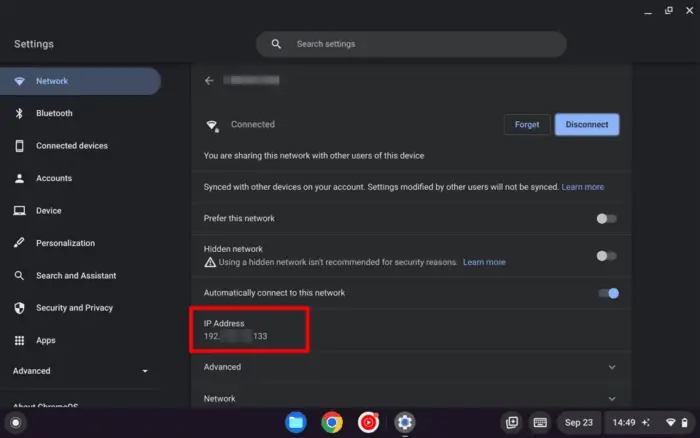
6. To find the IPv6 address, open the Network menu.
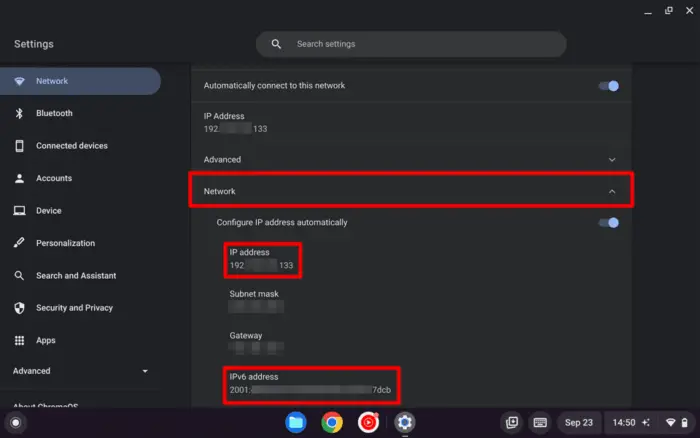
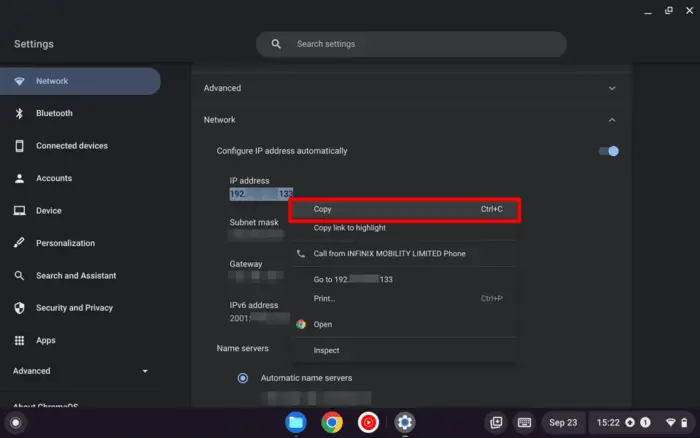
7. If you want to copy the address, you can do so by selecting the address with the cursor. After that right-click on it, select Copy, or press Ctrl+C.
As a side note, IP address and also MAC address can be sensitive information for your privacy. Bad actors could use it to track your location or spy your internet activity remotely without your knowledge. Be sure not to show it to the public.

![How to View Saved Passwords on Chromebook - How to View Saved Passwords on Chromebook [3 Methods] 23 How to View Saved Passwords on Chromebook [3 Methods]](https://asapguide.com/wp-content/uploads/2023/12/How-to-View-Saved-Passwords-on-Chromebook-700x438.png)
