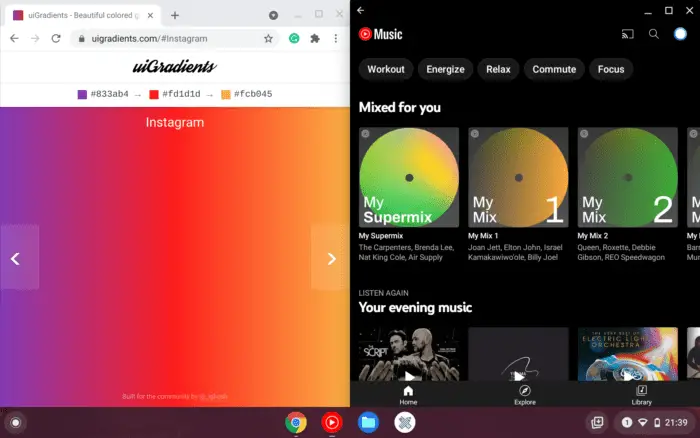
Chromebooks have become increasingly popular in recent years due to their simplicity, affordability, and seamless integration with Google services. One very handy feature of Chrome OS is the ability to pin apps to the taskbar, known as the Shelf, for quick and easy access. Having your most-used apps pinned to the Shelf can save you time and make multitasking much more efficient.
In this simple guide, we’ll walk through the steps for pinning apps to the Shelf on your Chromebook. Whether you’re new to Chrome OS or just looking to organize your apps better, pinning apps is a must-have tip for getting the most out of your Chromebook.
Table of Contents
How to pin an app to the Shelf
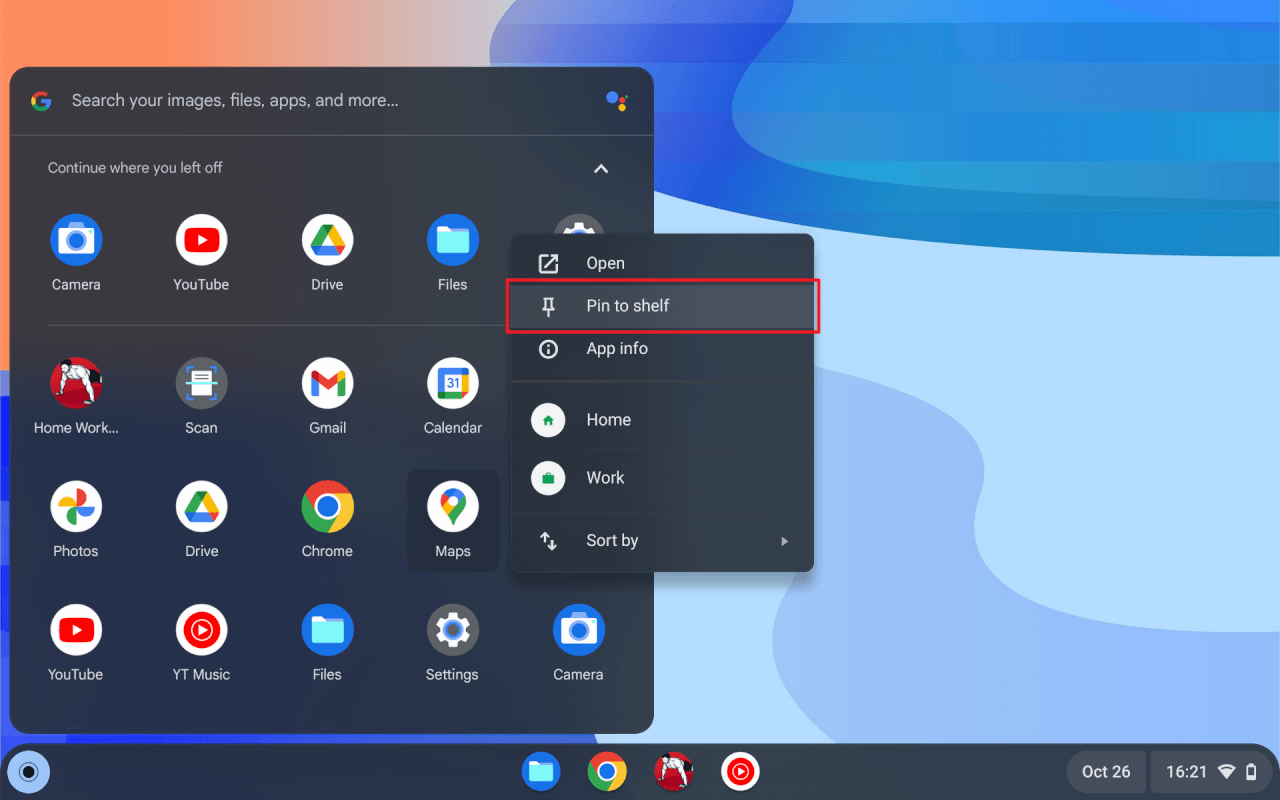
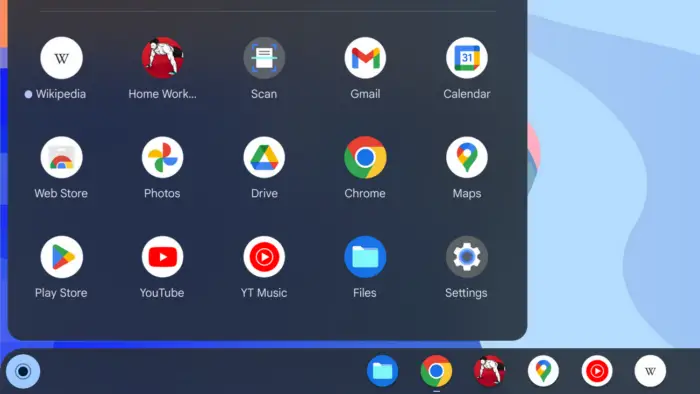
- Open the App Launcher located at the bottom left corner of the screen. This brings up a list of all installed apps on your Chromebook.
- Right-click on the App icon. Right-clicking can be done via a two-finger tap on the touchpad or Alt+Click.
- In the menu that appears, click on Pin to Shelf. This is the option that pins the selected app.
- Pinned App Appears on the Shelf. The Shelf runs along the bottom of the desktop.
And that’s all there is to it!
With just a right-click and a click of “Pin to Shelf”, you can populate your Chromebook’s taskbar with your most-used apps.
How to rearrange pinned apps
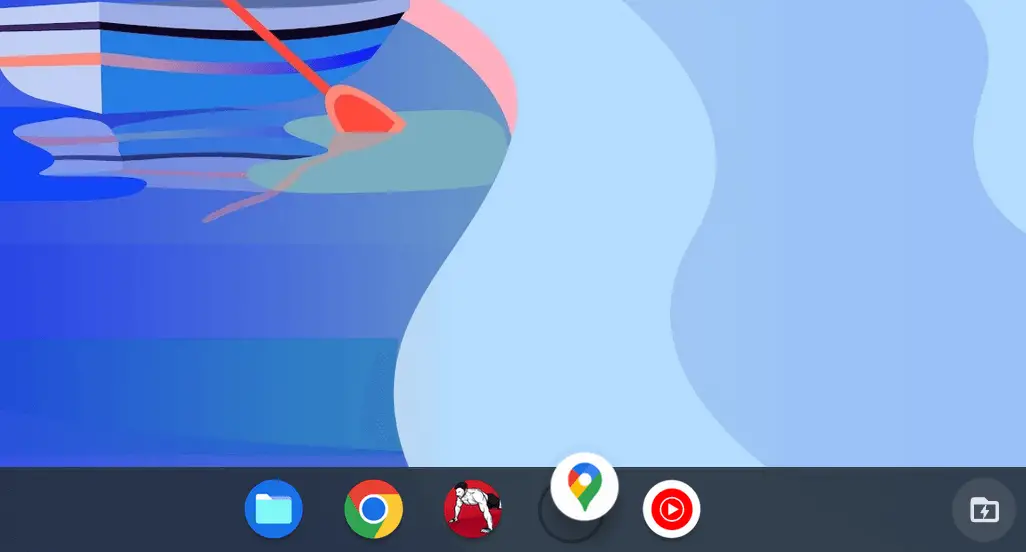
Once you have pinned some apps, you may want to rearrange their order along the Shelf. Doing so is easy:
- To move a pinned app, simply click and drag it left or right to the desired position on the Shelf.
- Dropping the app icon between two other icons will push them apart and make space to insert the app you’re moving.
- You can also drag pinned apps partially off the Shelf to create groupings or spaces between sets of apps.
How to unpin pinned apps
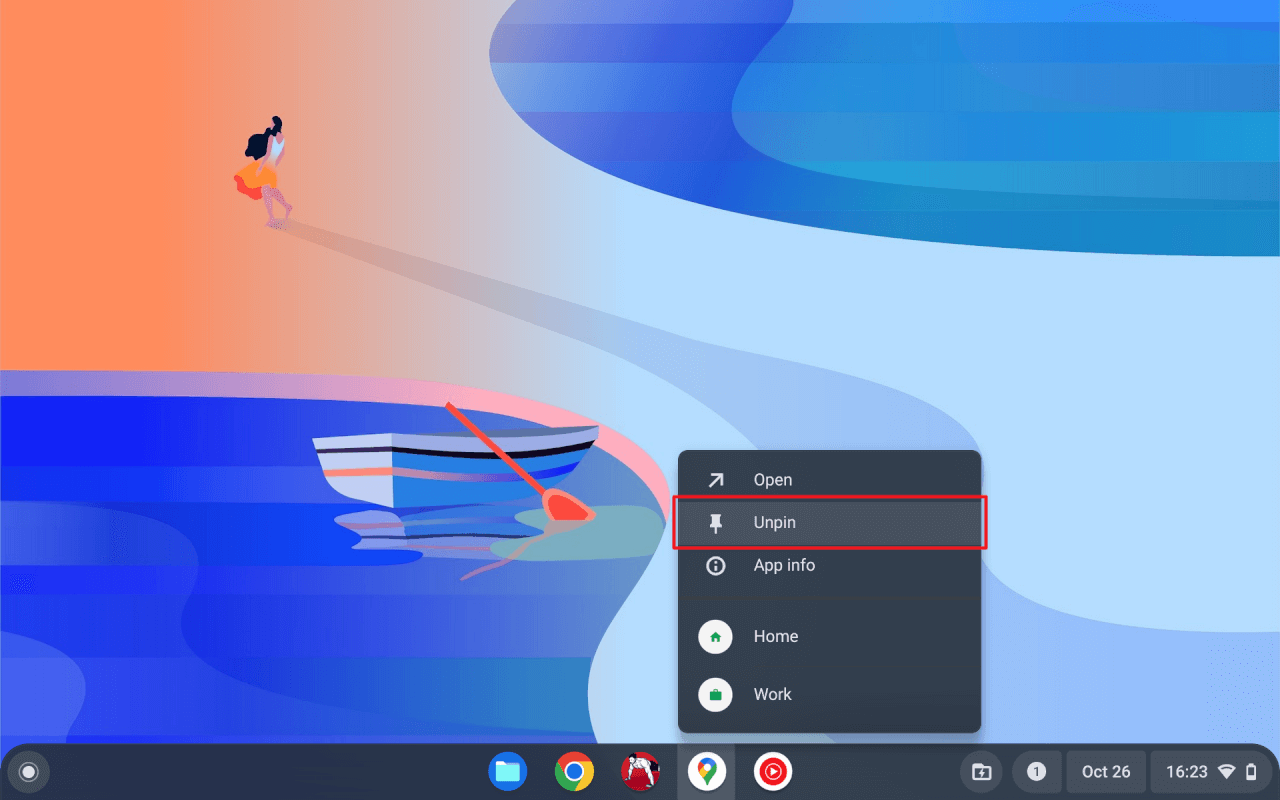
If you decide you no longer want an app pinned to the Shelf, unpinning it is just as simple:
- Right-click directly on the pinned app’s icon.
- Select Unpin from the menu.
- This will instantly remove the app from the Shelf, leaving you with a cleaned-up taskbar.
Feel free to play around with rearranging and unpinning apps as you get used to customizing your Chromebook’s Shelf. Like your desktop icons, the pinned apps are designed to be flexible to your preferences.
How to pin websites
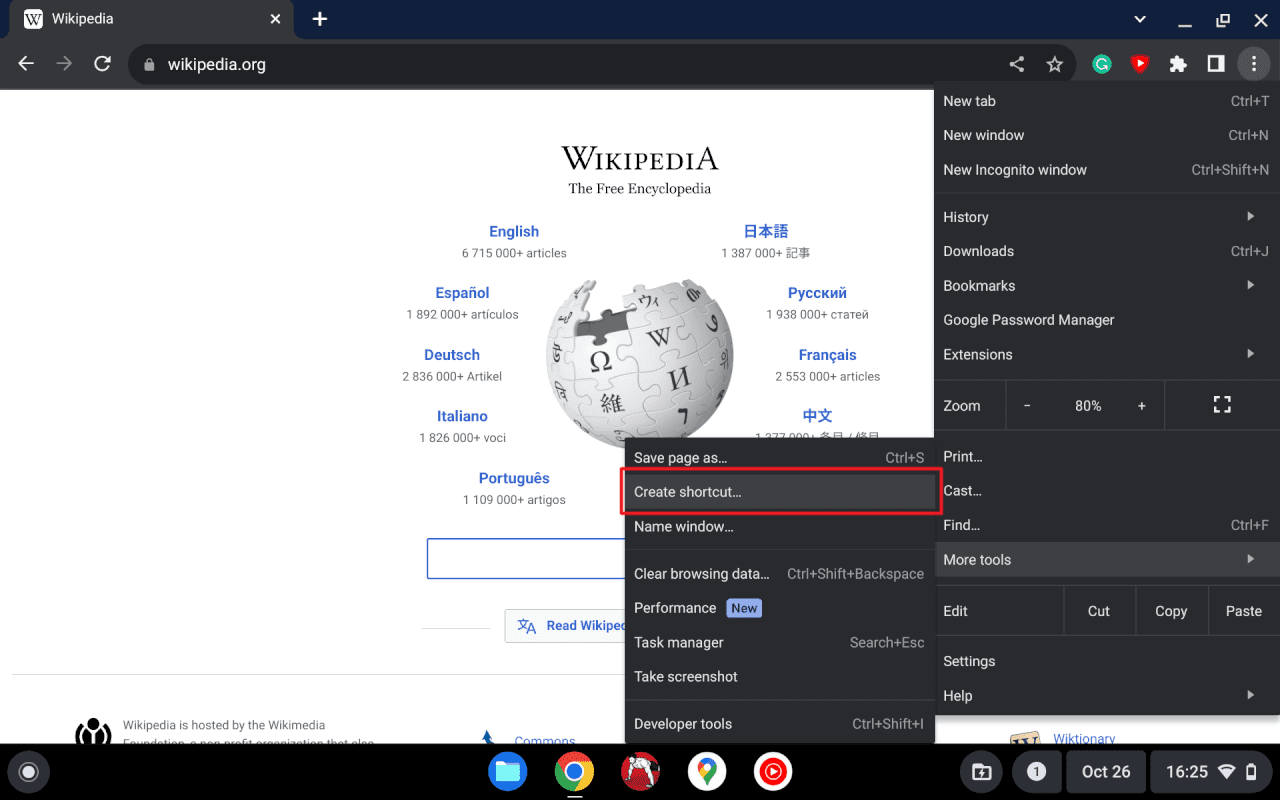
In addition to apps, you can also pin websites to the Chromebook Shelf for quick access. Here’s how:
- In the Chrome browser, navigate to the website you want pinned.
- Click the More Options button (three vertical dots) in the top right.
- Go to More tools and select Create shortcut…
- In the dialog box, you may check Open as window (optional) and then click Create.
- This will add a shortcut for the website under your Chrome apps.
- Locate the shortcut and pin it just like an app using the steps above.
Now you have one-click access to your favorite websites directly from the Shelf! The pinned site will open in a dedicated Chrome window so you can easily multitask between webpages and apps.
Tips for pinning apps to Shelf
With your most-used apps and websites pinned, you can fully utilize your Chromebook’s Shelf as an efficient and organized control center:
- Put your main apps first – Keep the apps you use all the time, like Gmail and Chrome, at the beginning for easiest access.
- Group by function – Pin apps that serve similar purposes, like social media sites or productivity apps, together in sections.
- Match your workflow – Arrange apps in an order that matches your daily routines and processes.
- Leave space – Utilize the full width of the Shelf and leave gaps between groups of apps. This makes them easier to see and access.
- Try different layouts – Don’t be afraid to play around with different arrangements until you find a Shelf layout that works best.
- Only pin frequently used apps – Avoid cluttering your Shelf by limiting pinned apps to your absolute must-haves.
- Replace as needed – If your app usage changes, easily replace pinned apps with new ones that better fit your current needs.
With the ability to freely customize and tweak your pinned apps Shelf, you can truly make Chrome OS your own optimized experience.
Conclusion
Pinning your favorite and most-used apps to the Chromebook Shelf unlocks a whole new level of efficiency. Instant anytime access to your go-to apps helps you multitask faster, stay organized, and get more done on your Chromebook.
Following the simple steps to pin, rearrange, and unpin apps gives you full control to customize the Shelf into your ideal Chrome OS workspace. Take a few minutes to play around with test arrangements, groupings, and layouts until your pinned apps Shelf is honed into an optimal control center.
So tap into the full potential of your Chromebook and start pinning your apps today. In no time, you’ll have a clean and efficient Shelf that makes your Chromebook experience smoother, more intuitive, and more productive.
FAQs
Can you pin apps to the Chromebook desktop?
You can’t pin apps to the Chromebook desktop, but you can pin apps to the Chromebook Shelf. To do that, open Launcher, right-click on an app and then select Pin to Shelf.
How do you customize the taskbar on a Chromebook?
You can customize the taskbar or Shelf on your Chromebook by right-clicking on it. It will reveal some menus to change the Shelf position, theme color, and autohide feature.
How do I add apps to my Chromebook Launcher?
Your Chromebook Launcher contains all apps available on the device. To add apps, you can simply install new apps to the device and it will be listed on Launcher.

