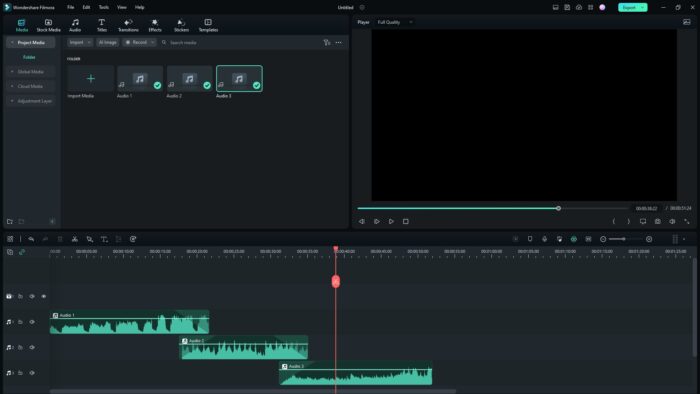
Creating a smooth transition between two audio clips is an essential part of video editing. This effect helps maintain the flow of the video and prevents an abrupt stop in the audio. One of the most recommended ways to achieve this is by utilizing the so-called audio crossfade effect. This effect makes two audio clips transition smoothly without a silent gap.
You might have seen this effect in many YouTube videos and Hollywood movies. By doing so, the video creator may quickly change the tone and mood of the video in an instant. Essentially, one audio is fading out before the second audio clip slowly replaces it. Again, there is no gap between them.
Table of Contents
What is a crossfade audio effect?
In video editing, the crossfade effect is used to transition between two audio clips by gradually fading out the first audio clip while simultaneously fading into the next audio clip. This effect can help maintain the flow of the video and lets the audience know that the two scenes are connected.
In Filmora 12 or higher, the crossfade effect is available for you to use. But for older versions, there is a simple workaround to apply a crossfade effect to audio clips in Wondershare Filmora (PC). In this article, I will show you how, and it should only take less than 60 seconds to apply.
How to add audio crossfade effect in Filmora 12
In Filmora version 12.5.6, they already updated the program with a native crossfade effect, which is easier to implement and customize. In order to follow this tutorial, make sure your Filmora version 12.5.6 or above. You can check the version via Help > About.
With that said, check out these steps!
1. Launch the latest version of Filmora on your computer.
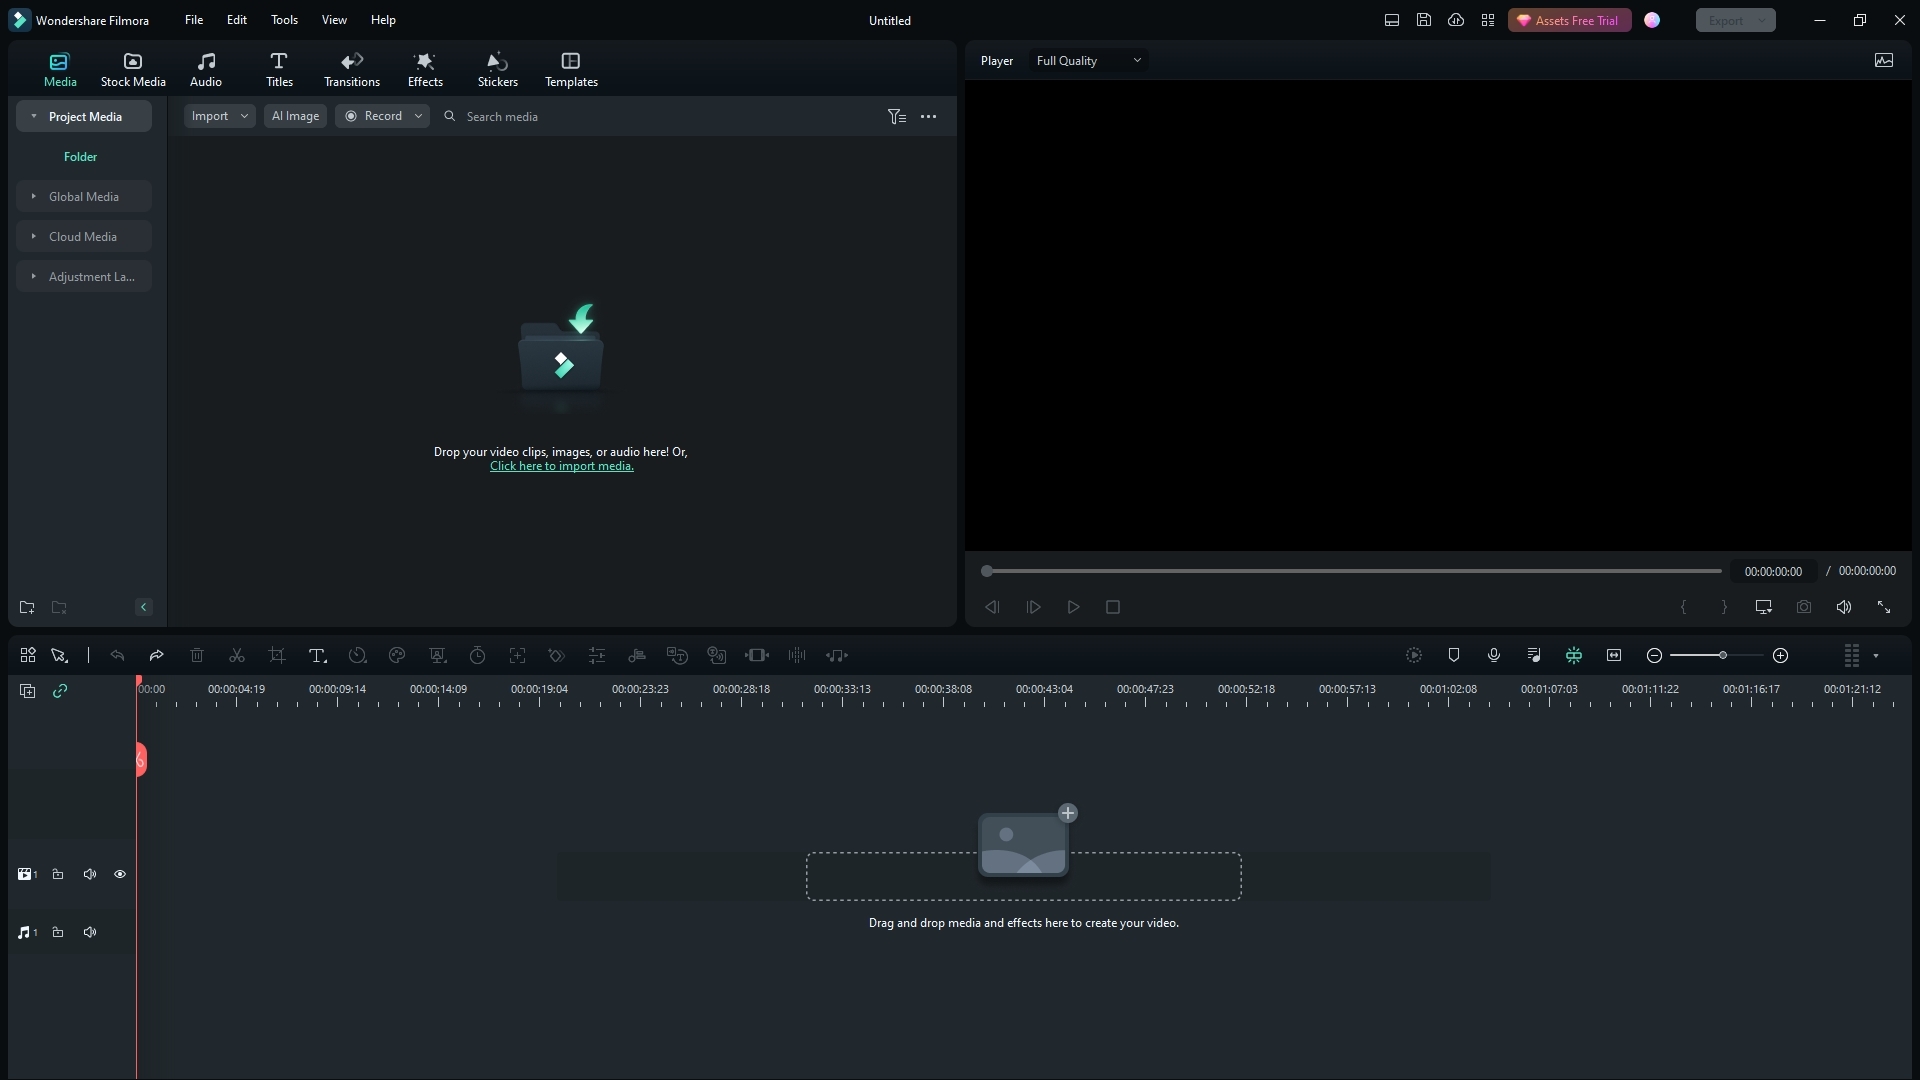
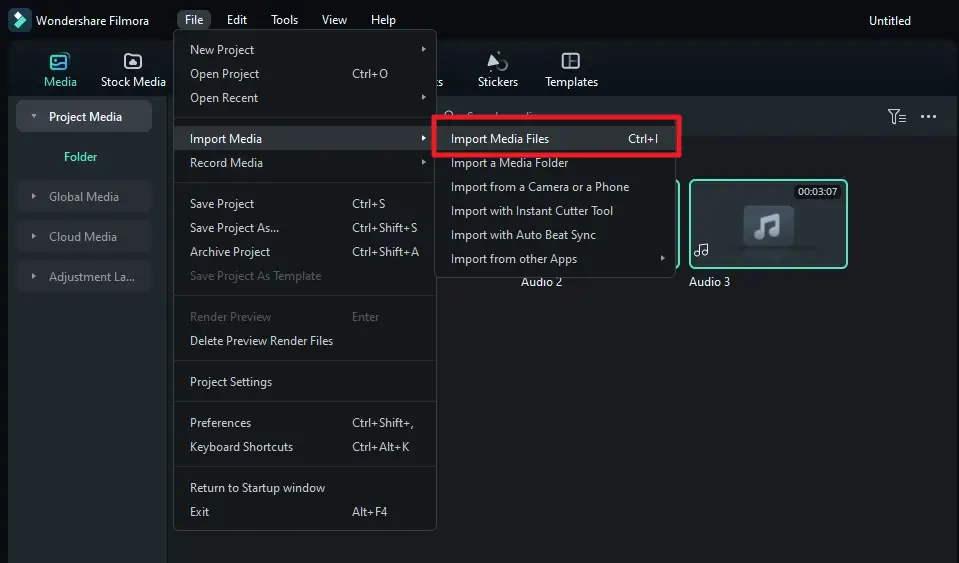
2. Import your audio files into the program. You can drag and drop the files or navigate via File > Import Media > Import Media Files.
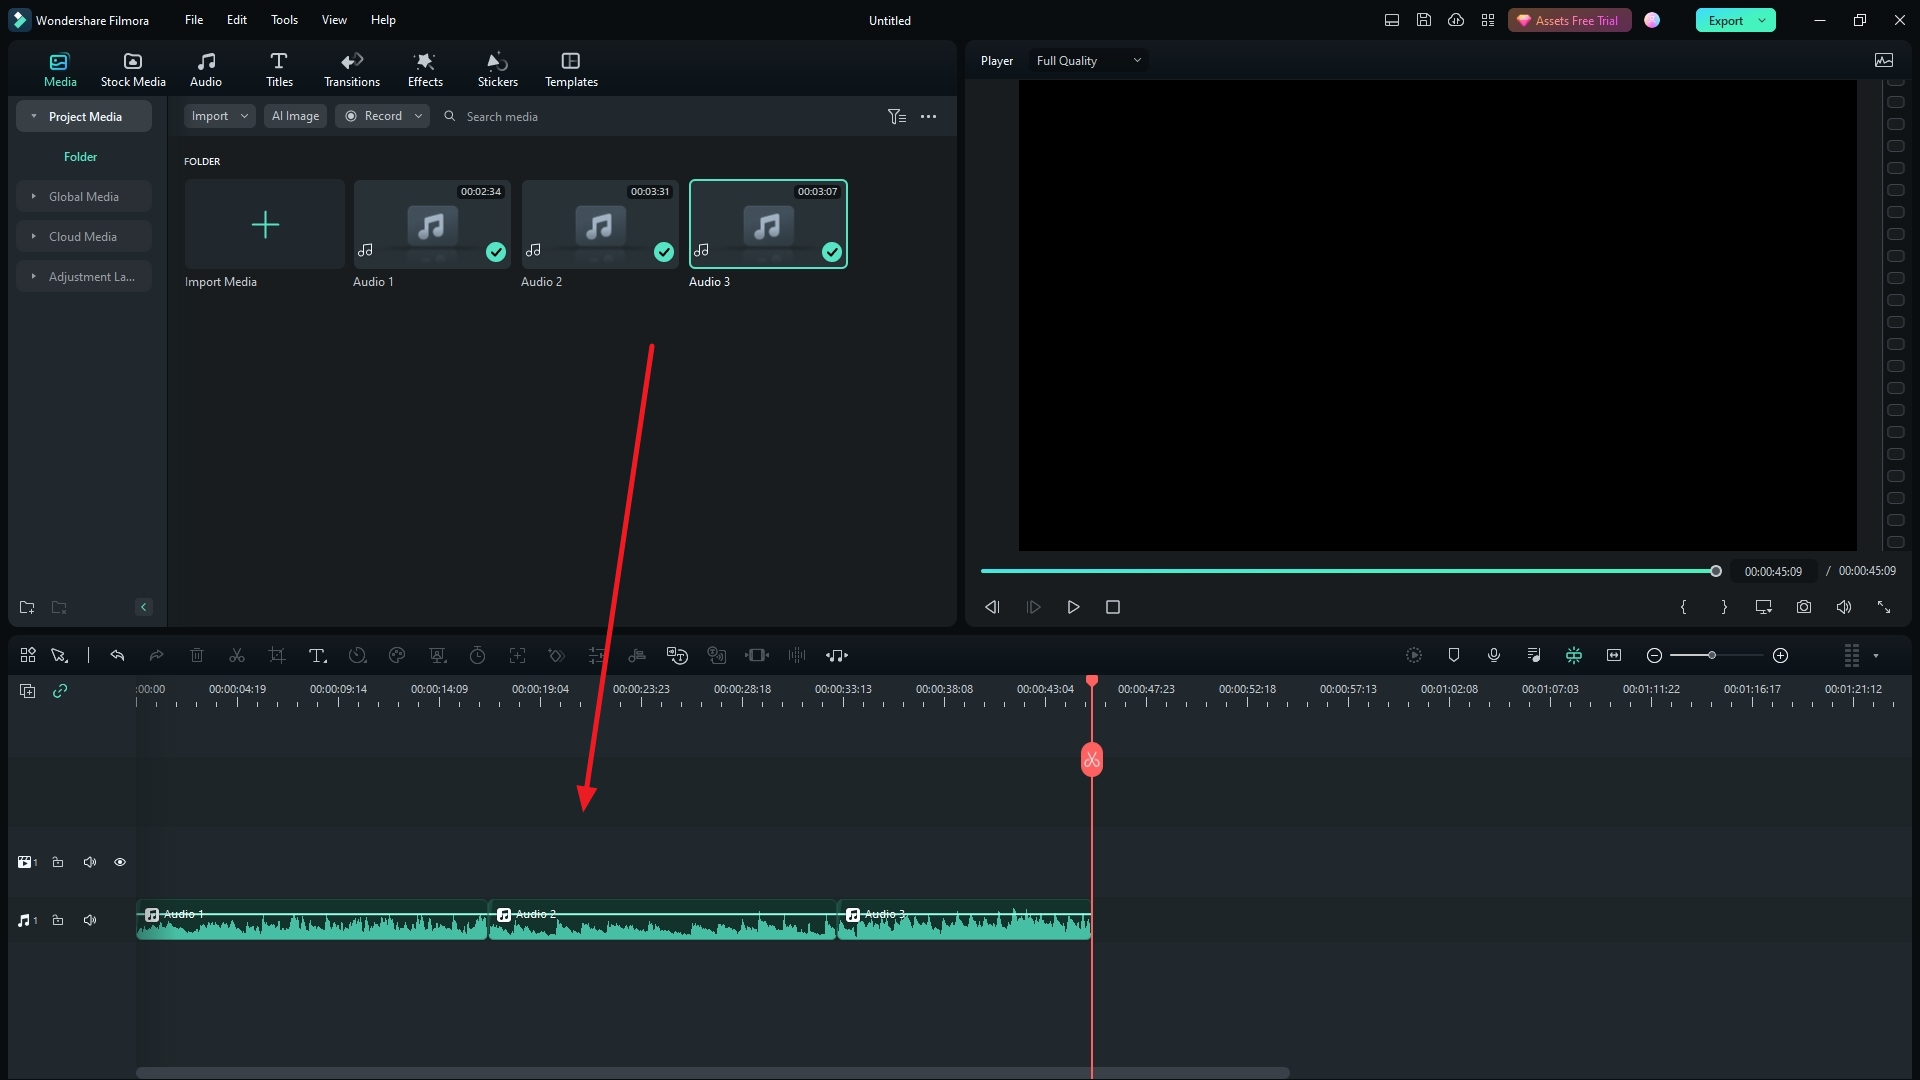
3. Drag and drop the audio files into the video timeline.
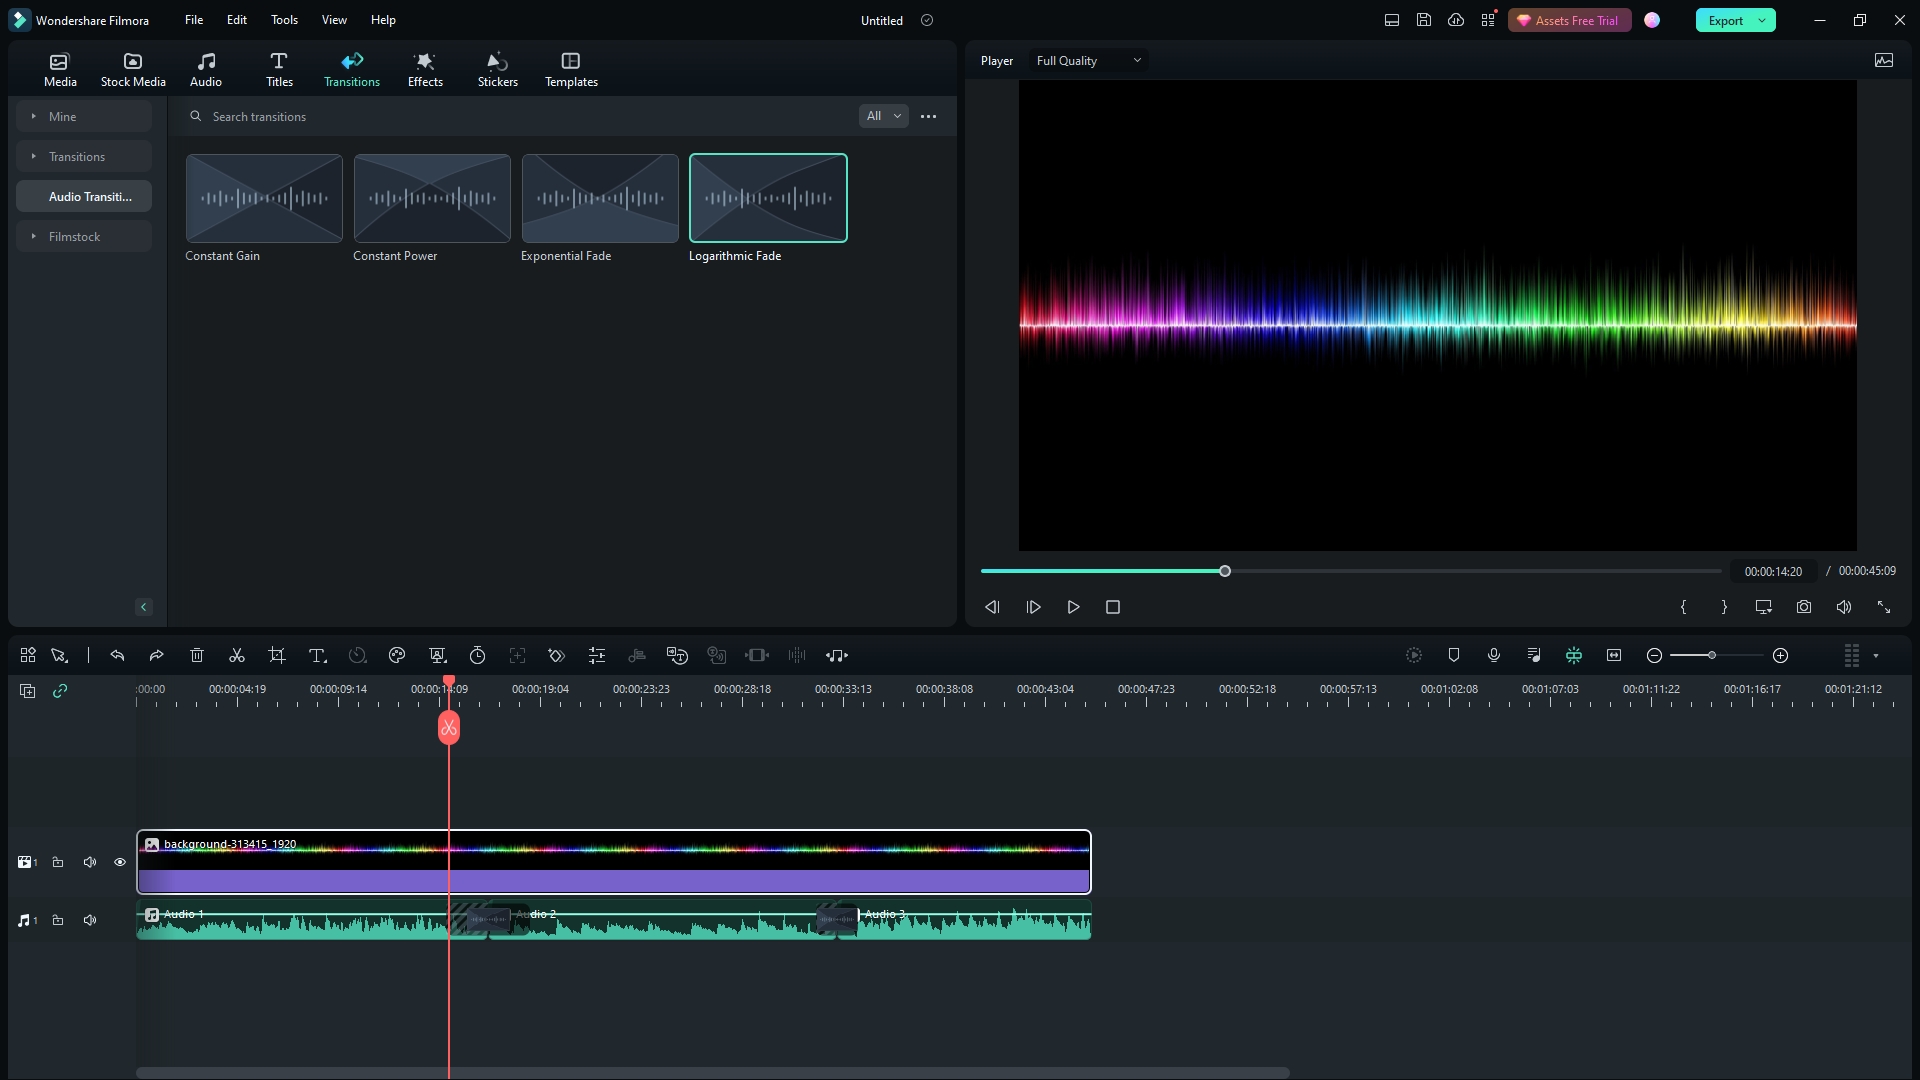
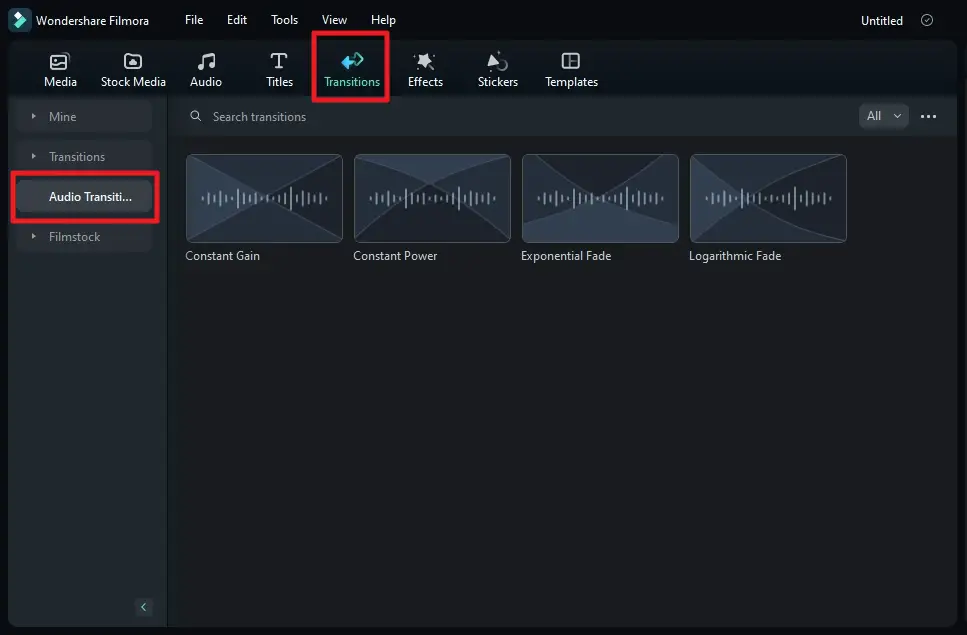
4. Now, go to the Transitions menu and then click Audio Transitions.
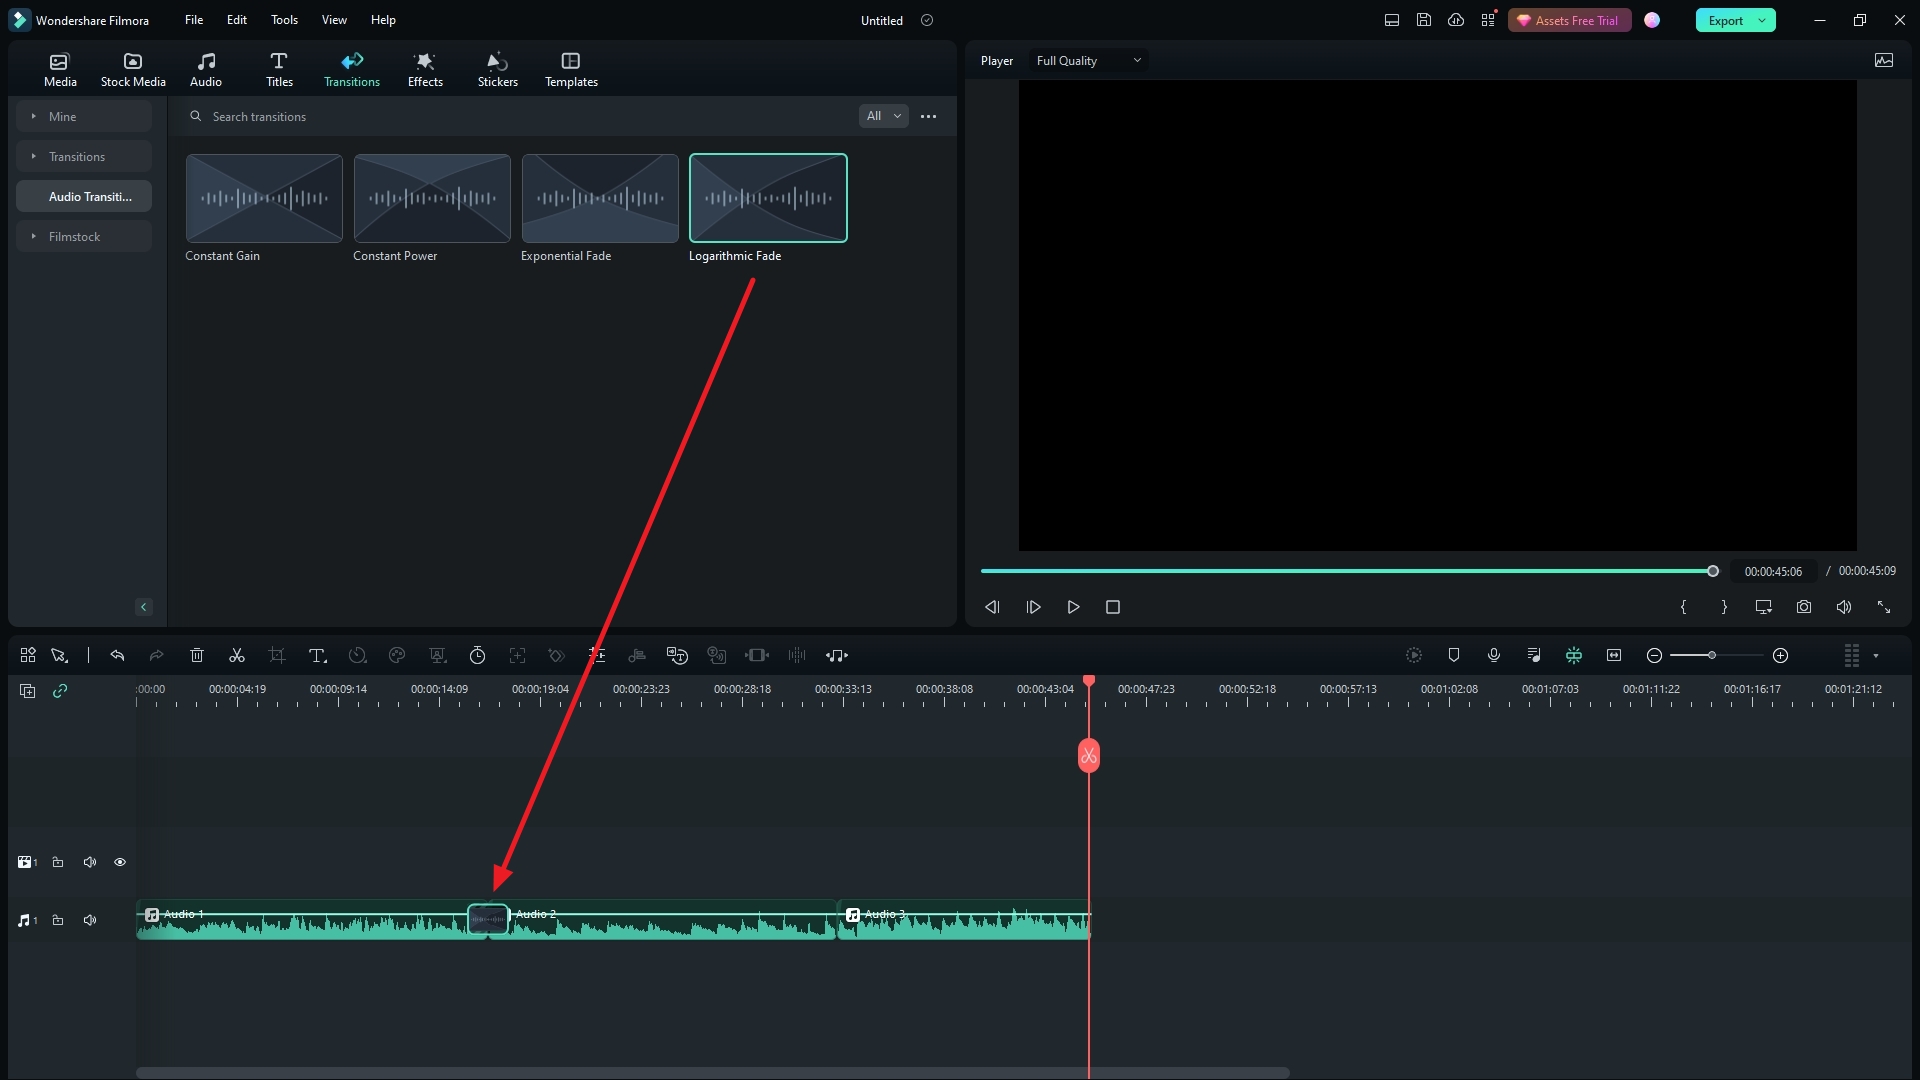
5. Drag and drop an audio crossfade effect into the border between two audio clips. In this example, I’m going to use “Logarithmic Fade,” but feel free to use other effects that you like.
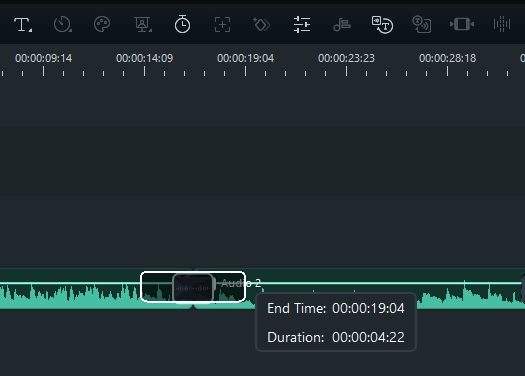
6. You may increase or decrease the transition duration with the cursor.
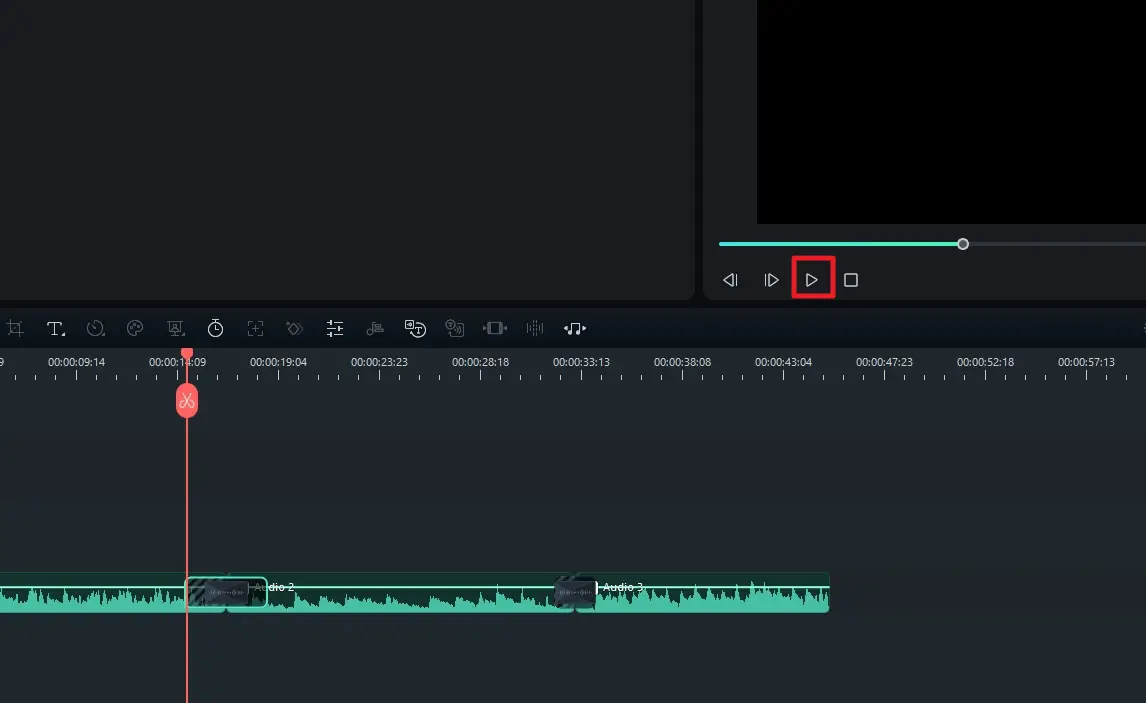
7. Once the effect has been applied, Play the video to preview the result.
How to add an audio crossfade effect in Filmora 12, 11, 10, and older
For anyone that’s running Filmora 12.5.6 or older can try the following method to create a crossfade effect on audio. It may not be as pretty as the native ones, but this should be fine in most cases. Here’s how.
1. Launch Filmora on your computer.

2. Import the audio files to the project. In this example, I have three separate audio clips.

3. Now, drag and drop the first audio to the timeline.
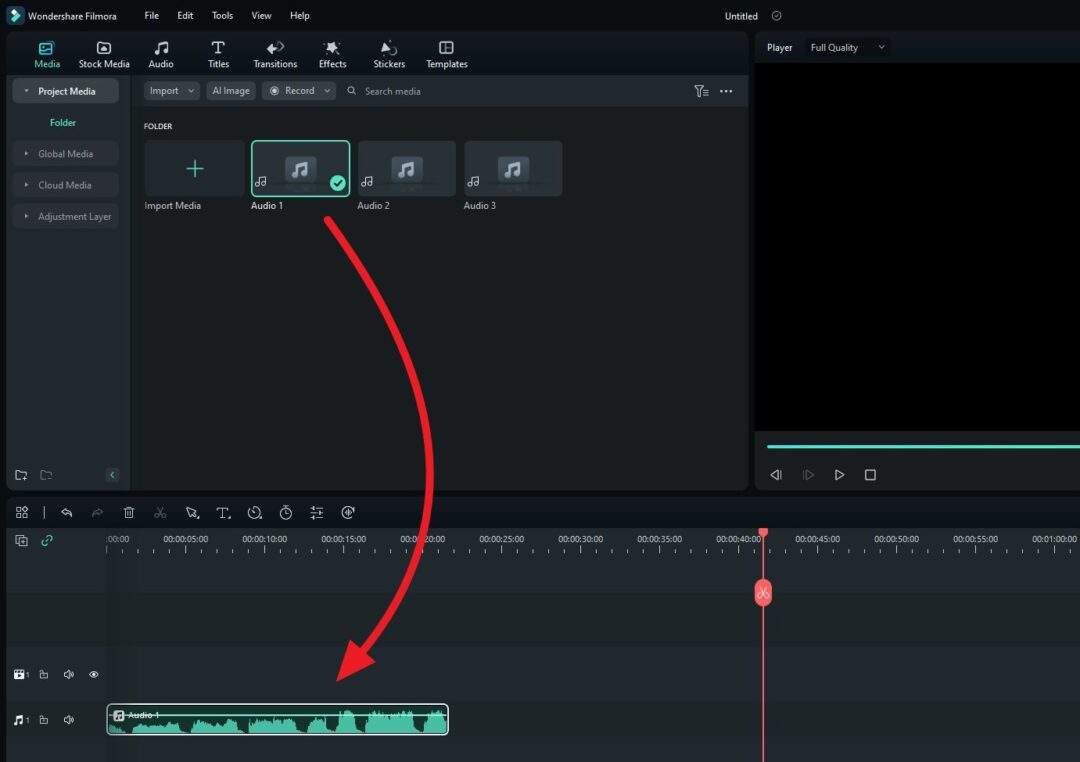
4. Right-click on the audio track and select Adjust Audio.

5. Set the Fade Out to be 5 seconds and then click OK.
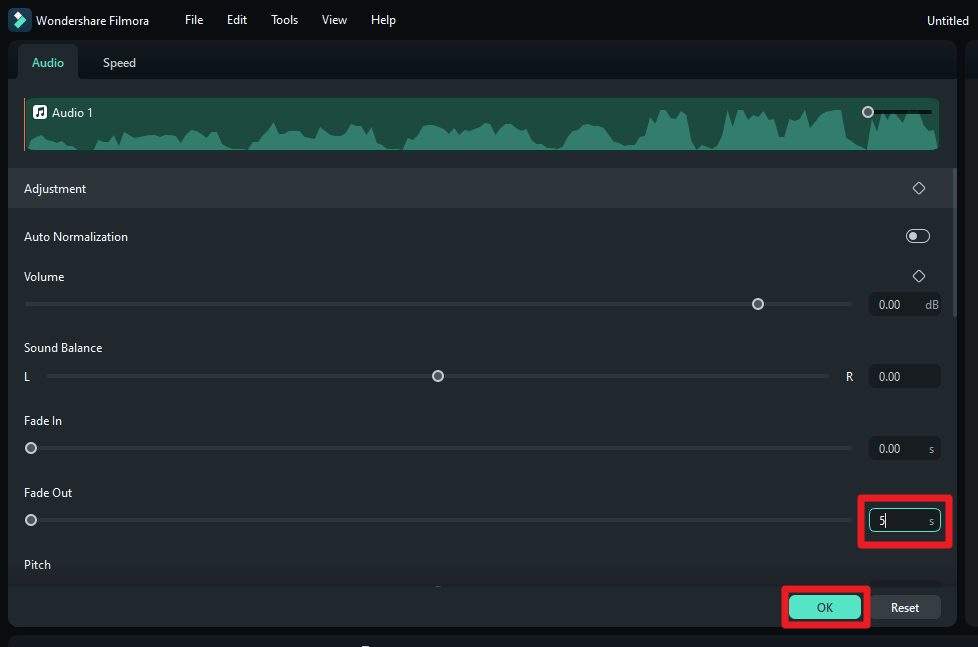
6. You should see a visual cue at the end of the track. This is signaling that the last 5 seconds of the audio will be fading out.
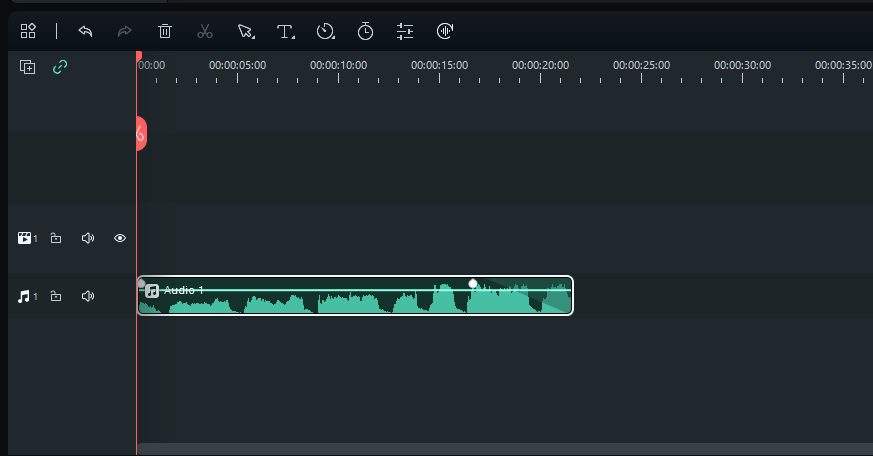
7. Then, drag and drop the second audio right beneath the first audio, particularly the part where it is fading out.
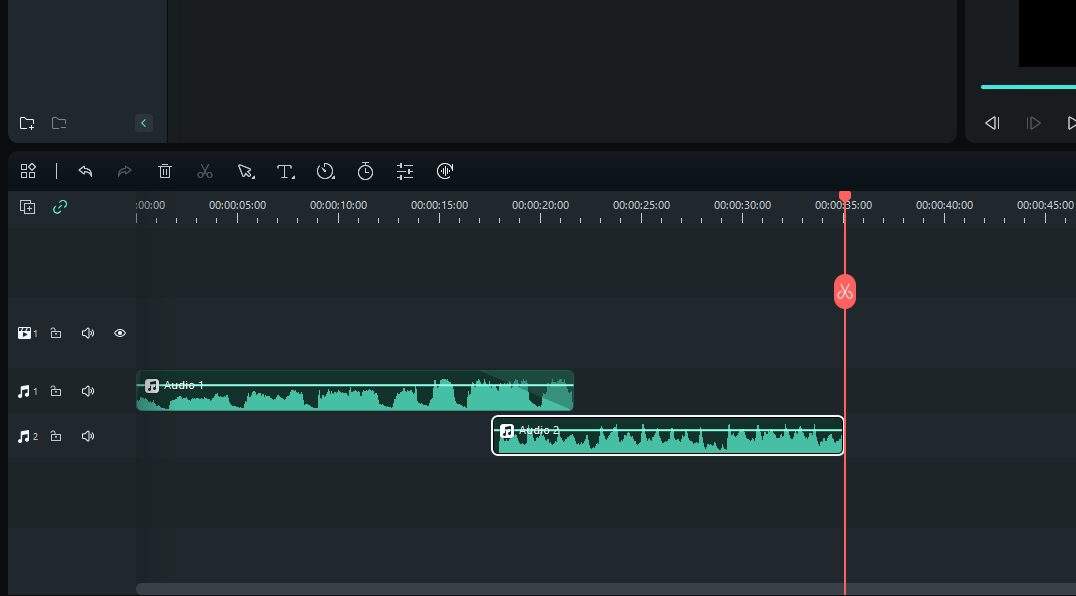
8. Now, right-click on the second audio and select Adjust Audio.
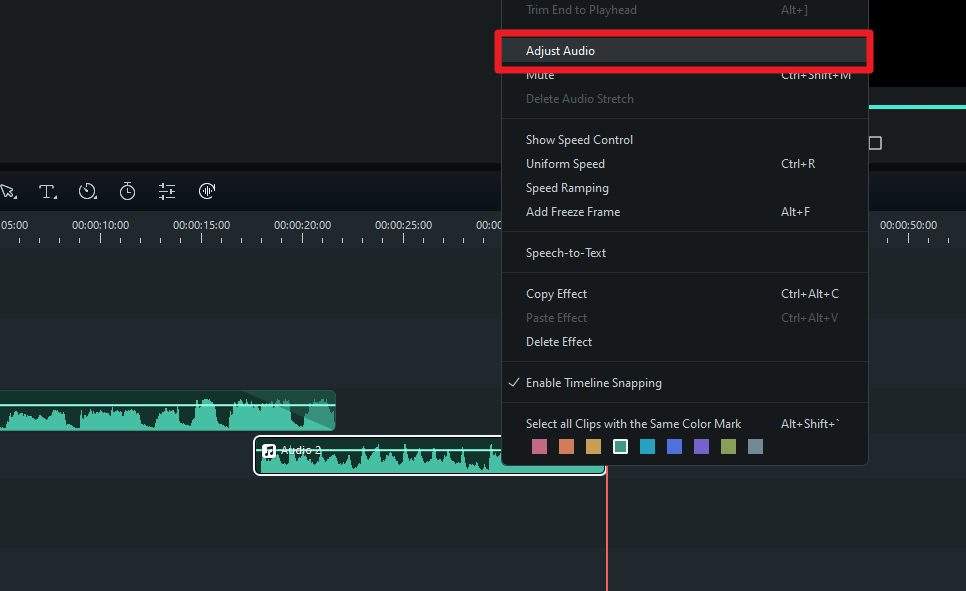
9. Set the Fade In to 5 seconds as well. If you want to add another audio after it, you might set the Fade Out as well. Lastly, click OK.

10. The crossfade effect between the first and second audio clips has been created.
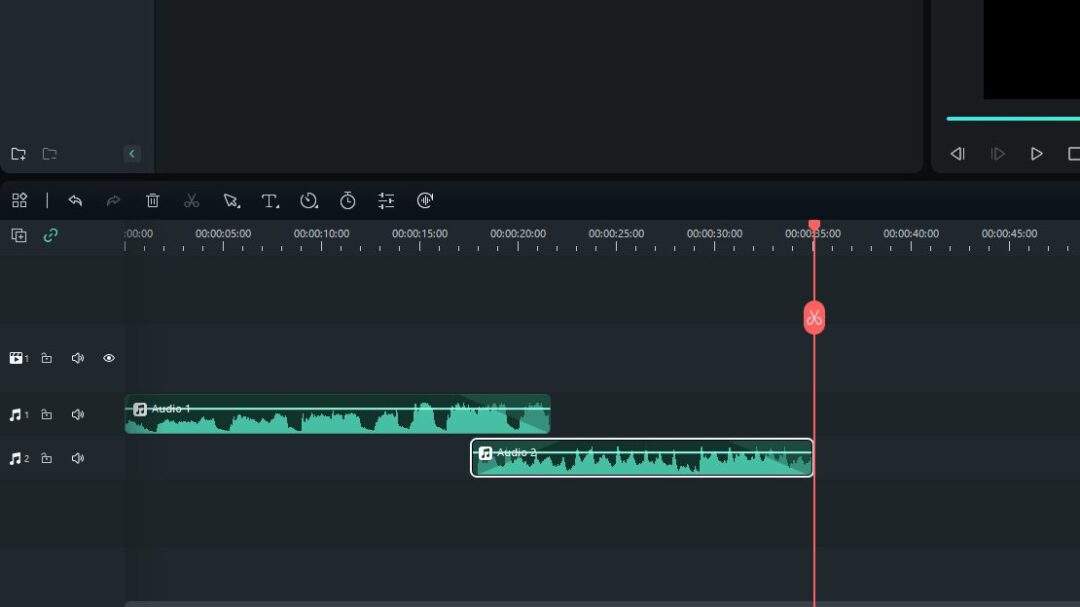
11. You may repeat this process again to create a crossfade effect for another audio clip.
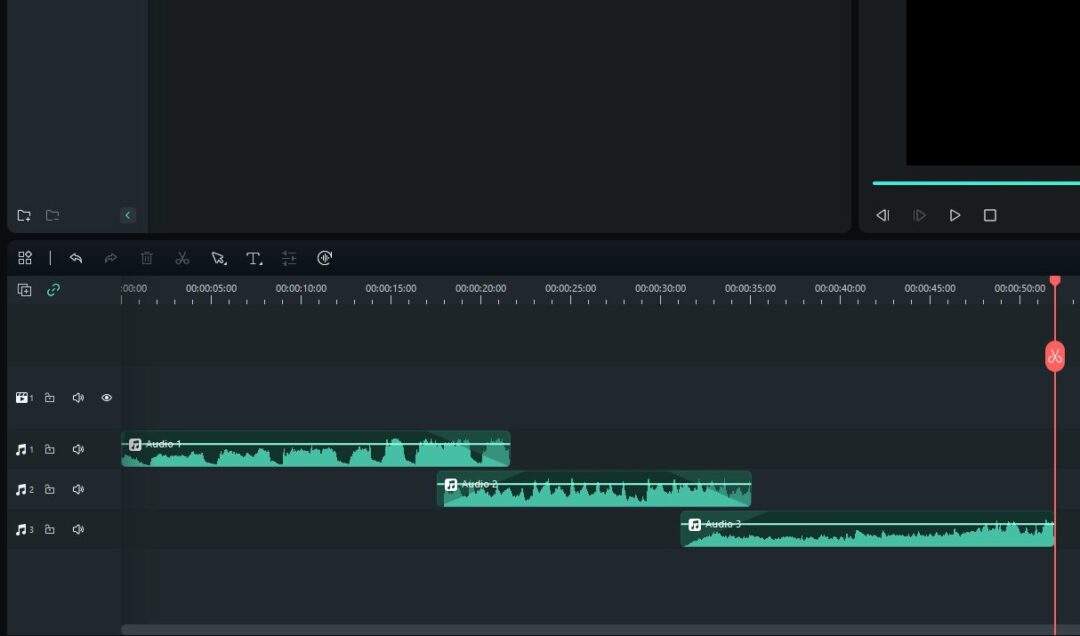
Finally, don’t forget to play to track to make sure it sounds nice. Feel free to adjust the Fade In and Fade Out durations for each clip to your liking. The 5-second setting that I mentioned above is just an arbitrary number.
FAQ
Does Filmora come with a native audio crossfade effect?
Yes, there is a native audio crossfade effect on Filmora version 12.5.6 or above. To see the software version, go to Help > About. To update Filmora, go to Help > Check for Update. Older versions of Filmora can only get an audio crossfade effect by overlapping two audio clips and then adding a Fade out and Fade in effect on each clip.
How do you fade in and fade out audio in Filmora?
Right-click on the audio track, select Adjust Audio, enter the seconds for Fade In and/or Fade Out, and finally, click OK. Overlap two audio clips at the right part, and you will get a crossfade effect.
Can you add audio effects in Filmora?
Sure. Filmora comes with various audio effects you could try. Double-click on the audio track, and the program will show you settings for sound balance, fade effects, pitch, noise reduction, equalizer, and much more.

