Key takeaways:
- Stabilize shaky clips with AI tools in Filmora 13 or 14
- Processing uses CPU, not GPU, so it’s slow
- You can pick the smoothness level for best results
Ever shot a video that looked like you filmed it during an earthquake? Shaky footage can ruin the vibe, especially if you’re recording action or POV stuff. The good news: Filmora’s got an AI stabilization tool that can smooth out those wild movements and make your clips way easier to watch.
In this post, I’ll walk you through how to use Filmora’s AI video stabilizer, what to expect, and a few tips to get the best results—even if your computer isn’t the fastest. Ready to make your videos less dizzy and more chill? Here’s how I do it.
Getting Started with AI Video Stabilization in Filmora
So, you’ve got a shaky video. Maybe it’s a mountain biking POV, or just some handheld footage that didn’t turn out as smooth as you hoped. Filmora 13 and 14 both have the AI stabilization feature, but don’t count on it if you’re still on version 12 or below.
To get started, import your shaky clip into Filmora. I usually trim it down to a short section first—processing takes a while, so no need to waste time on footage you won’t use.
Duplicating Clips for Before and After Comparison
One trick I always use: duplicate your clip. That way, you can quickly compare the original vs. the stabilized version side-by-side. Just right-click and copy, then paste it right next to the original on your timeline.
Finding the AI Tools in Filmora
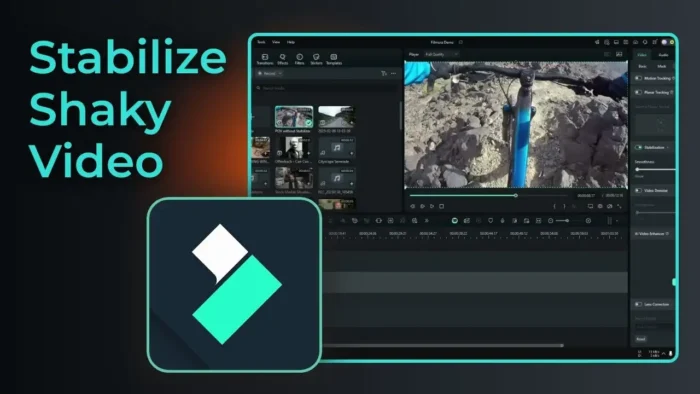
Double-click the clip you want to fix. On the right, you’ll see the editing menu. Go to the Video tab, then scroll until you spot AI Tools. Look for Stabilization. This is the magic button you need.
Enabling Stabilization and Letting Filmora Work
Turn on the Stabilization toggle. Filmora will start analyzing your video. Here’s the part where patience pays off: the process uses your CPU, not your GPU, so it’s kind of slow, especially on longer clips.
Don’t touch anything while it’s working. Seriously, don’t even try to play the video or make other edits. If you do, the process will stop and start over. Learned that the hard way.
Why Processing Is Slow and What to Expect
Filmora’s stabilization is solid, but it’s not quick. Since it leans on your CPU, even a short 5-second clip can take a minute or more. If you’re stabilizing a longer video, go grab a snack or something. I’m hoping future versions will use the GPU for faster results, but for now, patience is part of the workflow.
Want to speed up your computer in general? Peep this guide: How to speed up Windows easily
Choosing Your Level of Smoothness
Once the process is done, you can play with the smoothness setting. Filmora lets you pick between weak, normal, or strong stabilization. If you want the video super steady, go for strong—just know it’ll take even longer to process.
Comparing Before and After
Now, play both clips. The difference might be subtle, but if you look close (especially at the start of the video), the stabilized version is smoother. The wild shakes get toned down, and the motion feels less jarring.
If you want to see the difference more clearly, try exporting both clips and watching them full screen. Sometimes it’s hard to tell in the tiny preview window.
Tips for Best Results with Filmora AI Stabilization
- Trim your clip before stabilizing to save time
- Don’t multitask in Filmora while it’s processing
- Test different smoothness levels for the best look
- If you’re working with a long video, stabilize in sections
If you want to add more effects after stabilizing, check out How to add text in Filmora or How to add transition in Filmora.
What to Do If Filmora Stabilization Isn’t Enough
Sometimes, even with AI stabilization, your footage might still look rough. If that’s the case, you can try cropping in a bit more or combining stabilization with slow motion to hide the shakes. For more on improving your video quality, see How to improve video quality in Filmora.
Exporting Your Stabilized Video
Once you’re happy, export your video like normal. Filmora handles the rest. If you need to rotate or crop your video after stabilizing, check out How to rotate video in Filmora or How to resize picture on PC.
Troubleshooting Common Problems
If stabilization keeps restarting, make sure you’re not clicking around or playing the video during processing. If Filmora crashes or freezes, try updating to the latest version or close other apps to free up memory. Here’s a quick fix guide if your PC is acting up: How to clean PC.
Extra: Other Filmora AI Tools Worth Trying
Filmora’s AI toolkit isn’t just for stabilization. There’s also background noise removal, color grading, and more. Play around with these if you want to polish your videos even more. For example, Remove background noise in Filmora can help your audio sound crisp.
FAQs
How do I find the AI stabilization tool in Filmora?
Double-click your clip, go to the Video tab, then scroll to AI Tools and enable Stabilization.
Does Filmora use GPU for stabilization?
Nope, it uses your CPU, so expect slow processing, especially on longer videos.
Can I control how strong the stabilization is?
Yeah, you can pick between weak, normal, or strong. Stronger settings take longer to process.
What Filmora version do I need for AI stabilization?
You’ll need Filmora 13 or 14. It’s not guaranteed on older versions.
Why does stabilization keep restarting?
If you edit or play the video while it’s processing, it’ll stop and start over. Just let it finish before touching anything.
🎬✨ No more shaky videos—just smooth, watchable clips!