Key takeaways:
- Quick Split in Filmora lets you cut video clips fast with one click
- You can preview the frame before splitting, so your cuts are accurate
- Switch between split and select modes with icons or keyboard shortcuts
Ever had a long video and just wanted to chop out the boring parts—without messing around with a bunch of menus? 🎬 That’s where the Quick Split tool in Filmora comes in. It’s all about making those cuts fast, right where you want them. I’ll show you how to use it, how to get clean edits, and how to avoid the most common mistakes. If you want to edit like a pro but keep things simple, stick around.
Table of Contents
- Getting Started with Quick Split in Filmora for Fast Edits
- Why Quick Split is a Game-Changer for Video Editing
- Step-by-Step: Using Quick Split Tool Like a Pro
- Pro Tips for Clean Cuts and Smooth Edits
- Keyboard Shortcuts to Speed Up Your Workflow
- What to Do After Splitting Your Video
- Common Mistakes and How to Avoid Them
- Troubleshooting: If Quick Split Isn’t Working
- How Quick Split Compares to Other Editing Tools
- Editing Smarter, Not Harder
- FAQs
- How do I enable Quick Split in Filmora?
- Can I preview the frame before splitting?
- How do I go back to normal mode after splitting?
- What if I accidentally split in the wrong place?
- Can I use Quick Split on multiple clips at once?
Getting Started with Quick Split in Filmora for Fast Edits
So you’ve loaded up Filmora, and your timeline is looking like a mess of raw footage. No worries. The Quick Split tool is your best friend for slicing up those long clips into manageable pieces. Here’s how I use it every time I want to cut a video without slowing down my workflow.
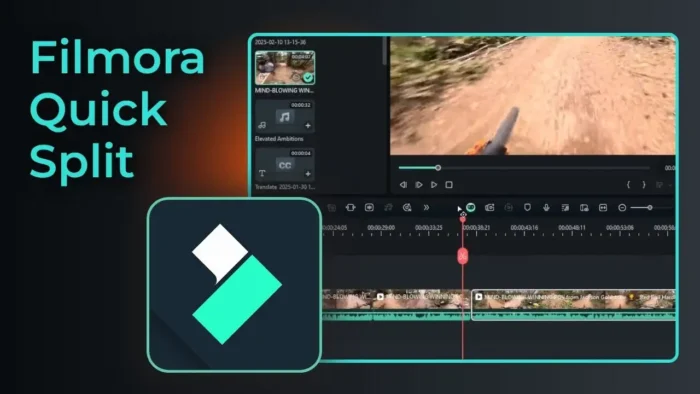
First, look for the cursor icon above your timeline. Click it, and you’ll see a menu pop up. Choose Quick Split Mode from the list. If you’re more of a keyboard person, just tap the C key—way faster.
Now, your cursor changes, and you’re in split mode. Move along your timeline and click exactly where you want to cut. Each click makes a new split. What’s cool is you get a preview of the frame before you commit, so you know you’re not slicing in the wrong spot.
When you’re done splitting, you’ll want to get back to normal mode. Just click the select tool (the regular cursor icon) or hit the V key. That’s it. Your clip is now chopped into as many sections as you need.
Why Quick Split is a Game-Changer for Video Editing
Let’s be real—nobody wants to waste time dragging the playhead and searching for the split button every time. Quick Split lets you:
- Cut multiple sections in seconds
- See exactly what frame you’re splitting
- Avoid accidental cuts in the wrong place
If you’re editing content for YouTube, TikTok, or just family videos, this tool speeds up your whole process. It’s especially useful if you’re working with long takes or want to cut out mistakes fast.
Want to make your edits even cleaner? Check out how to blur faces in Filmora if you need to protect someone’s privacy in your clips.
Step-by-Step: Using Quick Split Tool Like a Pro
Step 1: Enable Quick Split Mode
- Click the cursor icon above the timeline
- Choose Quick Split Mode from the dropdown
- Or just hit C on your keyboard
Step 2: Make Your Splits
- Move your cursor along the timeline
- Click at each spot where you want a cut
- Preview the frame before you split
Step 3: Return to Select Mode
- Click the select tool icon (regular cursor)
- Or press V on your keyboard
Now you’ve got a bunch of clips from your original video, ready to rearrange, delete, or add effects.
Pro Tips for Clean Cuts and Smooth Edits
- Zoom in on the timeline for more precise cuts
- Use the preview window to double-check your frame before splitting
- After splitting, select and delete unwanted sections with ease
- Combine with the audio crossfade effect in Filmora for smoother transitions between clips
Keyboard Shortcuts to Speed Up Your Workflow
| Action | Shortcut Key |
|---|---|
| Enable Quick Split | C |
| Enable Select Mode | V |
| Play/Pause | Space |
| Undo | Ctrl + Z |
Getting familiar with these shortcuts means you’ll spend less time clicking around and more time actually editing.
What to Do After Splitting Your Video
Once you’ve split your clips, you can:
- Rearrange them by dragging and dropping
- Delete any unwanted sections
- Add transitions, effects, or overlays
- Export your finished video
If you’re new to editing, you might want to check out the best free simple video editor software for beginners for more options and tips.
Common Mistakes and How to Avoid Them
- Cutting at the wrong frame: Always use the preview to double-check
- Forgetting to switch back to select mode: You’ll end up making extra cuts by accident
- Not zooming in: Small details can get missed if you’re too zoomed out
Troubleshooting: If Quick Split Isn’t Working
If you can’t activate the Quick Split Mode, make sure:
- Your clip is selected in the timeline
- You’re in the right workspace (sometimes Filmora hides tools in different layouts)
- The software is up to date (how to update Filmora)
Still stuck? Try restarting Filmora or checking their help docs.
How Quick Split Compares to Other Editing Tools
Here’s a quick table to show how Quick Split stacks up against the standard split tool in Filmora:
| Feature | Quick Split Tool | Regular Split Tool |
|---|---|---|
| One-click cuts | ✅ | ❌ |
| Frame preview | ✅ | ❌ |
| Keyboard shortcut | ✅ (C) | ✅ (Ctrl+B) |
| Batch splitting | ✅ | ❌ |
Editing Smarter, Not Harder
Quick Split is all about making your editing life easier. If you want to go deeper, try learning more about how to add text in Filmora or how to zoom in on Filmora for more creative edits.
And if you’re really looking to polish your videos, improving video quality in Filmora is a solid next step.
FAQs
How do I enable Quick Split in Filmora?
Click the cursor icon above the timeline and pick Quick Split Mode, or just press C.
Can I preview the frame before splitting?
Yes, you see a preview of the frame right before you split, so you know exactly where your cut lands.
How do I go back to normal mode after splitting?
Click the select tool icon or hit V on your keyboard.
What if I accidentally split in the wrong place?
Just use Ctrl + Z to undo your last action and try again.
Can I use Quick Split on multiple clips at once?
No, you need to select one clip at a time, but you can make multiple splits in that clip without leaving split mode.
Ready to make your edits faster and cleaner? Quick Split is your go-to. ✂️

