Since Microsoft Paint doesn’t come with a multi-layer system, it’s hard to insert more than one image within the same window.
However, there is a simple trick that lets you insert another image in Paint without overlapping each other. And a method like this can be useful in some situations.
So, how to do that?
The following guide is based on Microsoft Paint Windows 10. However, the program has the same feature and interface as the other Windows versions.
Table of Contents
How to insert multiple Images in Paint
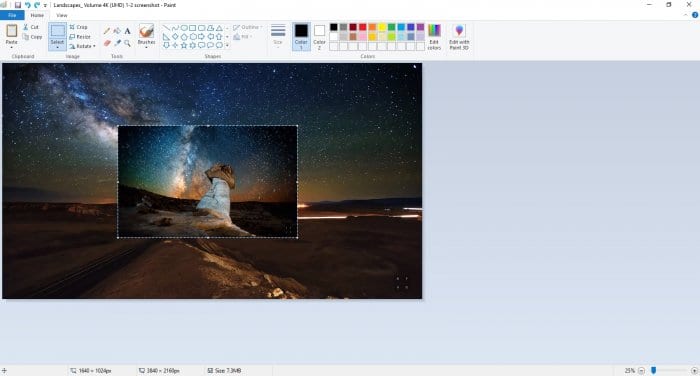
In this tutorial, I’m going to explain to you about inserting another image on top of an image in the Paint window. From there, you can move and resize the image so it will fit into the background image you set before.
1. Launch Paint, and go to File > Open (CTRL+O).
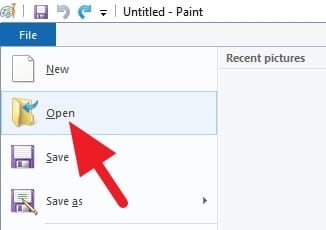
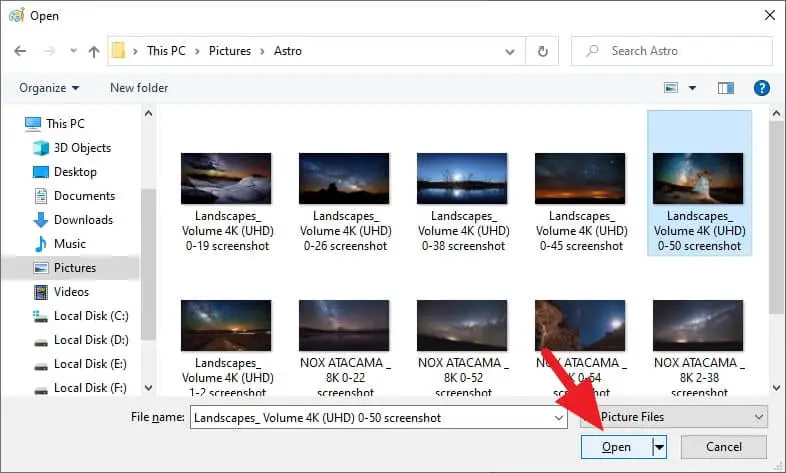
2. Select the image you want to insert on top of another image. And then click Open.
3. Now you would see the image has imported to Paint.
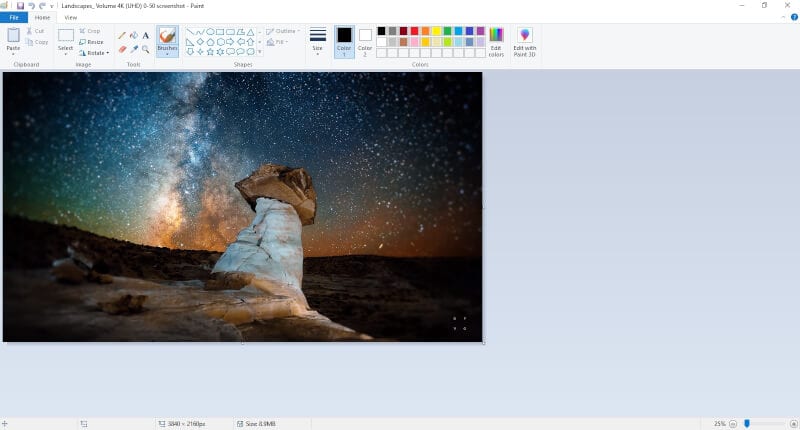
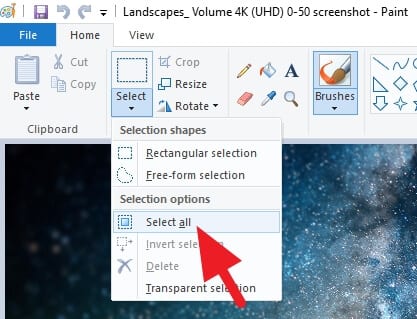
4. Click Select > Select all (CTRL+A).
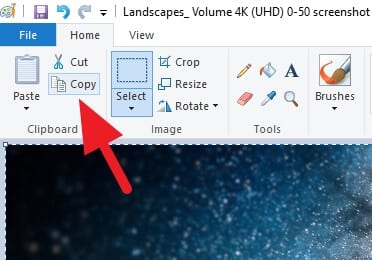
5. Click Copy (CTRL+C).
6. Next, go to File > Open (CTRL+O).

7. Select the image you want to set as the base (background), then click Open.
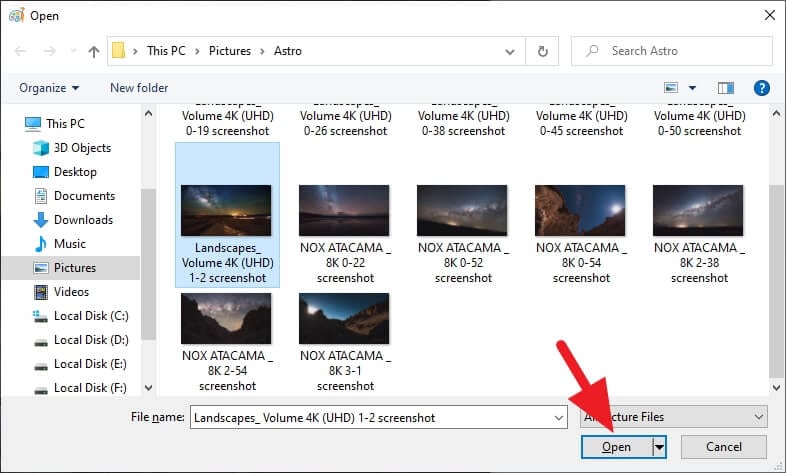
8. The previous image will be replaced by the image you just selected.
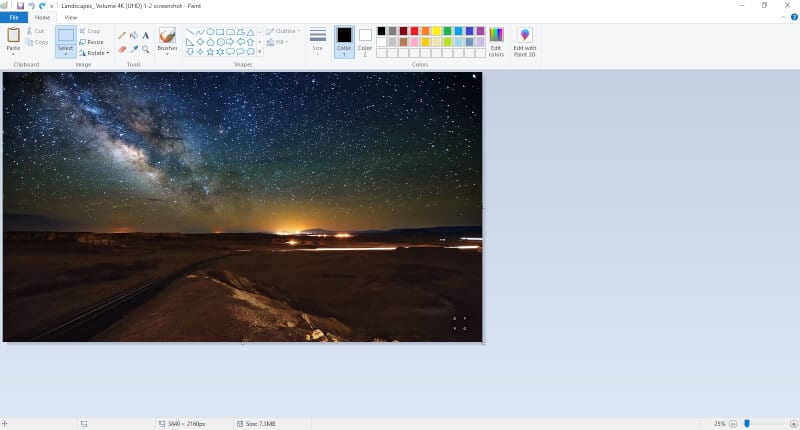
9. Now, click Paste (CTRL+V).
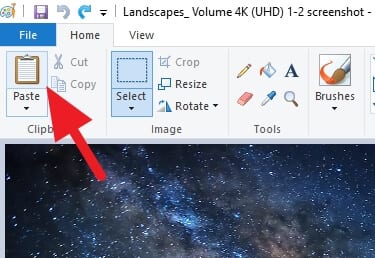
10. The first image you copied will be there. You can move or resize the image as you wish.
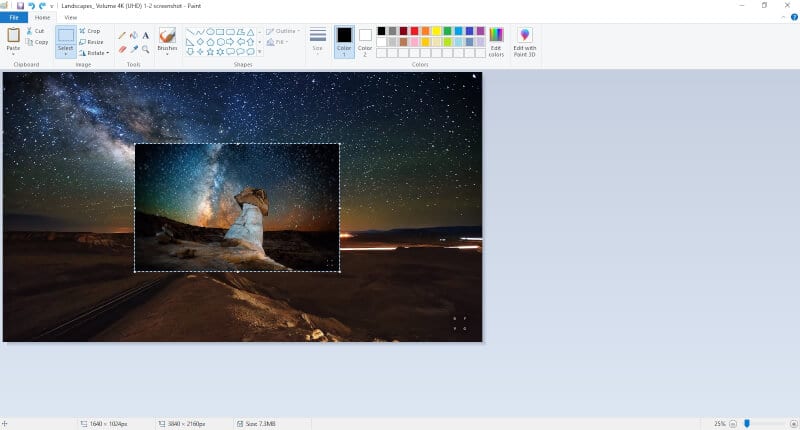
Do not click on the other elements if you haven’t resized and/or moved the image. Otherwise, it will blend into the base image and can’t be moved/resized anymore (became one image). You may have to do some trials and errors before saving the image.
Also, you probably need to Save as the image instead of Save since it will create a new image file, so it won’t override the original image.
Some limitations of copy-paste images in Paint
While the copy and paste method does provide a way to simulate working with multiple images in Paint, there are some limitations to be aware of:
- Once an image is pasted into the composite, selecting and moving other elements will deselect it. The pasted images lose their editability as distinct objects and blend into the background.
- There is no way to reorder overlapping pasted images. Since Paint does not have layers, images paste directly on top of each other.
- Transforms like rotations and skews cannot be applied to pasted images without affecting the entire composition. Each pasted image loses its ability to be edited independently.
So while copy and paste allows assembling multiple images on one canvas, there is limited flexibility compared to a true multi-layer editing program. The pasted images become unified parts of a singular whole.
When to use a more advanced editor
For most basic compositing jobs, copy and pasting images into Paint provides sufficient capability. However, for more complex projects, a layered editing program like Photoshop is recommended. Some examples where Photoshop would provide better multi-image support include:
- Projects where you need to edit or apply transforms to individual layers after compositing.
- Composites where layer order needs to be easily rearranged.
- Projects where layer masks or blending modes are desired for seamless compositing.
- High resolution printing projects where maximum image quality is essential.
So while Paint can work for mockups and casual composites, Photoshop is better suited for professional, production-level multi-image projects. Alternatively, the upgraded Paint 3D may offer better tools than the original Paint program.
Conclusion
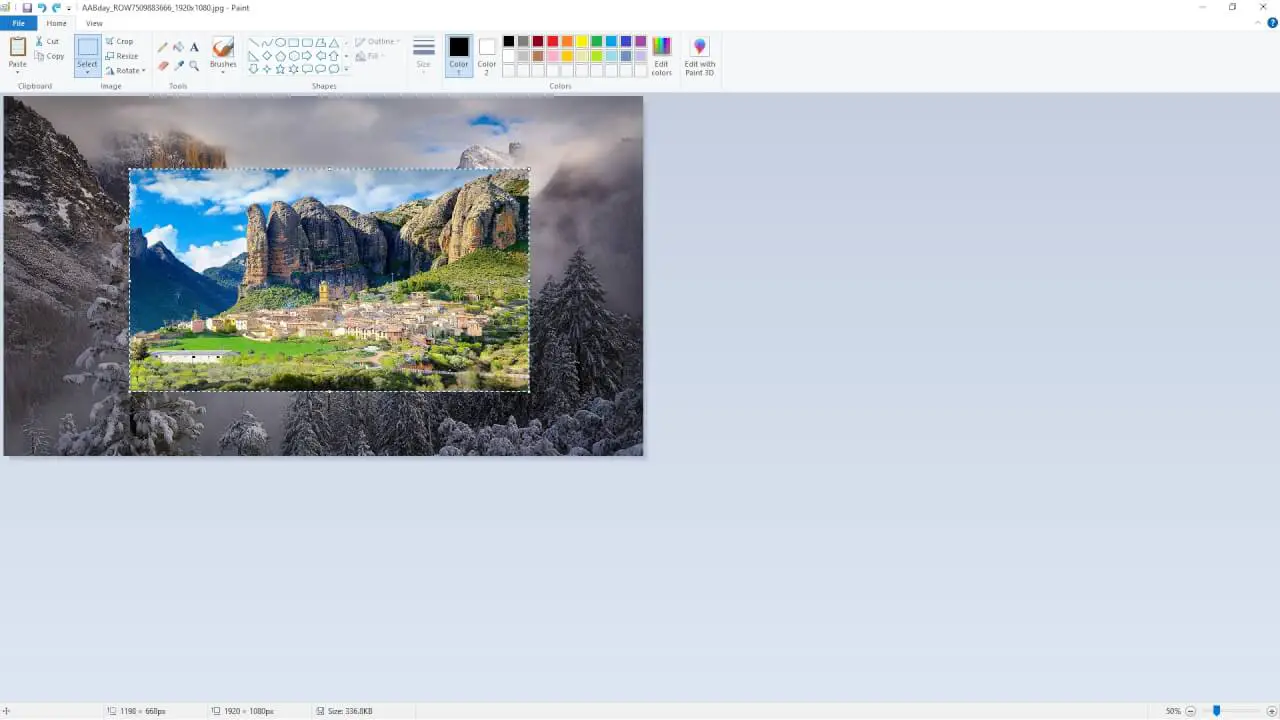
Microsoft Paint does not directly enable working with multiple images in the same file. Yet with some clever use of the copy and paste functions, you can import separate photos, illustrations, and other visual elements into one Paint project.
This provides a fast way to simulate a multi-image document for rough drafts and simple composites. Just open images in individual windows, copy and paste them into a single canvas, then save the final composition as a new file.
FAQs
How do I insert multiple images into Paint?
To insert multiple images into Paint, open one image in Paint, copy it (Ctrl+C), open another image, and paste (Ctrl+V) the first image onto the second. You can repeat this process to add more images.
How do I add another picture in Paint?
To add another picture in Paint, open the first image, then copy the second image (Ctrl+C) from another source and paste it (Ctrl+V) into the Paint window with the first image.
How do I put two pictures side by side in Microsoft Paint?
To put two pictures side by side in Microsoft Paint, open the first image, increase the canvas size to accommodate the second image, then copy the second image (Ctrl+C) from another source and paste it (Ctrl+V) next to the first image.
How do I stack images in MS Paint?
To stack images in MS Paint, you can use the updated Paint app (version 11.2308.18.0 or higher) which supports layers and transparency. You can add, remove, and manage layers on the canvas to create richer and more complex digital art.
Alright. I hope the guide above helps you! Thank you for reading.

