Bootable USB drives are a great way to test a variety of Linux distros on a wide range of PCs. To help make this process more straightforward, we’ve created a simple tutorial that will show you how to make a bootable USB drive. We’re going to take a USB flash drive and turning it into a bootable USB drive for Linux, specifically Ubuntu.
Before we get started, make sure that the flash drive capacity is at least 8 GB or larger. If you do have any files on it, back them up elsewhere because this process is going to erase whatever’s on it.
1. Go to Rufus.ie and download the latest version of Rufus, which is version 3.21 at this time of writing.

2. Now go to Ubuntu.com and download the latest version of the Ubuntu operating system for desktop PCs and laptops, which is Ubuntu 22.10. You can use any version of Ubuntu, or even any other Linux distro.

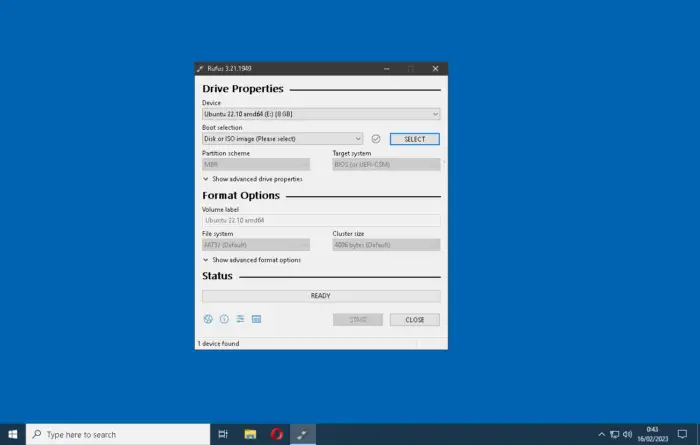
3. Now that the ISO file of Ubuntu is finished downloading, plug your flash drive and we’re back to Rufus. Run Rufus and under Device, select the USB flash drive that you’re going to use for this. You may have multiple drives, so make sure you’re selecting the correct one.

4. Click on Select and navigate to wherever you save that ISO file.

5. Highlight it and click Open.

6. In the Partition scheme, select MBR and the Target System for BIOS or UEFI

7. In the Volume label you can name it whatever you’d like. Then you’re going to leave the File system and the Cluster size as default.

8. Click Start.

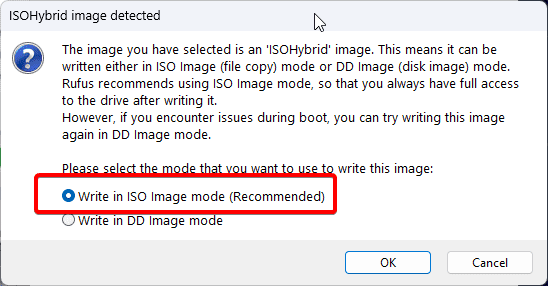
9. A warning is going to pop up, saying “The image you have selected is an ISOHybrid image”. Just use the recommended settings.
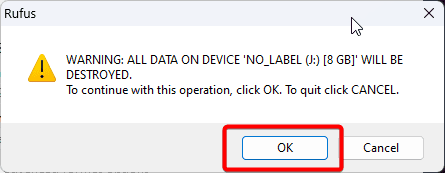
10. A final warning about the data that’s on this drive is going to be destroyed. If you’ve got it all backed up, click OK.
11. Now it’s going to go through the process of creating the bootable USB flash drive.
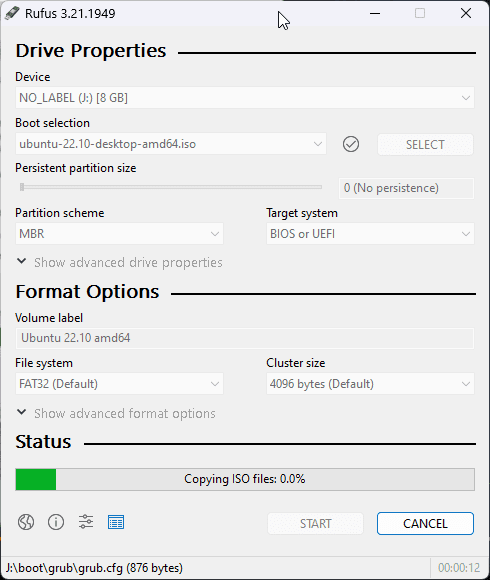
12. Once it’s finished, the ready bar is going to be fully green. You can click on Close.

13. At this point, you can use the USB drive to either boot directly from the drive and try out the operating system, or you can use it to fully install the operating system.
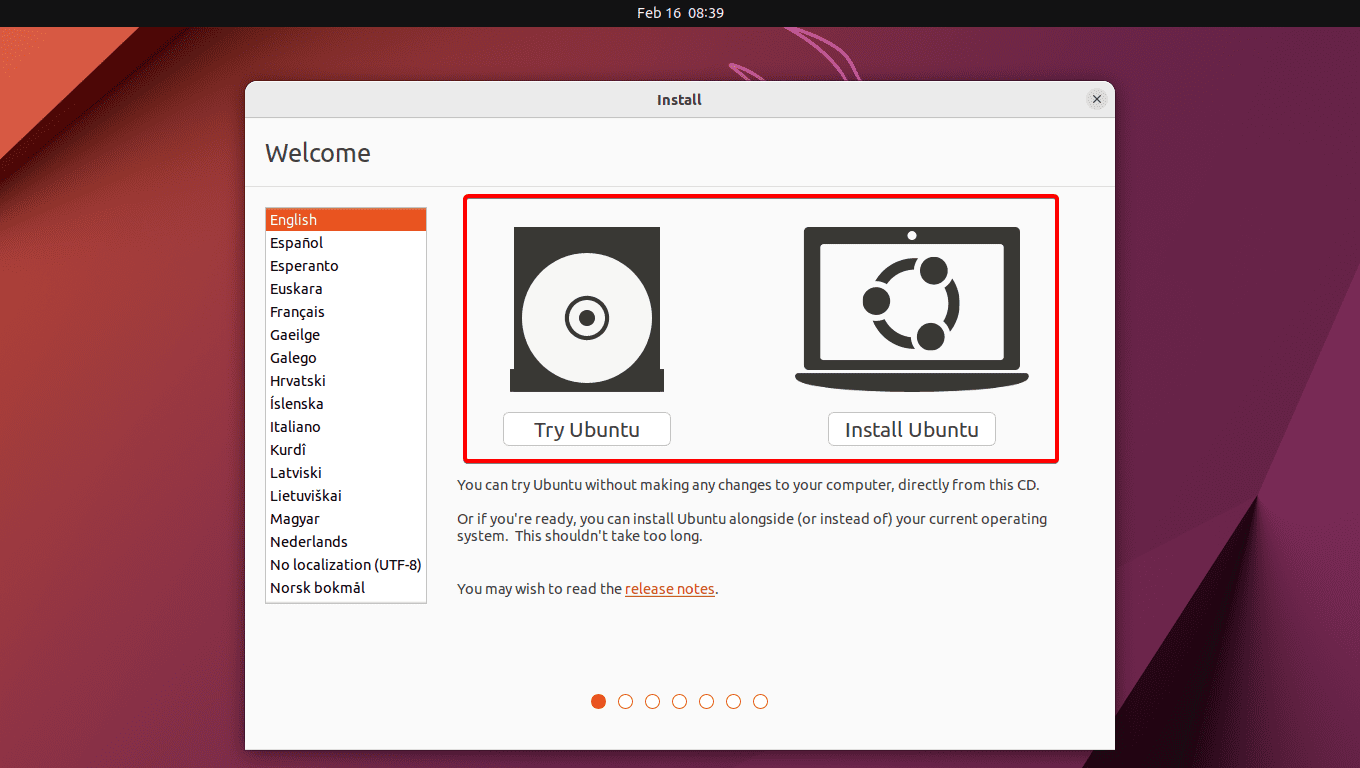
As you can see it’s really easy to set up and use.

