Adobe Photoshop has everything you need to manipulate photos. A glow effect adds interest, draws the viewer’s eye, and creates a magical or surreal look. And yes, you can make an object look glow like the moon or lightsaber.
Turns out, to make such effect is not hard and can be done within 3 minutes of work. You don’t need to install a third-party plugin. All you need was already inside the program.
So, here is the guide!
The following guide is based on Adobe Photoshop CS4. However, the step by step guide should be the same for other versions.
Table of Contents
How to make object glows in Photoshop
In the following guide, you will learn how to make any object in Photoshop glows with a soft light. The result will somewhat look like the moon, glowing stick, or lightsaber. It best if you already understand working with some Photoshop tools, especially for selecting an object. With practice and an artistic eye, you can use this glow technique to enhance any image.
1. Open the image you want to edit with Photoshop.
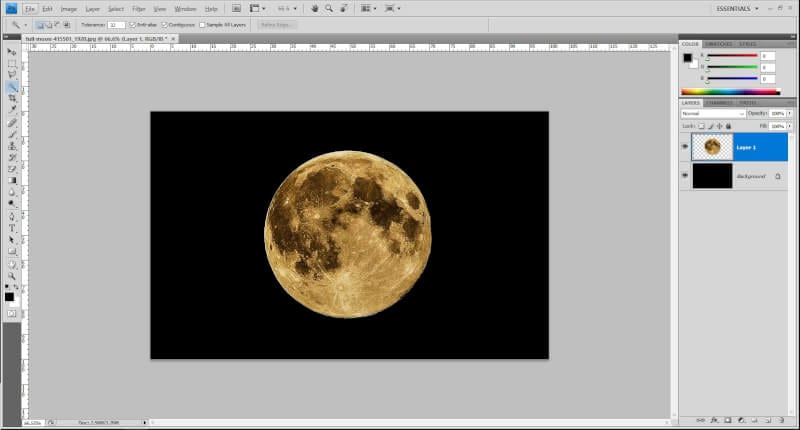

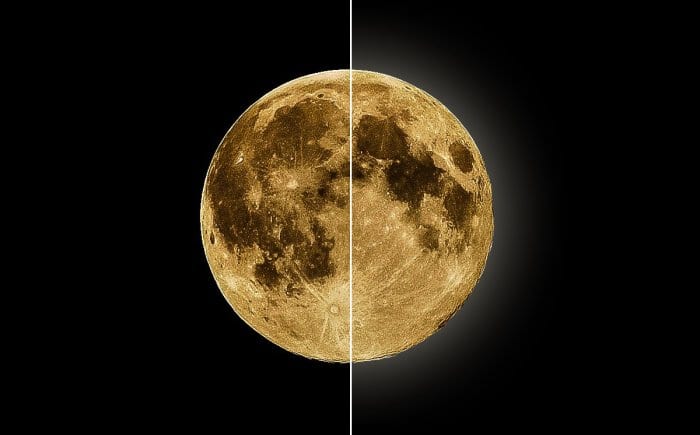
2. Make sure you already separated the object you want to glow from the rest of the image. For example, I have a moon photo with a black sky background.
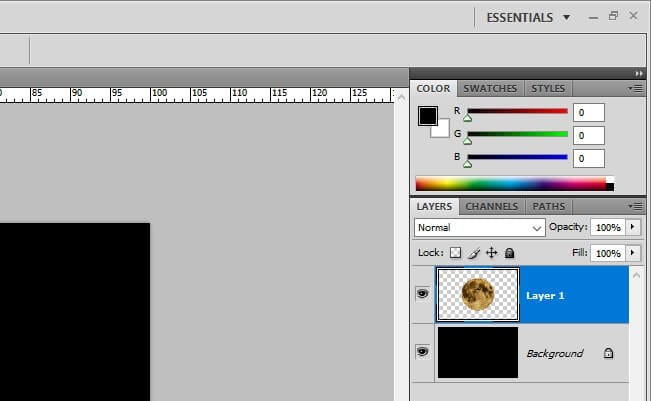

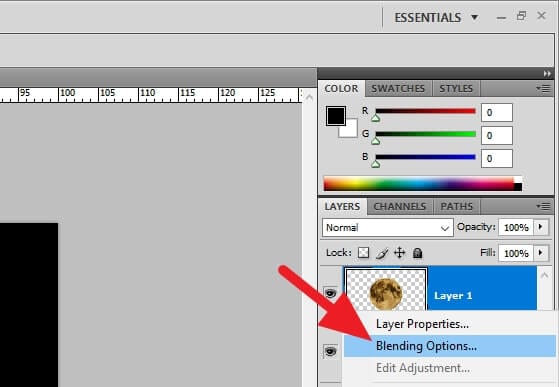
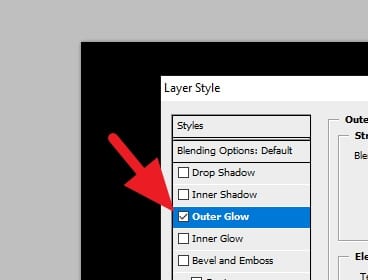
3. On the layer you want to make its object glows, right-click on it and select Blending Options…

4. Check on Outer Glow.

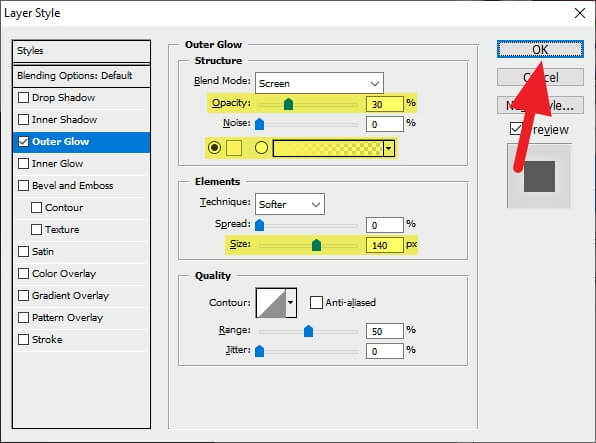
5. Play around with the Opacity, Color, and Size as highlighted with yellow. Then, click OK. (You can play with other parameters, but the three aforementioned before are the most common)

6. Now, you got the result.
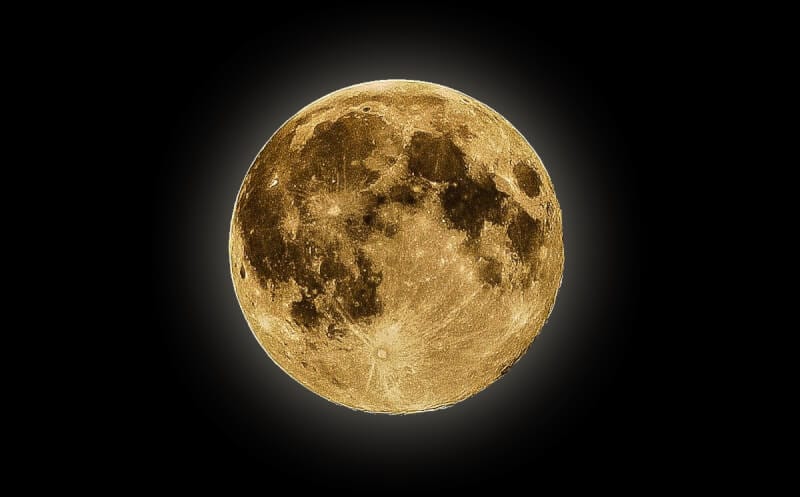

The glow effect works best if you match the glowing color with the source of light. You may also have to play with Size and Opacity to depict the intensity of light.
How to enhance the surreal effect
If you want to push the glow into more fantastical territory, you can add embellishments for extra impact. To enhance the surreal glow effect:
- On a new layer above the glow, apply lighting effects like rays, beams, or rimlight. Use a soft brush at low opacity to paint these effects subtly emanating outward from the glow.
- Add lens flare effects using the Lens Flare filter. Position the flares so they appear to originate from the glow area.
- For an atmospheric effect, add fog or mist using the Clouds filter or brush tools. Apply it only in areas surrounding the glow for a dreamy look.
- If desired, convert the image to black and white using a Black & White adjustment layer. The glow will stand out dramatically.
- For a final magical touch, paint sparkles or floating particles around the glow using a speckled brush.
These extra elements complement the main glow and enhance the surreal atmosphere. Use them selectively to keep the overall image cohesive.
How to make the glow more realistic
The duplicate-and-blur technique provides the foundation for any glow effect. But achieving truly realistic results takes practice and an artistic eye. Keep these tips in mind:
- Subtlety is key. The glow should augment the image, not overwhelm it. Build up the effect gradually and use low opacity settings.
- Mask and paint for natural variation. Irregularities in a glow make it more convincing. Paint gently to mimic the way light radiates and bounces.
- Match the color temperature. Choose glow colors that align with the image lighting. Warm orange/yellow for sunlight, cool blue/purple for moonlight.
- Use multiple blending modes. Mixing up the modes creates textures and dimensions within the glow.
- Compositing ties it together. Proper blending, tinting, and painting integrates the glow into the scene realistically.
- Enhancements in moderation. Effects like lens flares and sparkles add magic, but go easy to avoid looking tacky.
With a refined artistic approach and an observant eye for light in the real world, you can create stunning Photoshop glow effects that elevate any image into something remarkable.
Conclusion
In general, this method might not be resulting in a good quality photo. That’s why it’s recommended to master some Photoshop features to make the output file looks as expected. Brush, for example, is one of the most used tools in Photoshop. You can learn how to create a brush in Photoshop for beginners.
What once was mundane now shines with a compelling, magical luminosity. I hope this guide helps you. Happy editing!
FAQs
How do I make an image glow in Photoshop?
To create a glow effect in Photoshop, duplicate your effect layer several times and add different levels and intensities of Gaussian Blur. Play with the Blending Modes to give it a soft glowing feel.
You can also add Layer Masks to each of your glow layers and use a black paint tool to block out various spots for a more natural look.
How do you add a glow effect in Photoshop Elements?
In Photoshop Elements, you can make graphics glow by applying the inner glow and outer glow layer styles. Click the “Inner Glow” check box, select a bright color, and drag the opacity to its right extreme. Then, click the “Outer Glow” check box and adjust the color, opacity, and size until you get the desired effect.
How do you make a glowing beam in Photoshop?
To create a light beam effect in Photoshop, create a new layer and shape a rough light cone with the Lasso tool. Pick the color tone from the light source with the Eyedropper tool, create a gradient from the light down towards the floor, and apply a field blur. Adjust the blending mode and opacity to achieve the desired effect.
How to do glow effect?
To create a cinematic glow effect around a subject in Photoshop, create a new layer and choose the soft Edge brush tool. Pick a color nearest to the subject and dab a few times in the direction of light. Double click on the layer to open up the layer style box and adjust the white point from the underlying layer until the effect disappears from the background.
