Despite the name of Paint 3D, it still able to process 2D images just like its predecessor — Paint.
One feature that confuses some people is the ability to resize an image in Paint 3D because of the nature of its new interface.
However, changing an image’s dimension is quite simple. The software also comes with a lot more flexibilities and features when it comes to resizing images.
Table of Contents
How to resize an image with Paint 3D
In this tutorial, you will learn how to resize an image with Paint 3D correctly. It will change the dimension but not cropping part of it.
1. Open the image you want to resize with Paint 3D.
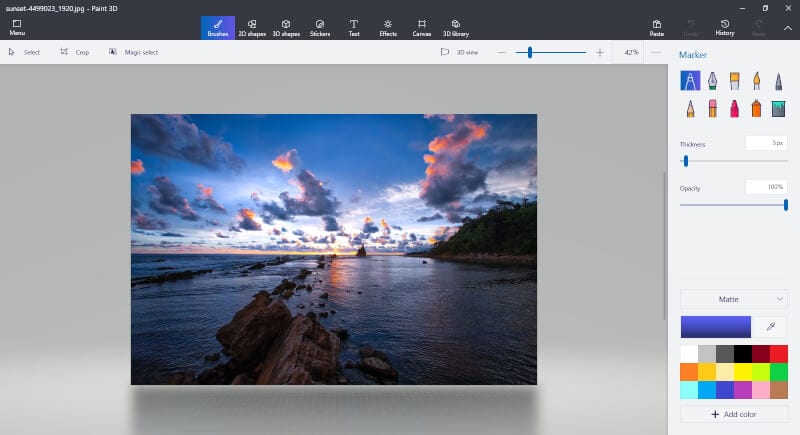

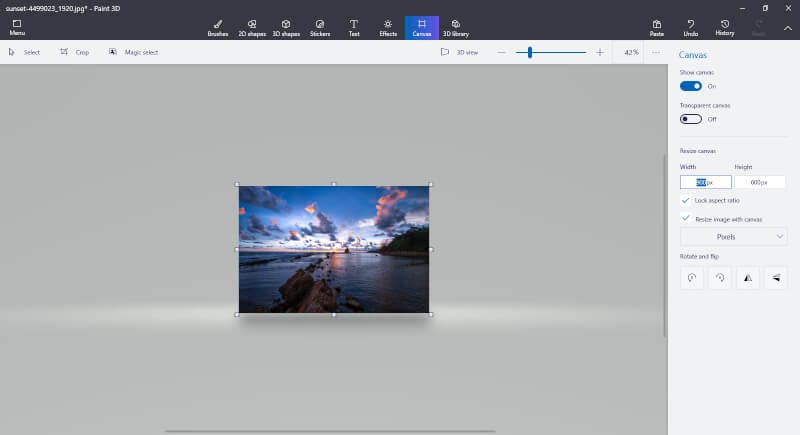
2. Go to the Canvas menu or you can activate it with CTRL+W.
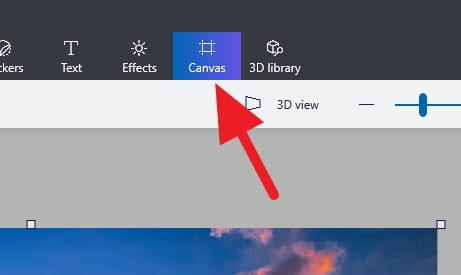

3. You should see a new window on the right side. Make sure you check the Resize image with canvas option. This setting will prevent the image from being cropped when resized.
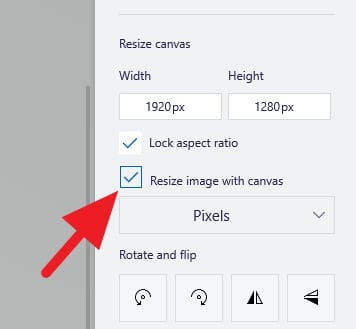

4. Now select the exact number you want to set, then press Enter. Since the Lock aspect ratio setting checked, you only need to change the number of the Width or Height.
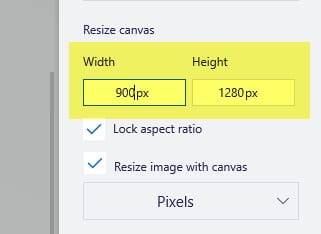

5. You would notice the image looks smaller or bigger depending on your setting.

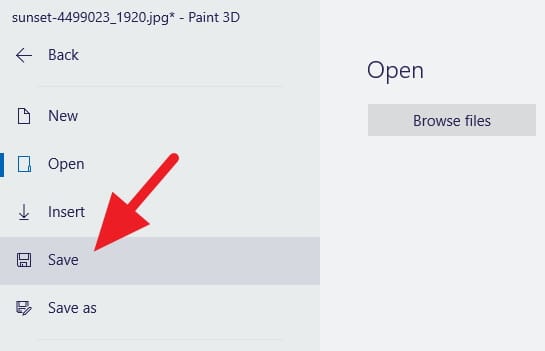
6. After finished, you can save the image. First, click Menu.


7. And then select Save. Or you can use hotkey CTRL+S.

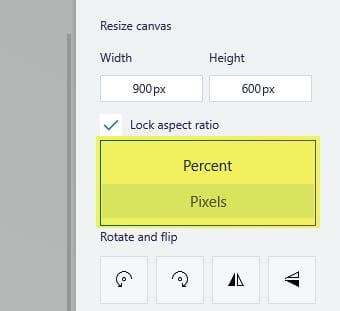
If you are not familiar with the “Pixels” unit, Paint 3D allows you to use the “Percent” unit which considerably easier for most people. The default number is 100% but you can add or subtract as you wish.

Now, you have learned how to resize an image with Paint 3D. You can play with other configurations to make it more desirable.
If you want to make the image bigger (upscale), then it needs a different technique and software. I have covered that on 5 Best Free Tools to Upscale Image Without Losing Quality.
Why Use Paint 3D for Image Resizing?
Here are some of the advantages of using Paint 3D to resize images on Windows 10:
- Simple and intuitive interface – Easy to use even for beginners.
- Handy built-in editor – No need to install third-party software.
- Maintains aspect ratio automatically – Prevents distortion as you resize.
- Real-time previews – See results instantly as you adjust size.
- AI upscaling – Gives great quality when enlarging images.
- Lossless non-destructive editing – Preserves original image quality.
- Compatible file types – Supports JPG, PNG, BMP, and more.
- Batch processing – Resize multiple images quickly.
For quick everyday image resizing tasks, Paint 3D provides an efficient and hassle-free solution.
FAQs
How do I crop a picture in Paint 3D?
To crop a picture in Paint 3D, follow these steps:
1. Open your photo in Paint 3D.
2. Select the Canvas tool from the top row.
3. Click and drag to select the area you want to keep.
4. Press Enter or click Done on the right-hand side to crop the image.
How do I resize an image in Paint 3D?
In Paint 3D, click the Canvas button, check “Lock aspect ratio” and “Resize image with canvas”, choose Pixels or Percentage, and adjust the width and height values. The image will resize in real time.
What does the “Resize image with canvas” option do in Paint 3D?
The “Resize image with canvas” option in Paint 3D allows the image to be resized when you change the size of the canvas. This is useful when you want the image and the canvas to have the same dimensions.




this tutorial is useful. I will use it to learn using ms paint 3d. what about editing and cropping? do you have a lesson? thank you.
The website offers a great selection of electronic accessories and gadgets that I couldn’t find anywhere else. https://istore.airriseinc.com/