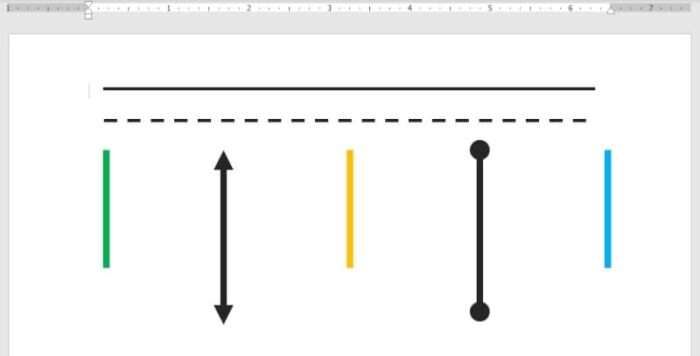
It’s almost impossible to make a straight line on a computer using a mouse pointer alone. You definitely need an additional “tool” to prevent the line from skewing, and of course, you won’t use a traditional ruler to keep the pointer aligned.
On Microsoft Word, you can create a straight line easily by using a mouse and keyboard — something that your computer should already have.
Here is the guide!
The following guide is based on Microsoft Word 365 version 1902. It may have a slightly different interface but the overall look should be similar to other Microsoft Word versions.
Table of Contents
How to create a straight line in Microsoft Word
In this guide, you will learn how to create a straight line in Microsoft Word in a very easy way. The result is either a straight horizontal or vertical line even if you don’t have a steady hand.
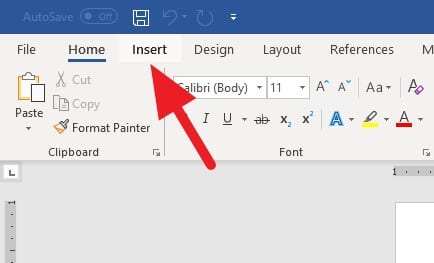
1. Go to the Insert menu.
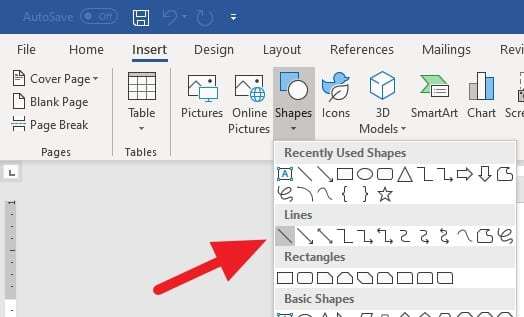
2. Click on Shapes, and select which type of line you want to draw.
3. Press the Shift button on the keyboard while dragging the pointer to form a straight line (horizontal or vertical).
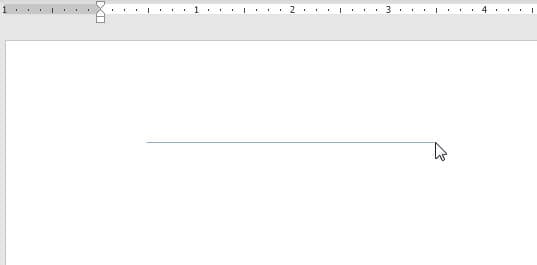
4. The straight line has created! You can go to Format > Shape Outline to customize its style and look.
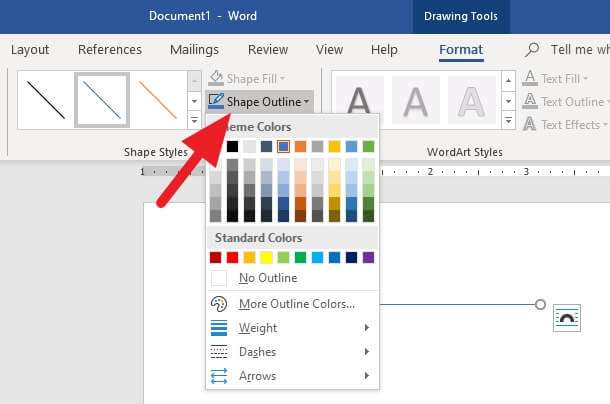
5. There are plenty of options you can choose to decor the line you just made.
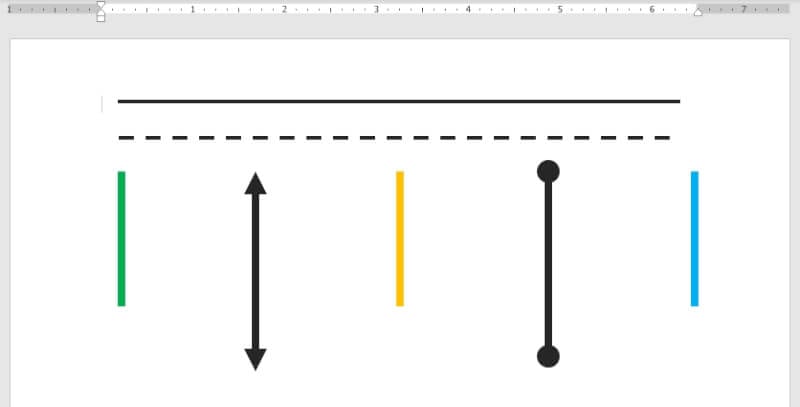
Remember, the most important component for creating a straight line in Microsoft Word is the Shapes tool and pressing Shift while drawing a line. If you want to make the line longer or shorter, click and hold the tip while pressing the Shift button to keep it straight.
This method also applies to other Microsoft Office programs, such as PowerPoint and Excel.
Customizing The Lines
Once you’ve inserted a line using any of the above methods, you can customize its appearance by right-clicking the line and selecting Format Shape.Some formatting options include:
- Color: Change line color or make it transparent.
- Width: Increase line thickness up to 15pt.
- Dashes: Convert to dotted, dashed, or double line.
- Arrows: Add arrowheads at one or both ends.
- 3-D effects: Add depth, shadows, reflections etc.
- Alignment: Align line left, right, center, or justify.
- Position: Set precise position relative to page or margins.
FAQs
How do I insert a straight line in Word?
Press Shift and drag while using the Line tool in Insert > Shapes to draw a perfectly straight horizontal or vertical line.
How do I draw a straight vertical line in Word?
To draw a straight vertical line in Word, go to the “Insert” tab, click on “Shapes”, and select the line shape. Press and hold the Shift key while drawing the line to ensure it’s straight.
How do I make a solid line in Word?
To make a solid line in Word, you can use the “Shapes” tool. Click on the “Insert” tab, then “Shapes”, and select the line shape. Click and drag to draw the line in your document. You can adjust the thickness and color of the line using the tools on the Format tab.
Which key is used to draw a straight line in MS Word?
The Shift key is used to draw a straight line in MS Word. When you’re drawing a line using the “Shapes” tool, holding down the Shift key will constrain the line to be straight.

