By default, your computer name usually consists of brand, version, and seemingly random number that hard to read. This will be the default name when you trying to connect Bluetooth devices, WiFi, and network sharing.
To make a computer name easier to remember, you can always rename it by following this guide.
Table of Contents
Method 1: Rename in Windows Settings
1. Go to Start, hit Windows Settings.

2. Select System.
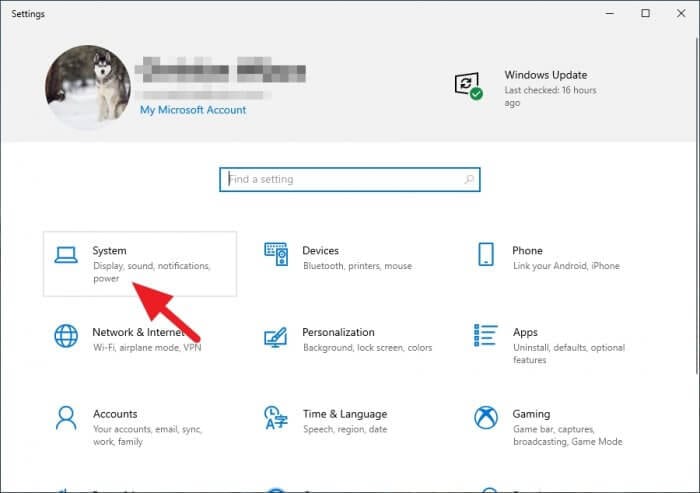
3. On the left panel, click About.
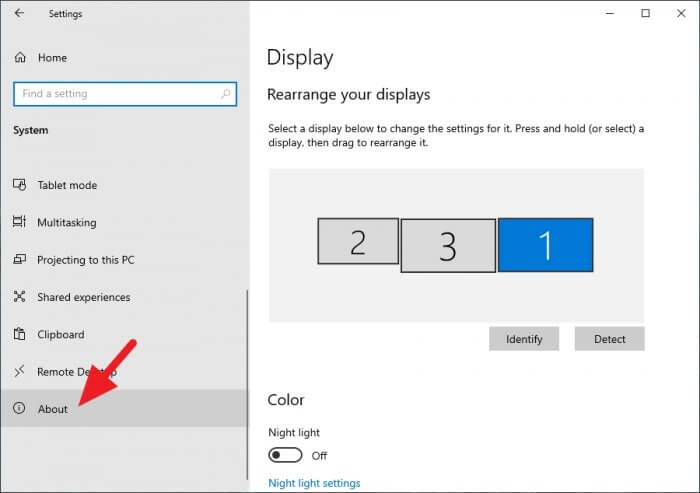
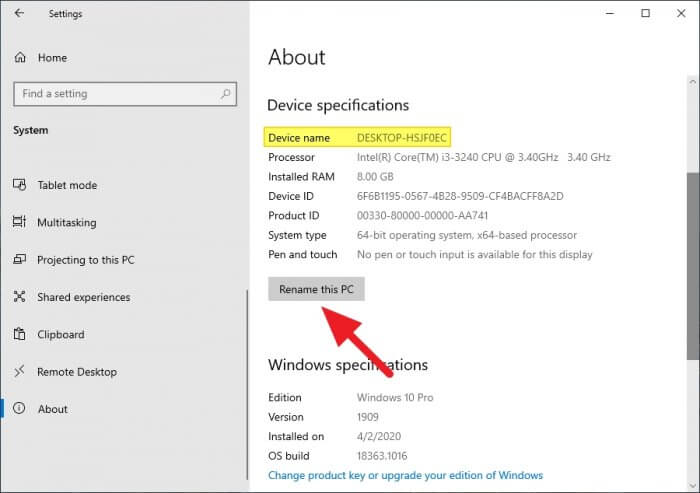
4. Click Rename this PC.
5. Give your PC a new name, then click Next.
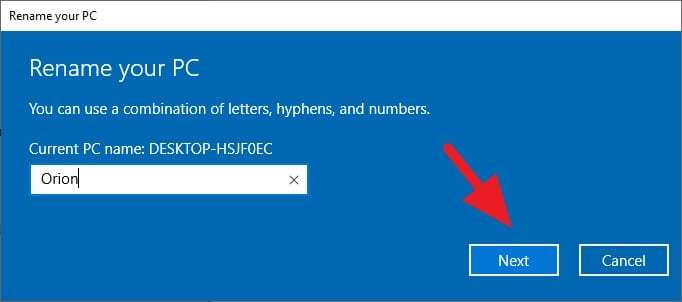
6. Restart the device to save.

7. The device name has been successfully changed.
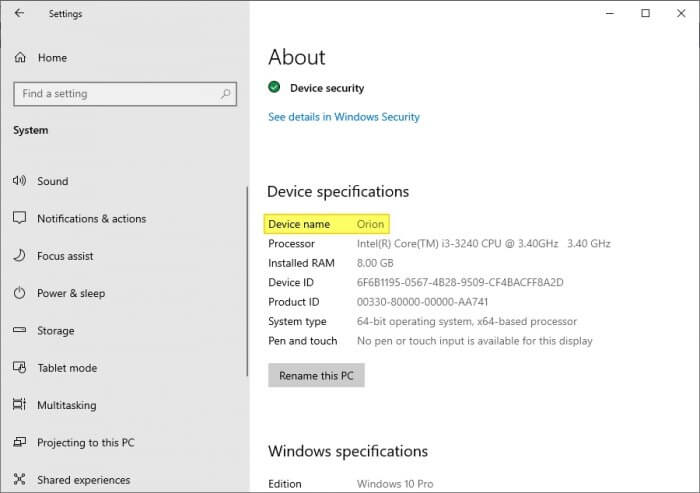
This is will only change the computer name, but not the Microsoft account connected to it. The name will be the default name even if you upgraded some of the computer components. But you still need to reactivate Windows first.
Method 2: Rename in System Properties
The classic way to rename your PC is in System Properties:
- Right-click the Windows start button
- Click System
- Click Advanced system settings on the left
- In the System Properties window, click the Change button
- Enter the new PC name and click OK
- Reboot your computer for changes to take effect
This method works on all modern versions of Windows, but involves a few more steps than using Settings.
Method 3: Rename with PowerShell
Using PowerShell commands is an advanced way to rename your PC:
- Search for PowerShell, right-click it, and select Run as administrator
- Type the command below to rename, replacing “NEW-PC-NAME” with your new name:
Rename-Computer -NewName "NEW-PC-NAME" - Press Enter and reboot when prompted
PowerShell is especially handy if you want to script the renaming process across multiple computers.
Conclusion
Renaming your Windows 10 PC to a more personalized and identifiable name only takes a few minutes. Just use Windows Settings, System Properties, PowerShell, or Command Prompt to change it. Doing so helps easily distinguish your computer from others when networked and gets rid of any generic default names.