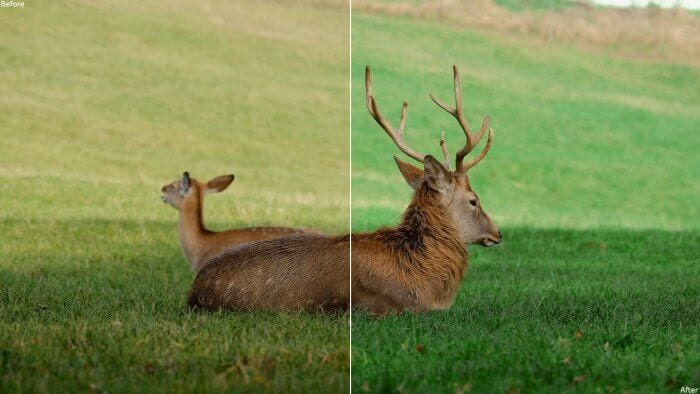
Color correction or color grading is important to improve the video’s quality by making footage relevant to what the human eye sees or to convey a certain mood.
Luckily, Wondershare Filmora comes with the ability to alter the colors and moods of your video footage. In this article, I will explain how to use color grading in Filmora.
NOTE: Color grading and color correction are basically the same processes but with different results. Both terms are sometimes interchangeable although not technically correct.
Table of Contents
- #1 Launch the Color Correction mode
- #2 Enable the comparison view to get a better sense of what has changed
- #3 White Balance: Change the temperature of the video
- #4 3D LUT: Get the job done faster by using premade color presets
- #5 Color: Can be used to make the video a little sharper
- #6 Light: Modify the lighting which also could affect the mood
- #7 HSL: Change the profile of each color
- #8 Vignette: Blur the border to make the center more prominent
#1 Launch the Color Correction mode
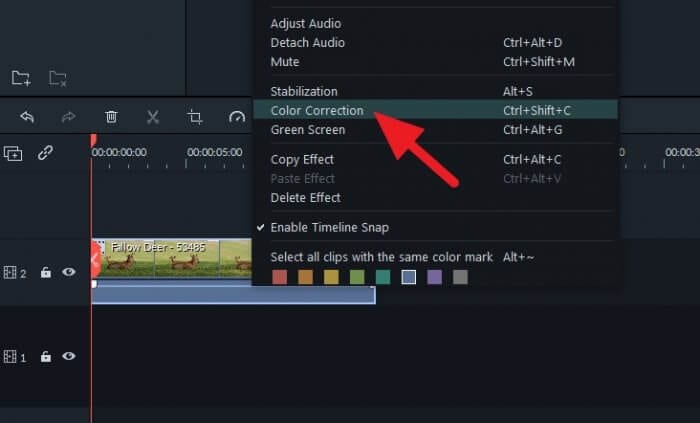

Import a video to Filmora and drag it into the video timeline. After that, right-click on the footage and select Color Correction.
#2 Enable the comparison view to get a better sense of what has changed


Now, it’s highly recommended to enable Side by Side View to compare before-after footage in real-time. You may skip this step if you wish.
#3 White Balance: Change the temperature of the video
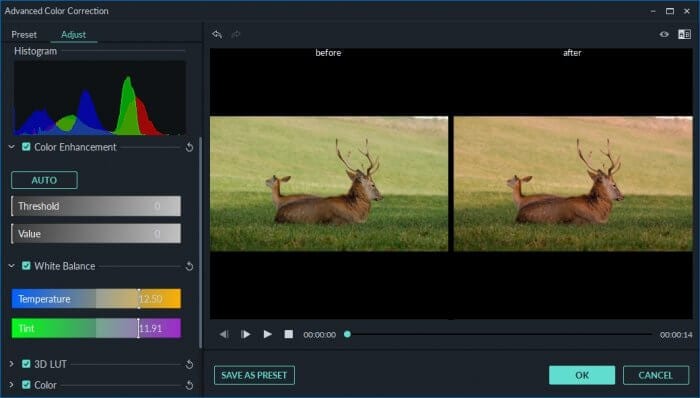

Move the slider to the left or right to change its temperature tone. The warmer color appears yellow or orange-ish while the colder color appears blue and slightly darker. This is especially useful to change the emotion you want to express.
#4 3D LUT: Get the job done faster by using premade color presets
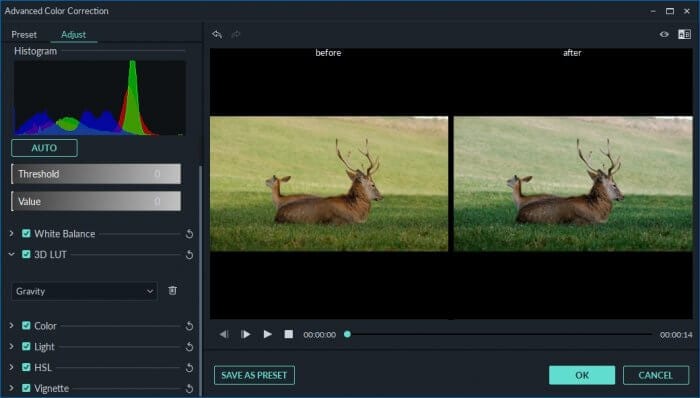

3D LUT is a perfect option if you are not familiar with a color grading technique but want to improve the video’s quality. Filmora comes with several presets you could try, but you can always download more 3D LUT files online.
#5 Color: Can be used to make the video a little sharper
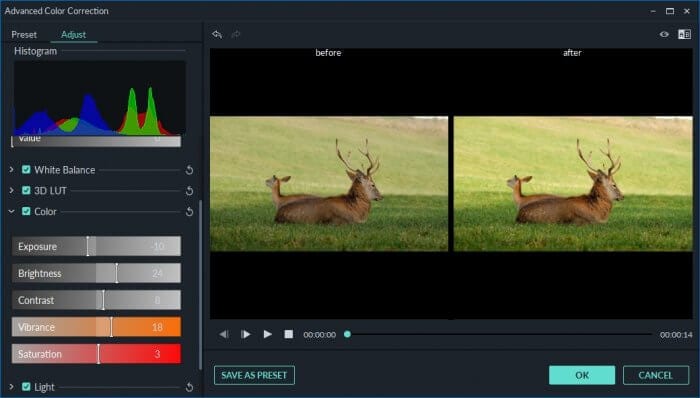

The Color option helps you to adjust exposure, brightness, contrast, saturation, and vibrance in general. This means each slider would affect the entire frame. These settings are extremely useful when the video is too bright/dark, out of focus, or had a different exposure level.
#6 Light: Modify the lighting which also could affect the mood
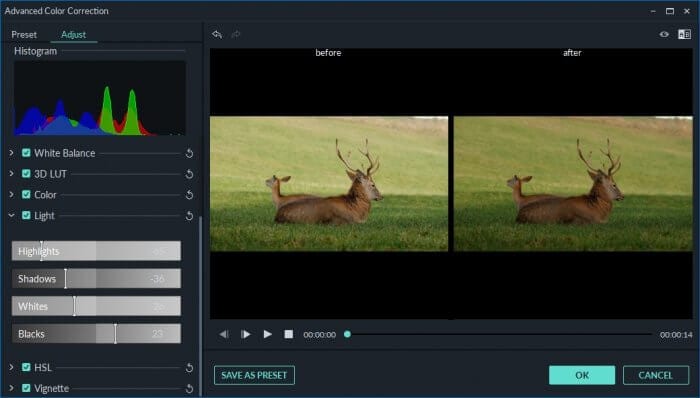

This particular setting is intended to change the white and black levels on the video. Just like the White Balance setting, Light can also change the overall mood of the scene.
#7 HSL: Change the profile of each color
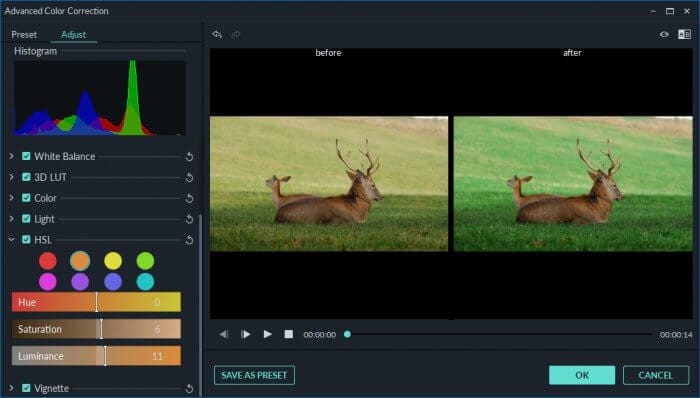

This is probably the heart of color grading in Filmora. You can pick one of eight available base colors and make some adjustments for it. In this example, I made the grass looks stronger and introduces brighter colors to the deer. The result is amazing considering the minimum effort to get that.
#8 Vignette: Blur the border to make the center more prominent
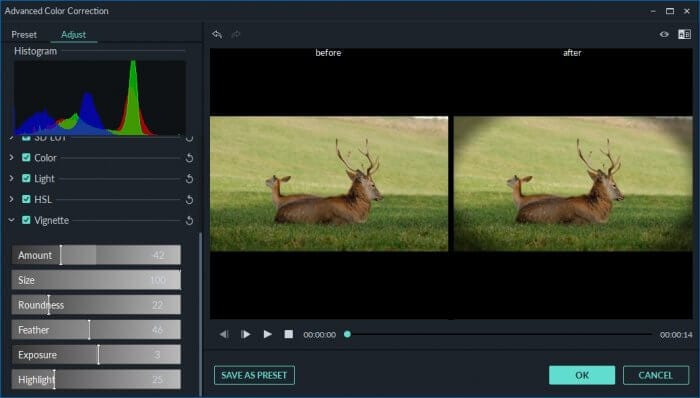

The Vignette setting is a decorative approach to lets the audience focus on what on the video by adding a dark area to the frame’s border. Although not necessarily changing the color, this effect could emphasize specific aspects of the video.
Please be aware that the color grading settings will only be applied to the select frame. So, if you have multiple frames you may need to group them first before making adjustments.
