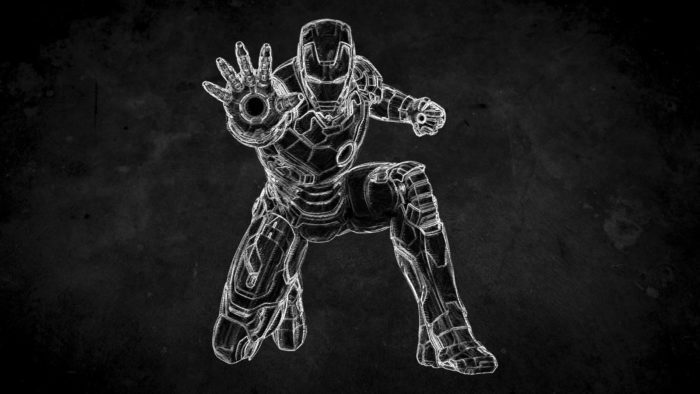
Adobe Photoshop doesn’t have a specific button that lets you instantly turn any picture into a chalk style. Instead, it’s a combination of multiple effects and settings that in the end, producing a style that is strikingly similar to when you draw something with a piece of chalk.
In this guide, I will show you a simple way to create a chalk effect on Photoshop for 2 minutes or less. The guide is based on Photoshop CC 2021 but should be somewhat similar to other versions of the software.
Here’s the guide.
1. Prepare the picture you want to turn into a chalk drawing on Photoshop.
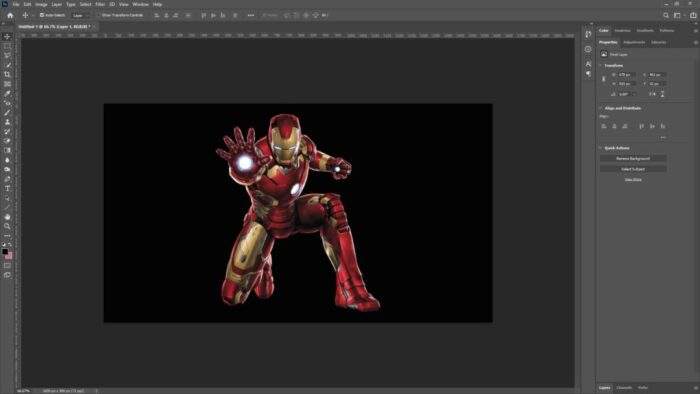

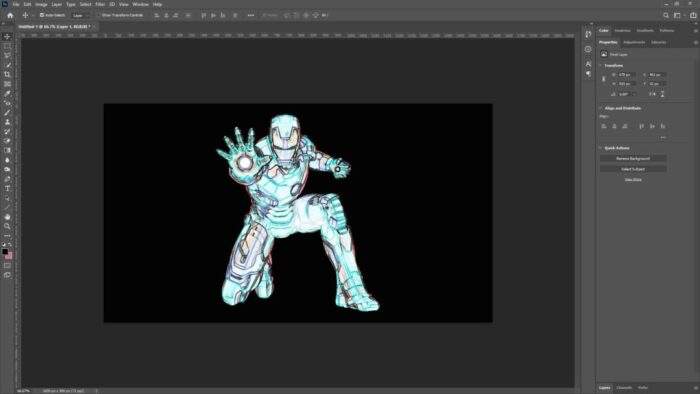
2. Go to Filter > Stylize > Find Edges.
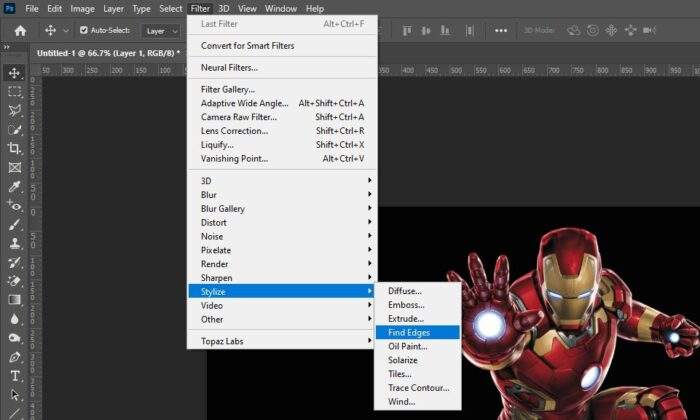

3. The result should appear like this.

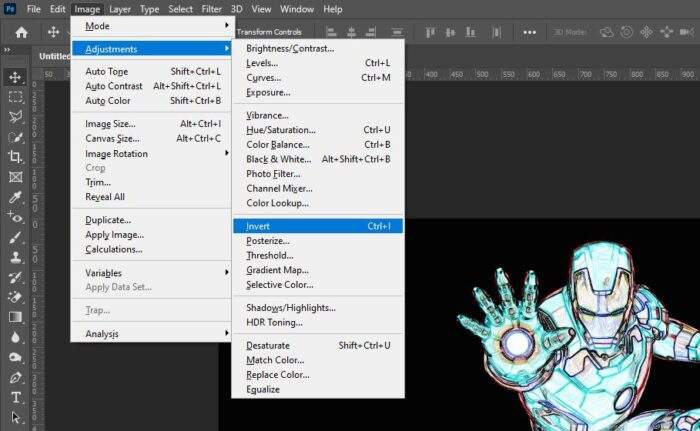
4. Click Image > Adjustments > Invert.

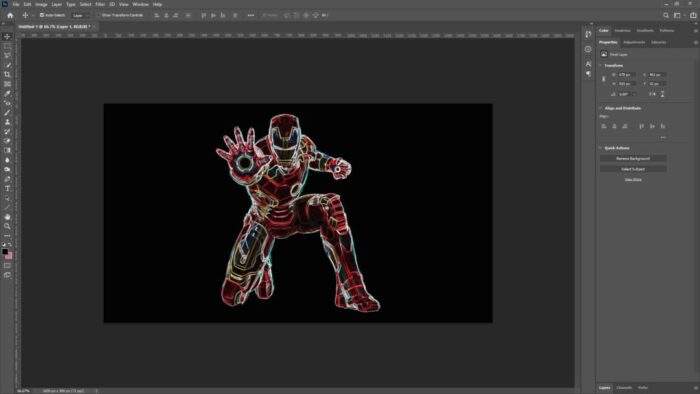
5. And it will turn into this.

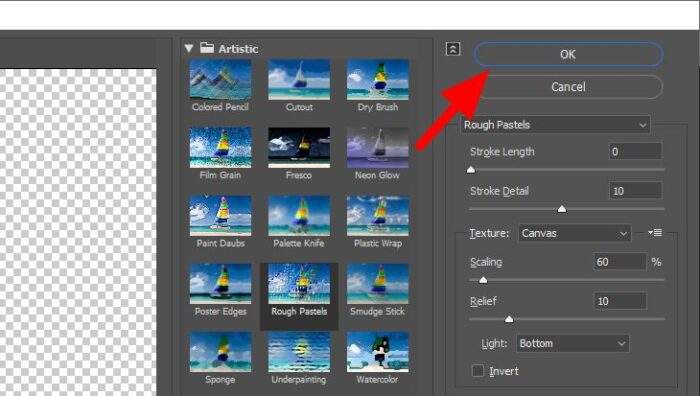
6. Next, head to Filter > Artistic > Rough Pastels. If you can’t find Artistic, you may enable it first via Edit > Preferences > Plugins > Show all Filter Gallery groups and names > OK.
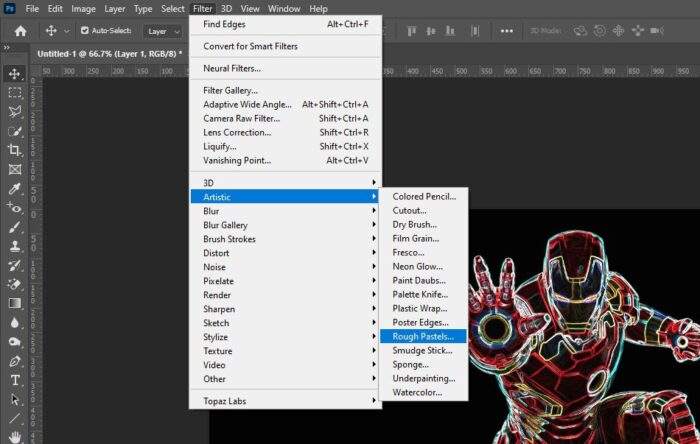

7. Adjust Stroke Length, Stroke Detail, Scaling, and Relief as you need, then hit OK.

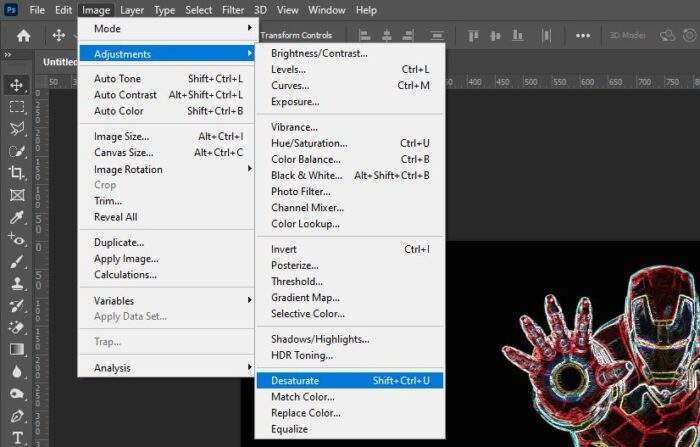
8. Navigate to Image > Adjustments > Desaturate.

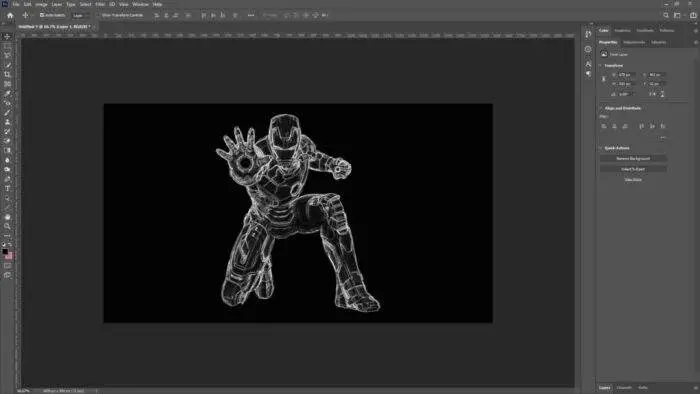
9. Now the picture has turned into a chalk style.

10. You may add extra customizations and change the background to make it look more appealing.
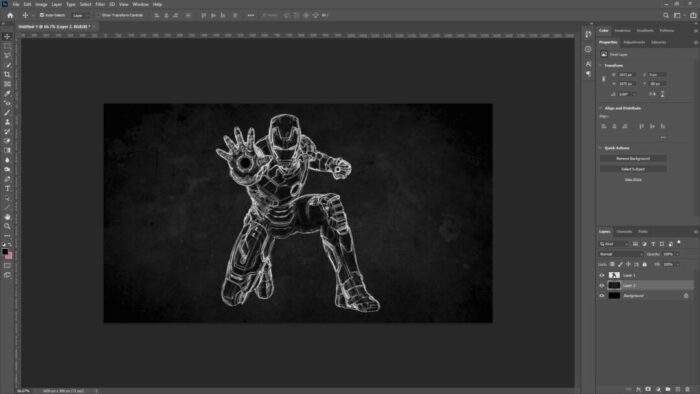

The guide above is just basic steps to create the effect. You can combine it with other editing techniques to fit your needs.
