On Windows 7, Windows 8, and Windows 10, the CPU priority level can be altered on an individual program (task). It comes with seven priority levels, ranging from Low, Below Normal, Normal, Above Normal, High, and Realtime.
Essentially, the higher the level, the more CPU power a program can pull at any given time, resulting in faster performance and smoother experience. This may be helpful on power-demanding apps and video games although the improvement could vary per system.
So here’s the guide to set the CPU priority level on your computer.
1. Right-click on Taskbar and select Task Manager. Alternatively, you can press Ctrl+Shift+Esc.

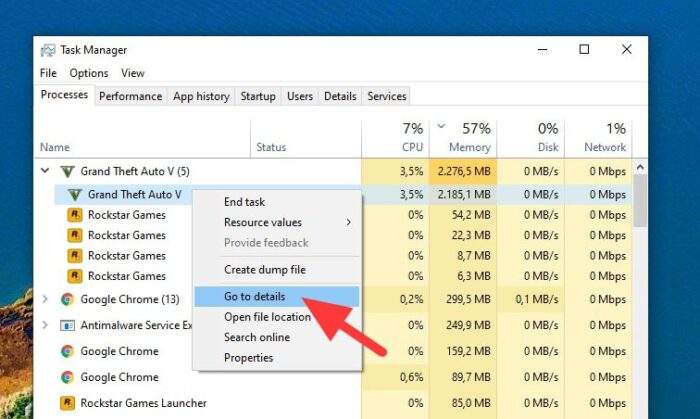
2. Under the tab Processes, right-click on a task and Go to details.

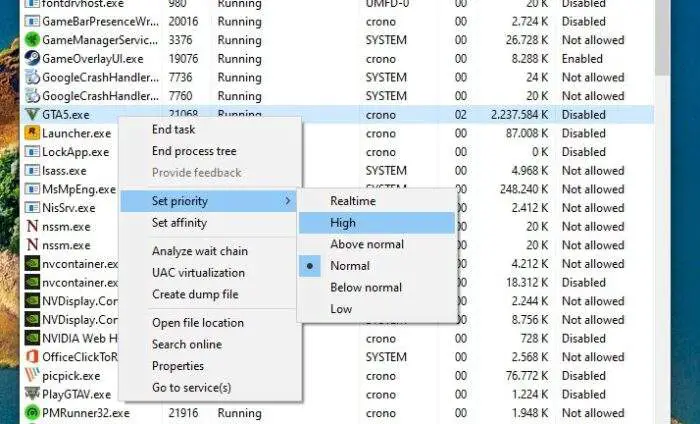
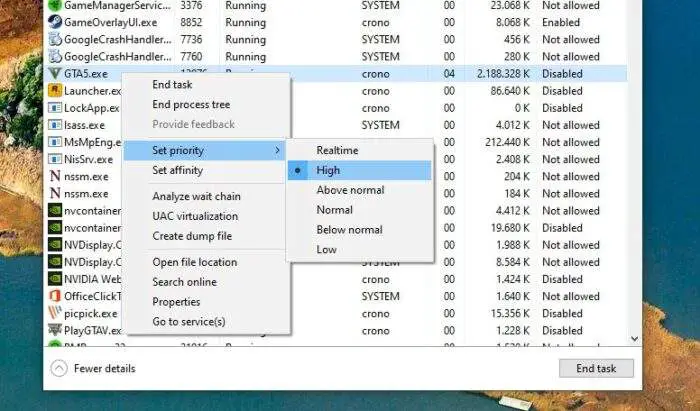
3. You will be transferred to the Details menu, right-click on the select program and choose the priority level.

4. Windows may warn you about the action, just click Change priority.

5. Now the CPU priority level has been changed.

As a side note here, the setting is only applied temporarily. If you close and run the program again the level would be set automatically (Normal) by the system to prevent confusion and possible crash with other programs.
If you encounter instability issues after setting a new level, just revert it back to the previous state or simply restart the program.


