Windows allows you to keep certain items hidden and can’t be discovered from a normal File Explorer. This originally intended to prevent you from accidentally deleting important files. But it may also be used to hide your personal documents so, in a way, it could lower the possibility of them being found by unauthorized parties.
In either case, hidden files will remain hidden unless you change the visibility to normal. Surprisingly, you can keep these files under the hidden mode while using them like normal items.
Here’s how to show hidden files or folders on Windows 7, Windows 8, and Windows 10.
Table of Contents
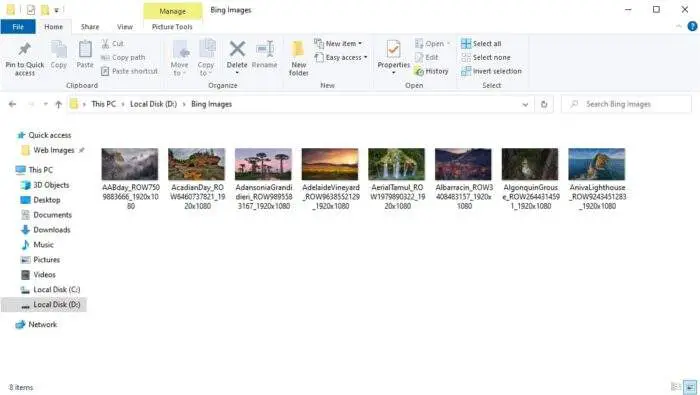
1. Go to the directory where the hidden items are stored.
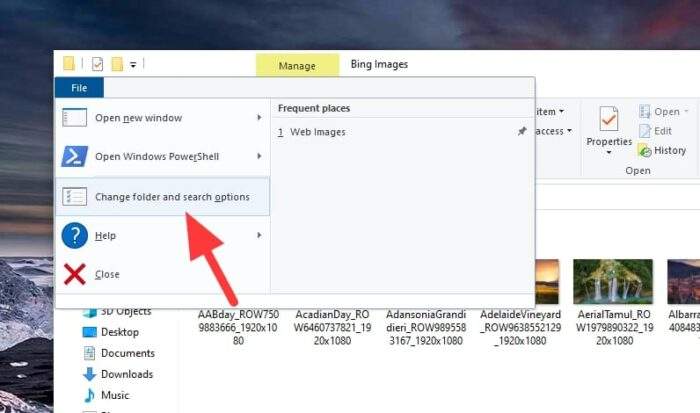
2. Click File > Change folder and search options.
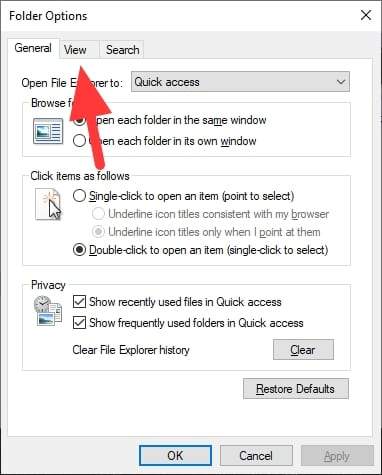
3. Go to the View tab menu.
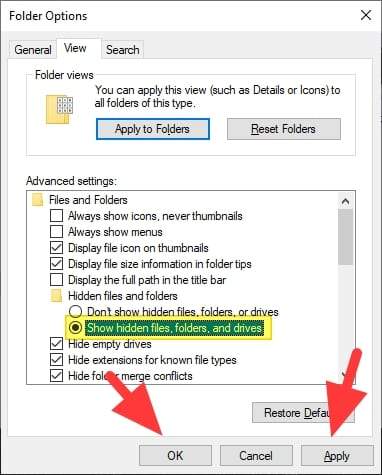
4. Enable the Show hidden files, folders, and drives option, then hit Apply and OK.
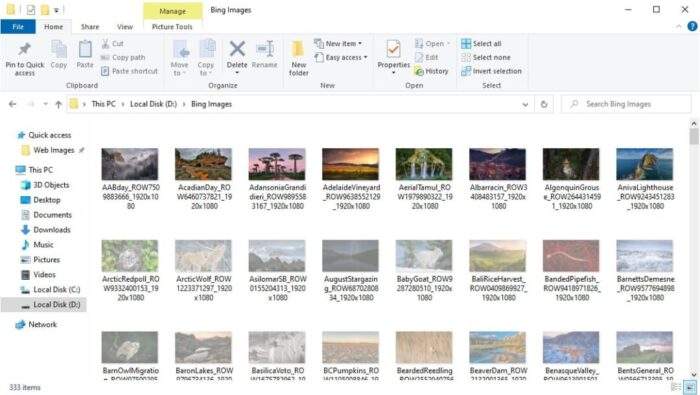
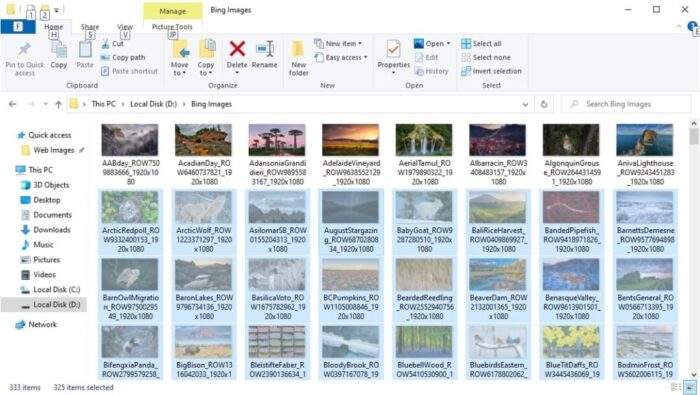
5. Now the hidden items will appear on a slightly faded look.
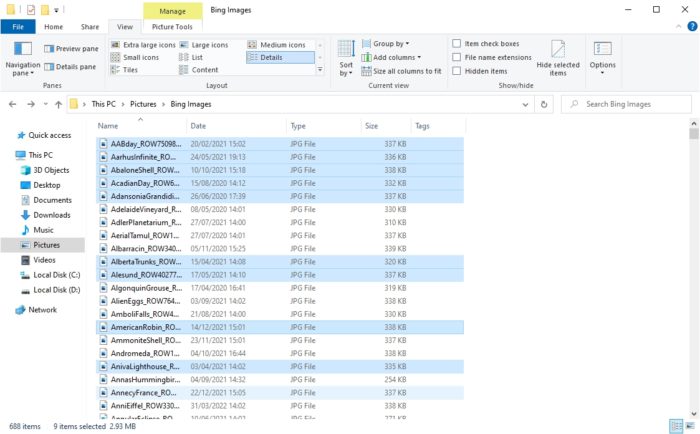
Alternatively, you can show or hide hidden items quickly right on the File Explorer. Just go to the ‘View’ menu, then check/uncheck the ‘Hidden items’ box.
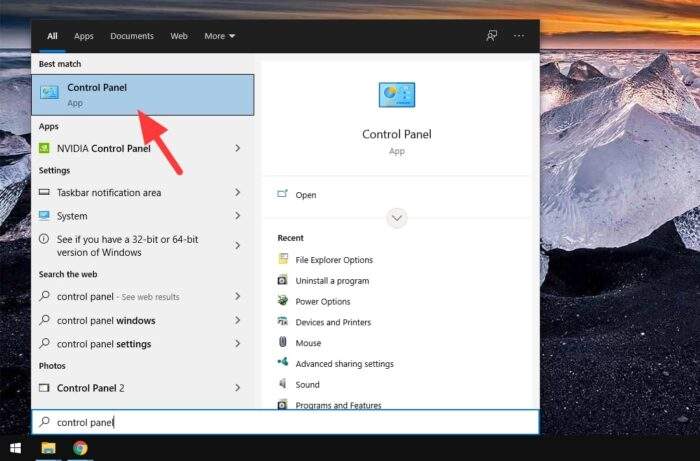
1. Go to Start, search for Control Panel and open it.
2. Click on Appearance and Personalization.
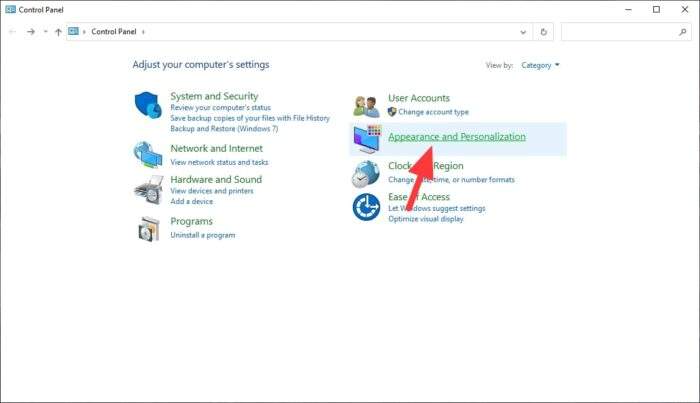
3. Select File Explorer Options.
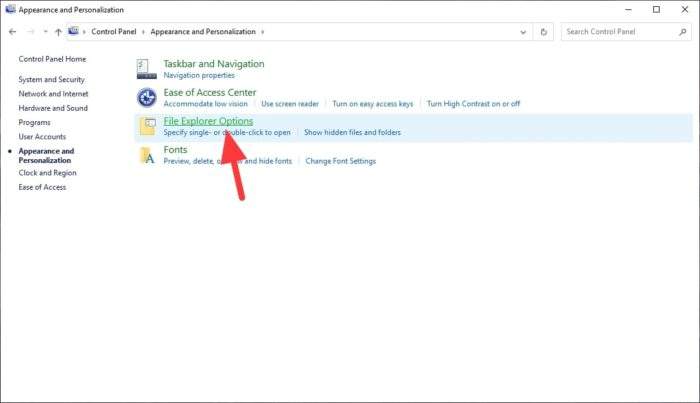
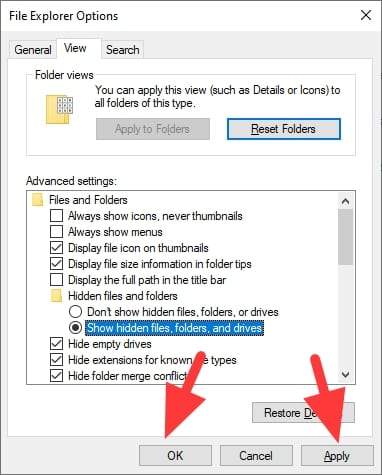
4. Click View.

5. Check on Show hidden files, folders, and drives. Click Apply and OK.
1. First, select files and/or folders you want to unhide.
2. Right-click on one of which, then select Properties.
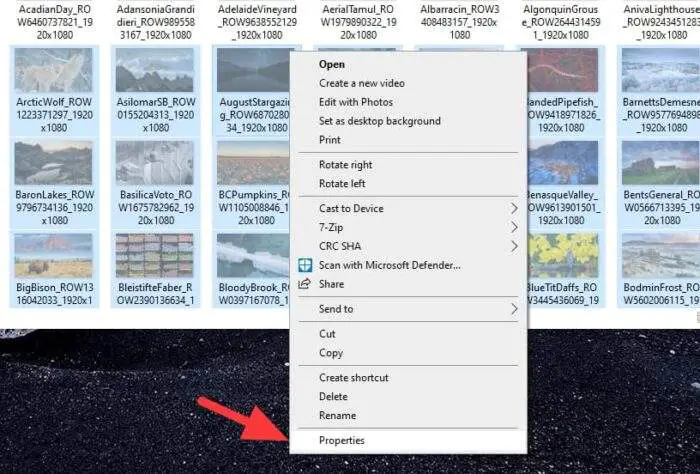
3. Untick the Hidden box, click Apply and OK.
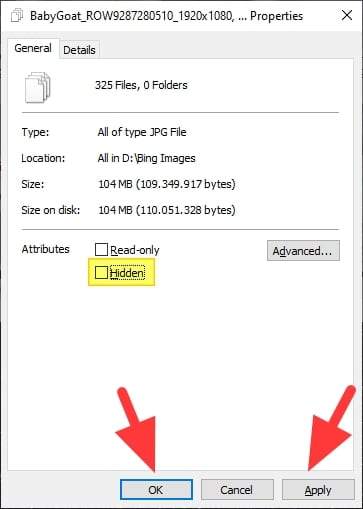
4. The hidden files are back to normal.
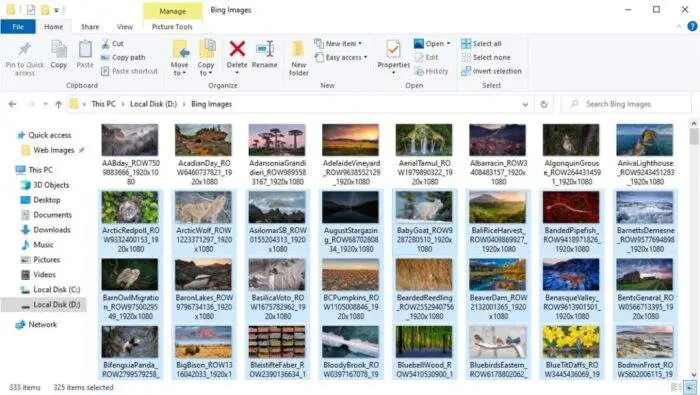
You can also unhide them from View > Hide selected items for a quicker access.
If you want to hide some files into another level, consider excluding them from Windows Start Search and if possible, archive the files with a password.
Windows allows you to keep certain items hidden and can’t be discovered from a normal File Explorer. This originally intended to prevent you from accidentally deleting important files. But it may also be used to hide your personal documents so, in a way, it could lower the possibility of them being found by unauthorized parties.
In either case, hidden files will remain hidden unless you change the visibility to normal. Surprisingly, you can keep these files under the hidden mode while using them like normal items.
Here’s how to show hidden files or folders on Windows 7, Windows 8, and Windows 10.
1. Go to the directory where the hidden items are stored.

2. Click File > Change folder and search options.

3. Go to the View tab menu.

4. Enable the Show hidden files, folders, and drives option, then hit Apply and OK.

5. Now the hidden items will appear on a slightly faded look.

Alternatively, you can show or hide hidden items quickly right on the File Explorer. Just go to the ‘View’ menu, then check/uncheck the ‘Hidden items’ box.
1. Go to Start, search for Control Panel and open it.

2. Click on Appearance and Personalization.

3. Select File Explorer Options.

4. Click View.

5. Check on Show hidden files, folders, and drives. Click Apply and OK.

1. First, select files and/or folders you want to unhide.

2. Right-click on one of which, then select Properties.

3. Untick the Hidden box, click Apply and OK.

4. The hidden files are back to normal.

You can also unhide them from View > Hide selected items for a quicker access.

