Key takeaways:
- Use Perplexity Pro and switch to the Flux.1 model for best results
- Write a simple, clear prompt and use custom prompt for black-and-white images
- Adjust prompts for higher contrast to remove unwanted gray shading
Ever wanted to make your own coloring book pages with AI? 🎨 Most people think Perplexity is just for research, but it can actually whip up some pretty cool black-and-white images for coloring books. If you’re a teacher, parent, or just looking for a side hustle, I’ll show you how to use Perplexity’s image generator and get results ready for print or digital use.
The process is way easier than you’d expect, but there are a few tricks to get the best, cleanest images—especially if you want to avoid those annoying gray shadows. I’ll break down the steps, share some prompt tips, and show you how to get your images into a book format. Ready to get creative? Here’s how I do it.
Table of Contents
- Setting Up Perplexity for AI Coloring Book Images
- Writing the Right Prompt for Coloring Book Style
- Using Perplexity’s Custom Prompt for Best Results
- Dealing With Shading and Getting Cleaner Images
- Saving and Editing Your Coloring Book Images
- Tips for Better Coloring Book Prompts and Results
- Exporting and Printing Your Coloring Book
- Selling or Sharing Your Coloring Book
- Troubleshooting Common Issues
- FAQs
- How do I access the image generator in Perplexity?
- What prompt works best for coloring book images?
- Why does my image have gray shading?
- Can I edit the images after generating them?
- How do I turn my images into a printable coloring book?
Setting Up Perplexity for AI Coloring Book Images
Before you do anything, you need Perplexity Pro. The image generation feature isn’t available on the free plan. If you’re not subscribed, check for a discount code in the video description to save a bit on your first month.
Once you’re in, head to your account settings. Scroll until you find the image generation model options. Pick Flux.1. I’ve tested Playground, D 3, and Flux.1—honestly, Flux.1 is the easiest and gives the best results for coloring book style. D 3 can work, but it’s more complicated and not as clean.
Writing the Right Prompt for Coloring Book Style
Now, go back to the homepage and start a new AI thread. Your prompt should be super clear and simple. For example:
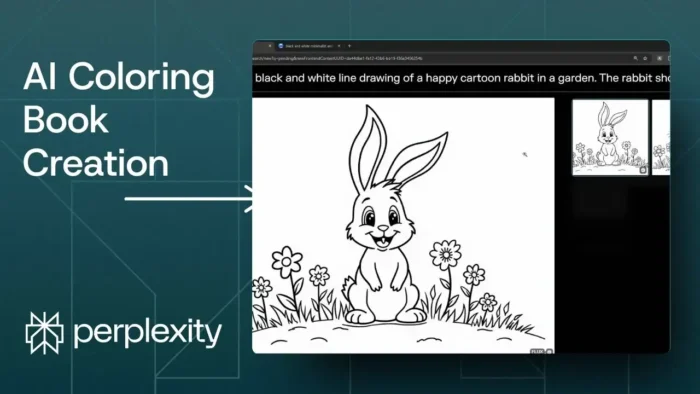
“A rabbit sitting in a garden surrounded by flowers, black and white, coloring book style.”
Keep it short. You don’t need to mention colors, since you want a black-and-white result. If you want to make sure there’s no shading, add “high contrast, no gray areas.” That’s the magic phrase to keep the lines bold and the background clean.
Using Perplexity’s Custom Prompt for Best Results
After you enter your prompt, click “Send.” When the answer pops up, hit the “Generate Image” button. You’ll see options for illustration or painting style, but skip those. Instead, click the custom prompt button.
Delete any suggested prompt Perplexity fills in for you. Paste in your own prompt—the exact one you wrote for the thread. Submit and wait a few seconds.
The first image might have some gray shadows or shading. If you see that, don’t panic. Just tweak your prompt by adding “high contrast, no gray areas,” and generate again. You’ll usually get a crisp, black-and-white image perfect for coloring.
Dealing With Shading and Getting Cleaner Images
Sometimes, the AI adds gray shadows to make the image look more lifelike. That’s not what you want for a coloring book. If you see this, just adjust your prompt:
- Add “high contrast”
- Specify “no gray areas” or “no shading”
- Keep the description simple and direct
Submit again and check the new result. The lines should be bold, and the background white.
Saving and Editing Your Coloring Book Images
Once you have an image you like, copy or download it. If you want to make a full coloring book, use a platform like Canva. Just paste your images into a template, arrange them how you want, and export as a PDF.
If you’re planning to sell your coloring book, sites like Amazon or Etsy are popular options. Just make sure your PDF is formatted to their specs.
For more on working with images and PDFs, check out how to convert PDF to Word without additional software or how to extract certain pages from a PDF if you want to split up your book.
Tips for Better Coloring Book Prompts and Results
- Keep prompts short and clear
- Always use “black and white” or “coloring book style”
- Add “high contrast, no gray areas” to avoid shading
- Skip illustration/painting presets—custom prompt works better
- If you want to edit your images, tools like Photoshop or Canva work well. You can make a brush in Photoshop or resize pictures on PC if you need to adjust
Exporting and Printing Your Coloring Book
Once your images are ready and arranged in Canva or another editor, export as PDF. You can print at home, take it to a print shop, or upload to a self-publishing platform.
If you need to save a picture as PDF or reduce PDF size for easier uploads, there are plenty of free tools online.
Selling or Sharing Your Coloring Book
Platforms like Amazon KDP and Etsy are popular for selling digital coloring books. Just make sure your images are high-res and your PDF meets their requirements.
If you want to share your book for free, you can host it on Google Drive and share the link. Here’s how to make a Google Drive folder public if you want anyone to access it.
Troubleshooting Common Issues
- Image has gray shading: Add “high contrast, no gray areas” to your prompt
- Lines are too thin: Ask for “bold lines” in your prompt
- AI doesn’t follow your prompt: Rewrite it, keep it simple, and avoid extra details
If you need to convert images to PDF with Google Drive or extract a single page from a PDF, those guides can help.
FAQs
How do I access the image generator in Perplexity?
You need Perplexity Pro. Go to settings, pick Flux.1 as your image model, then start a new thread and use the custom prompt feature.
What prompt works best for coloring book images?
Keep it simple: describe the subject, add “black and white, coloring book style, high contrast, no gray areas.”
Why does my image have gray shading?
The AI sometimes adds shading for realism. Add “high contrast, no gray areas” to your prompt and generate again.
Can I edit the images after generating them?
Yes, you can use tools like Canva or Photoshop to arrange, resize, or clean up your images. Learn how to resize images on PC if you need to adjust them.
How do I turn my images into a printable coloring book?
Paste your images into a Canva template, export as PDF, and print or upload to a platform like Amazon or Etsy. If you need to save pictures as PDF, there are easy guides to help.

