Plenty of things could go horribly wrong or funny when playing a video game. Or you may encounter a rare event that you want to share with your friends. The easiest to do is by taking a screenshot from the game screen.
We have learned that there are many ways to take a screen picture from a computer display. But those methods are far from practical considering video games are normally run in a fullscreen mode. Not to mention we often have to control our characters in a battle, making traditional screenshot methods are rather difficult.
Lucky for Steam users, the launcher has equipped with its own screenshot mode where we only need to press one button on a keyboard and it will save the result automatically to the computer and your online Steam account. Here’s how you can take a screenshot in Steam.
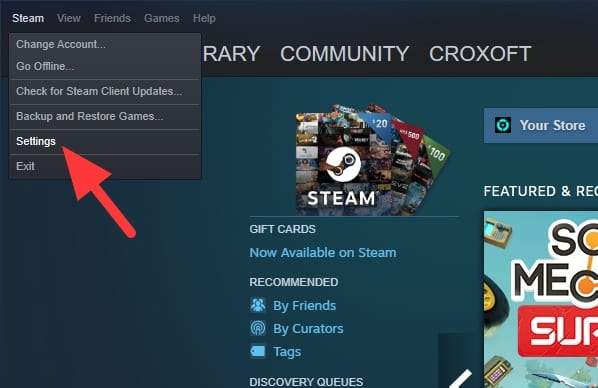
1. Launch Steam Client, then navigate to Steam > Settings.

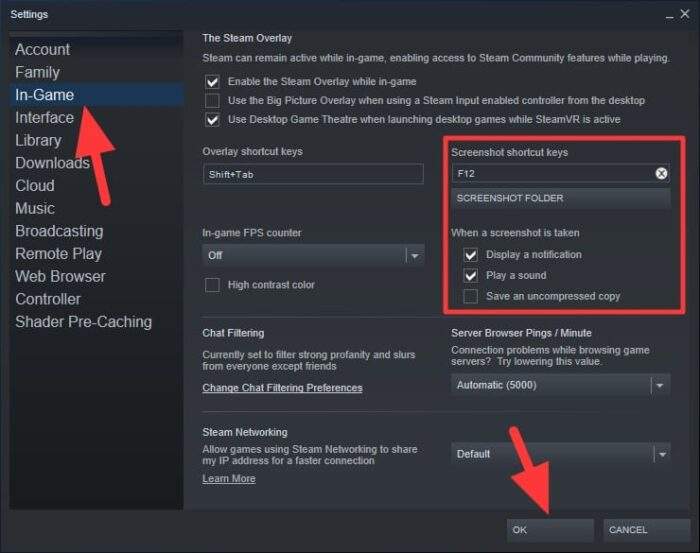
2. Under In-Game, make sure the screenshot button is configured. You may change other settings, such as a screenshot notification, sound, screenshot folder, and more. Then, hit OK.

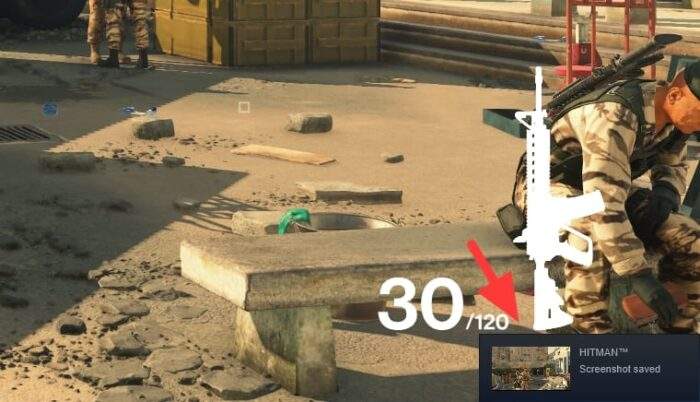
3. Launch a game from Steam and press the assigned screenshot button (default is F12). You may see a notification at the lower right corner of the screen. That means the screenshot has been captured and saved.

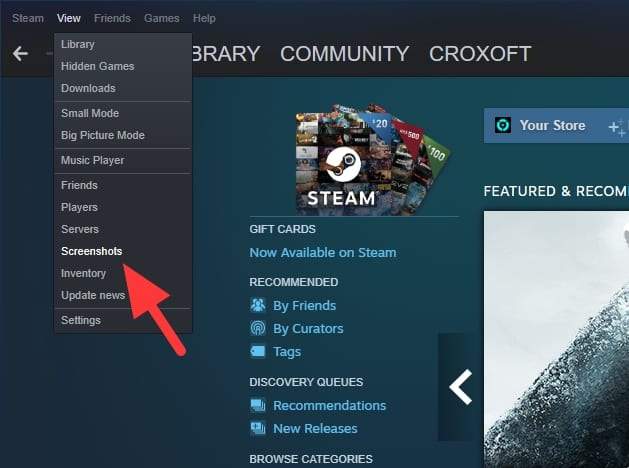
4. To see the screenshot, go to Steam Client > View > Screenshots.

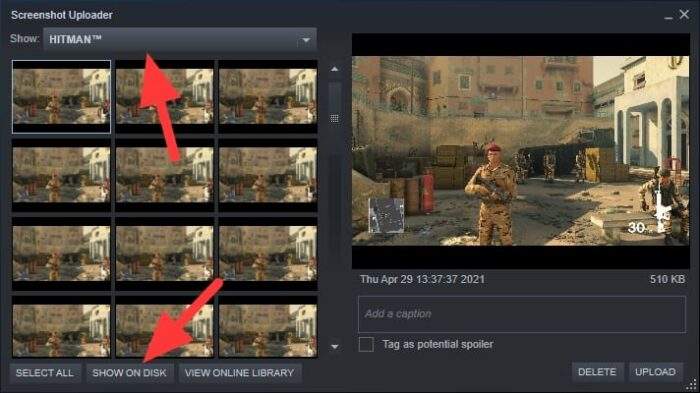
5. Select the game, then hit Show on Disk.

6. A File Explorer window will appear, showing the saved screenshot files.
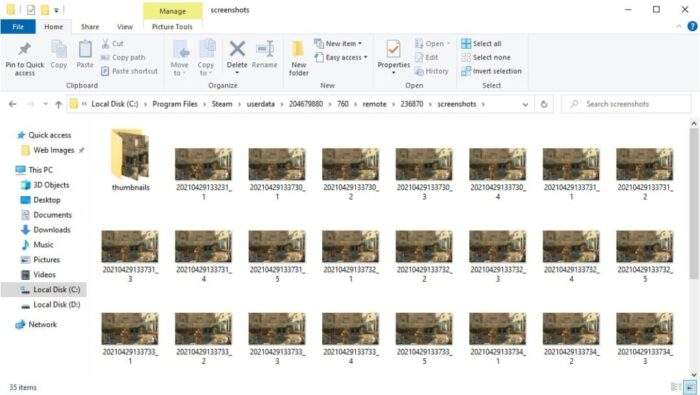

Screenshots in Steam are separated based on the game where they were taken from. The default location of the Steam screenshot is C:\Program Files\Steam\userdata but this directory is rather hard to explore as each screenshot folder is named with a string of numbers, not the game title. Therefore, accessing screenshots from Steam Client is a lot easier.


