With portability in mind, Chromebook devices are packed with some features that are often found on smartphones, namely cameras. The camera on your Chromebook can be used on its own, either to take a quick picture, scan a document, or record a video.
Each device has at least one camera on the front while the tablet version may benefit from the extra camera at the rear which often has a higher resolution. Nevertheless, the camera is capable of recording a continuous video and stored automatically to the device.
Here, you will learn how to record a video with the Chromebook camera.
How to take video with Chromebook
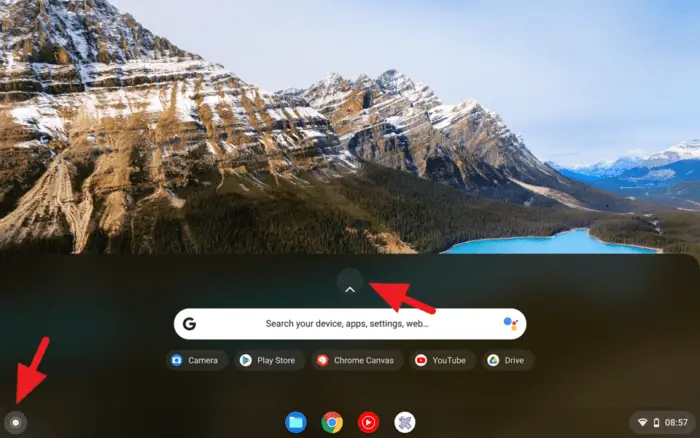
1. Click the Launcher button and then expand the menu.

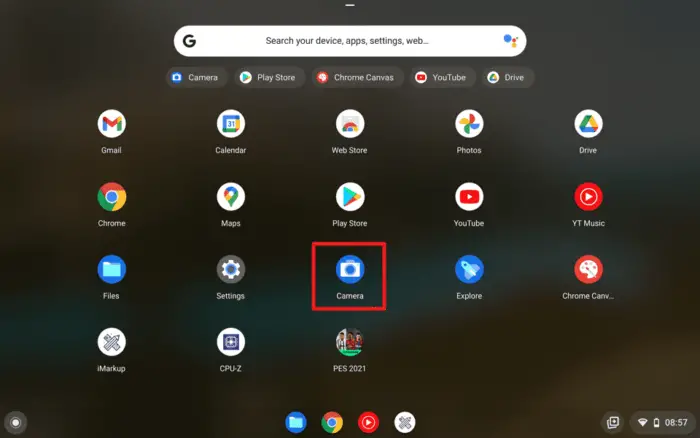
2. Open the Camera app.

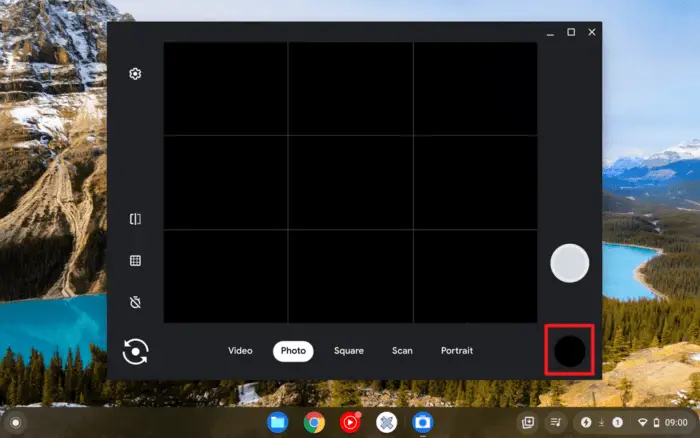
3. Flip the camera you wish to use, front or rear.
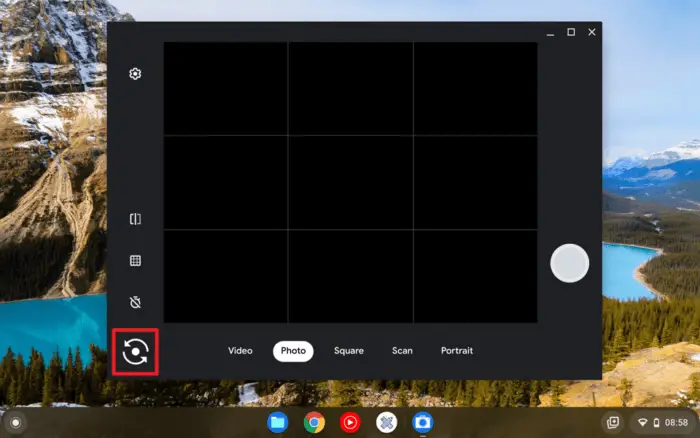

4. Then go to the Video mode.
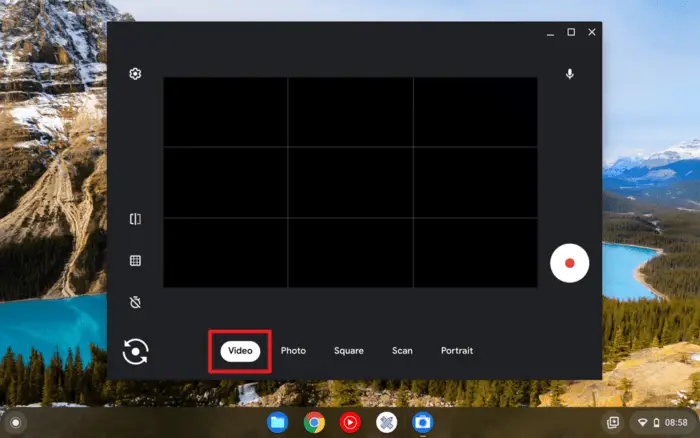

5. You can start recording by pressing the Start recording button.
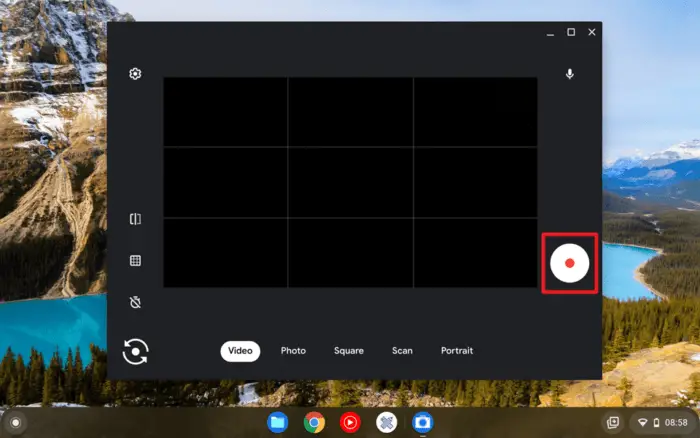

6. When it is on active recording, these three buttons will appear. The first one is used to take a picture, the next is to stop recording, and the last is to pause recording.
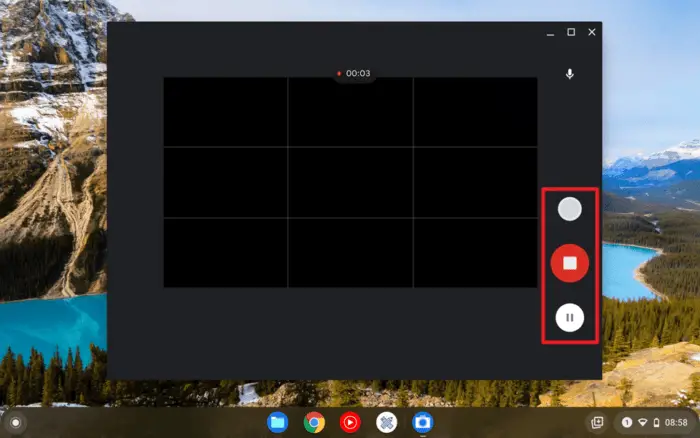

7. When you finished, the recently captured video can be seen from a preview thumbnail at the lower-right section.

Where can I see taken videos/pictures?
All videos and photos captured with your Chromebook are stored automatically in the internal storage. You can find it from the Files app, then navigate to My files > Camera.
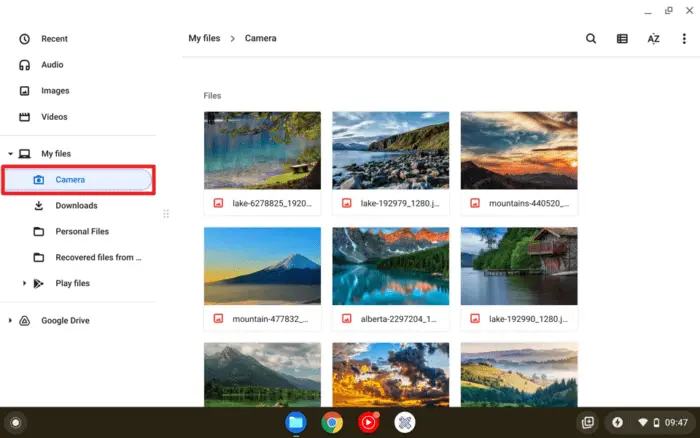

Note that the Camera app doesn’t give you an option to alter the storage location, but you can always move them later, maybe to external storage to save space.

