Writing down your tasks on a to-do list is a great way to keep everything in check. By ticking each of the scheduled tasks, you can track your progress and in many ways, reducing the probability of not finishing the job. Hence, you could be more productive.
One particular way to create a simple checklist is by using Microsoft Word, then print it out before you can tick each finished task with a pen. The problem is the fact that normal bullet points don’t have a specific area to let you mark each line.
But, by modifying the bullet icon, now you can. See the guide below to create a checklist in Microsoft Word (any versions).
1. First, make a normal list like this.
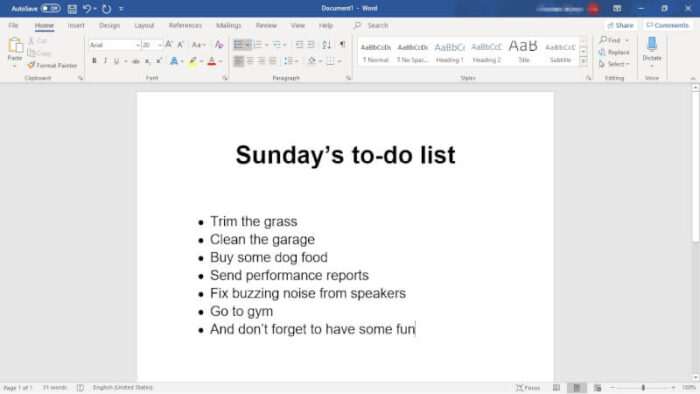

2. Then, select the list or just place the cursor on it.


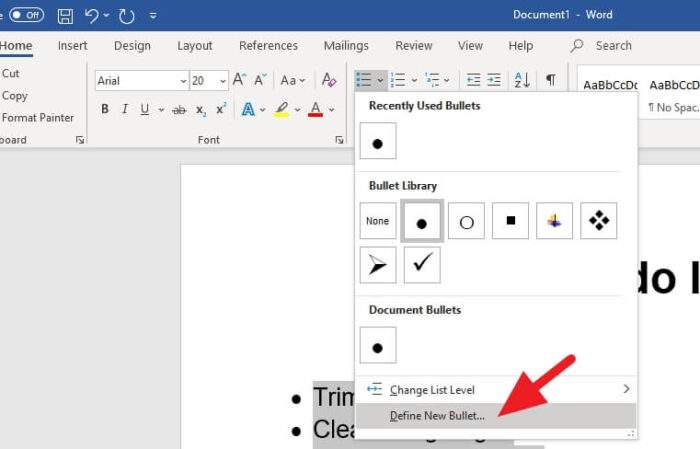
3. Go to Home > Bullets > Define New Bullet…

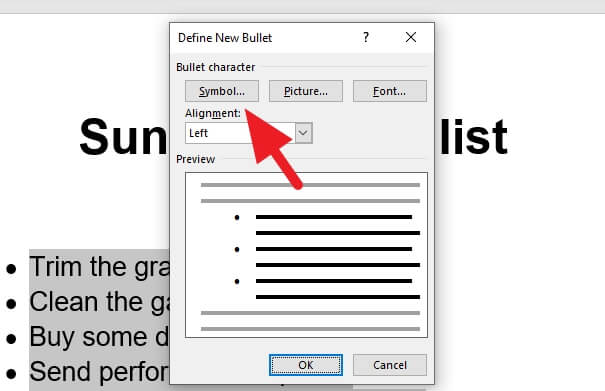
4. Click on Symbol…

5. On the Font, find and select Wingdings 2.
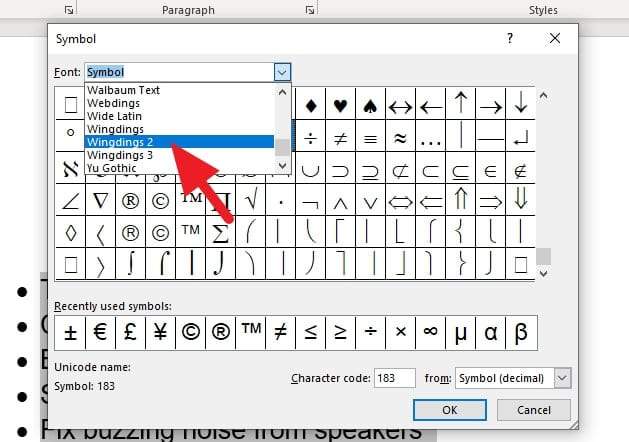

6. Select this square icon and hit OK.


7. Click OK to confirm.
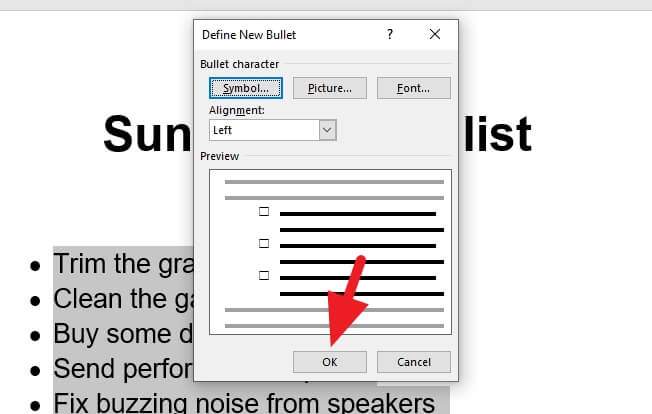

8. Now the checklist is ready to print!


Or you can adjust the spacing to make it look neater.


The square follows the size of the text. If you need to make it larger, just increase the font size and the squares will go bigger as well. I hope that helps!
