Key takeaways:
- Put clips together, no gaps for transitions
- Use Transitions menu for different styles
- Add sound effects for extra smoothness
Ever had two clips in Filmora that just cut from one to the next? It feels a little rough, right? If you want your video to flow better and keep people watching, you gotta add some smooth transitions. I’ll show you how to do that, step-by-step, and even how to throw in a sound effect for extra polish.
Table of Contents
- Make Sure Your Clips Are Side by Side With No Gaps
- Find the Transitions Menu and Pick a Style
- Drag and Drop the Transition Between Clips
- Preview and Adjust for the Best Flow
- Add a Sound Effect for Extra Smoothness
- Make Transitions Fit Your Video’s Mood
- Keep It Clean—Don’t Overdo It
- Quick Troubleshooting for Transitions
- Save and Export Your Video
- More Filmora Tips
- FAQs
- How do I add a transition in Filmora?
- Why won’t my transition work?
- Can I use sound effects with transitions?
- How do I change the length of a transition?
- Should I use the same transition for every cut?
Make Sure Your Clips Are Side by Side With No Gaps
Before you even think about transitions, line up your clips. They need to be right next to each other on the timeline—no empty space. If there’s a gap, Filmora won’t let you drop a transition between them. Just drag your clips until they snap together. That’s your starting point.
Find the Transitions Menu and Pick a Style
Now, head to the Transitions tab. You’ll see a bunch of styles—Filmora gives you a lot of choices, from basic fades to wild zooms and spins. Don’t stress about picking the “right” one. Just try a few and see what fits your footage. If you’re new to this, something simple like Dissolve or Fade usually works for most scenes.
If you want to get creative, match the transition to your footage. Like, if both clips are drone shots moving backward, a Zoom transition can make it feel like you’re warping from one place to another. That’s what I did in my example—it looked like a portal opened up. Pretty slick.
For more step-by-step tips, check this out: how to add transition in Filmora.
Drag and Drop the Transition Between Clips
Once you pick a transition, just drag it to the cut between your clips. Drop it right on the seam. You’ll see it snap into place. Now hit play and watch your clips blend together. If it feels too slow or too fast, you can grab the edge of the transition on the timeline and adjust its length. Shorter transitions feel snappier, longer ones are more dramatic.
Preview and Adjust for the Best Flow
Always preview your transition. Sometimes what looks cool in the menu feels weird in your video. If you don’t like it, just delete it and try another. Play around until it feels right. Matching the transition style to your footage can really level up the vibe.
Add a Sound Effect for Extra Smoothness
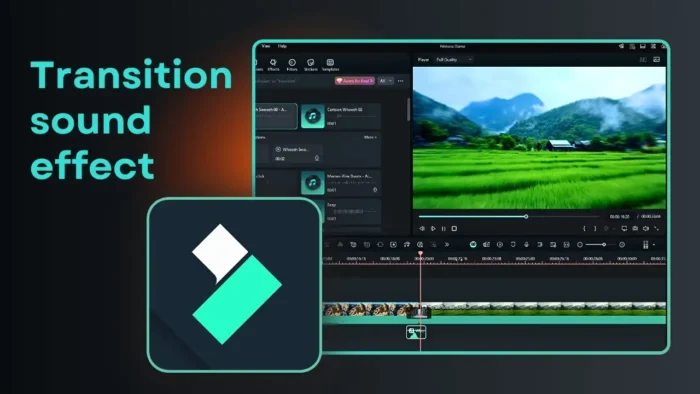
Transitions aren’t just about visuals. Sound helps sell the effect. Go to the Audio tab, then Sound Effects. Filmora has a bunch of short effects you can use. For a zoom transition, something like a whoosh or woosh works great.
Drag the sound effect onto the audio track, right under your transition. Line it up so it plays at the same time as the visual effect. You might need to nudge it a little earlier or later to get it perfect. If your transition is really quick, trim the sound effect so it doesn’t drag on.
If you want to dig deeper into audio tricks, check out audio crossfade effect in Filmora.
Make Transitions Fit Your Video’s Mood
Don’t just slap on any transition. Think about the mood. Fast cuts and zooms feel energetic, while fades and dissolves are more chill. If you’re editing a travel vlog, maybe use a Zoom or Spin for action scenes and a Fade for slower moments. Mix it up, but keep it consistent with your video’s style.
Keep It Clean—Don’t Overdo It
It’s tempting to use a different transition for every cut, but that gets distracting fast. Stick to one or two styles for your whole video. Too many wild transitions can make your video feel messy. Less is more.
Quick Troubleshooting for Transitions
- If your transition won’t drop: Make sure your clips are touching, no gaps.
- If the effect looks weird: Try a different transition or adjust the length.
- If the sound effect feels off: Drag it until it lines up with the visual.
Save and Export Your Video
Once you’re happy with your transitions, save your project. Then export your video in the format you need. If you want your video to look even better, you can also try color grading in Filmora or improving video quality.
More Filmora Tips
If you want to learn more tricks, like how to add text, zoom effects, or blur faces, check out these guides:
- How to add text in Filmora
- How to make zoom effect in Filmora
- How to blur face in Filmora
- How to remove background noise in Filmora
🎬 That’s pretty much it. Smooth transitions can make your videos feel way more pro—just don’t go overboard. Play around, have fun, and keep your edits fresh.
FAQs
How do I add a transition in Filmora?
Drag two clips together, go to the Transitions tab, pick a style, and drop it between your clips. Adjust the length if needed.
Why won’t my transition work?
Usually, there’s a gap between your clips. Make sure they’re touching on the timeline. No gap, no problem.
Can I use sound effects with transitions?
Yeah, just drag a sound effect from the Audio tab and line it up with your transition. It makes the effect feel smoother.
How do I change the length of a transition?
Click the edge of the transition on the timeline and drag it shorter or longer. Preview until it feels right.
Should I use the same transition for every cut?
Nope. Use one or two styles for a consistent look. Too many different transitions can be distracting.


